If you care about your website’s SEO, increasing the speed and passing Google’s Core Web Vital is crucial. FlyingPress is a caching and optimization plugin for WordPress that helps do exactly that through a modern and easy-to-use interface.
- What is the FlyingPress WordPress plugin?
- How much does FlyingPress cost?
- How to download and install FlyingPress
- How to set up FlyingPress in WordPress: A Beginner’s Guide
- Dashboard
- Cache Settings
- CSS Settings
- JavaScript Settings
- Font Settings
- Image Settings
- iFrame Settings
- CDN Settings
- Database Settings
- Keeping our WordPress website fast and optimized
- What I liked (and didn’t) the most about FlyingPress
- Conclusion: Is FlyingPress right for you?
From Flying Pages, Images, Scripts, and Analytics to creating one of the best cache and speed optimization WordPress plugins, FlyingPress is the sweetest and quickest way of making sure that your website values Google’s wishes; It loads fast and its Core Web Vitals are not in a hot red color.
What is the FlyingPress WordPress plugin?
FlyingPress is a premium WordPress plugin that can automatically handle your website’s cache, and optimize your HTML, CSS, and JavaScript files and code, images, videos, and frameworks, and it’s being used among bloggers and web developers to quickly increase their speed scores in the Google PageSpeed Insights.
The plugin has been created by Gijo Varghese, a blogger, web developer, and WordPress enthusiast who first introduced us with his previews optimization plugins, including the Flying Pages, Flying Images, Flying Scripts, and Flying Analytics – all of them still available in the WordPress plugin library.
It’s a modern and robust WordPress plugin that focuses on improving your website’s speed, including the score it gets in the Google PageSpeed Insights metrics. It’s here to help you fix the Core Web Vitals’ most crucial recommendations and issues, and you can do that by simply enabling some of the plugin’s features.
If you’re familiar with other cache plugins, you’ll be done with setting up FlyingPress within seconds, while if you’re a beginner, it should only take a few minutes.
Although anyone can use FlyingPress, from beginner to advanced, there are ways to increase your website’s speed even more by only excluding the CSS and JavaScript files that break your site’s design, and we’ll see how in a bit.
How much does FlyingPress cost?

As of this moment, FlyingPress is priced at $49.00 per year for 1 website, $99.00 for 3 websites, $199.00 for 25 websites or $249.00 for an unlimited number of websites that you can install and use the plugin. It’s fairly cheap, and if there’s any investment you’d absolutely want to make for your website, that’s increasing its speed.
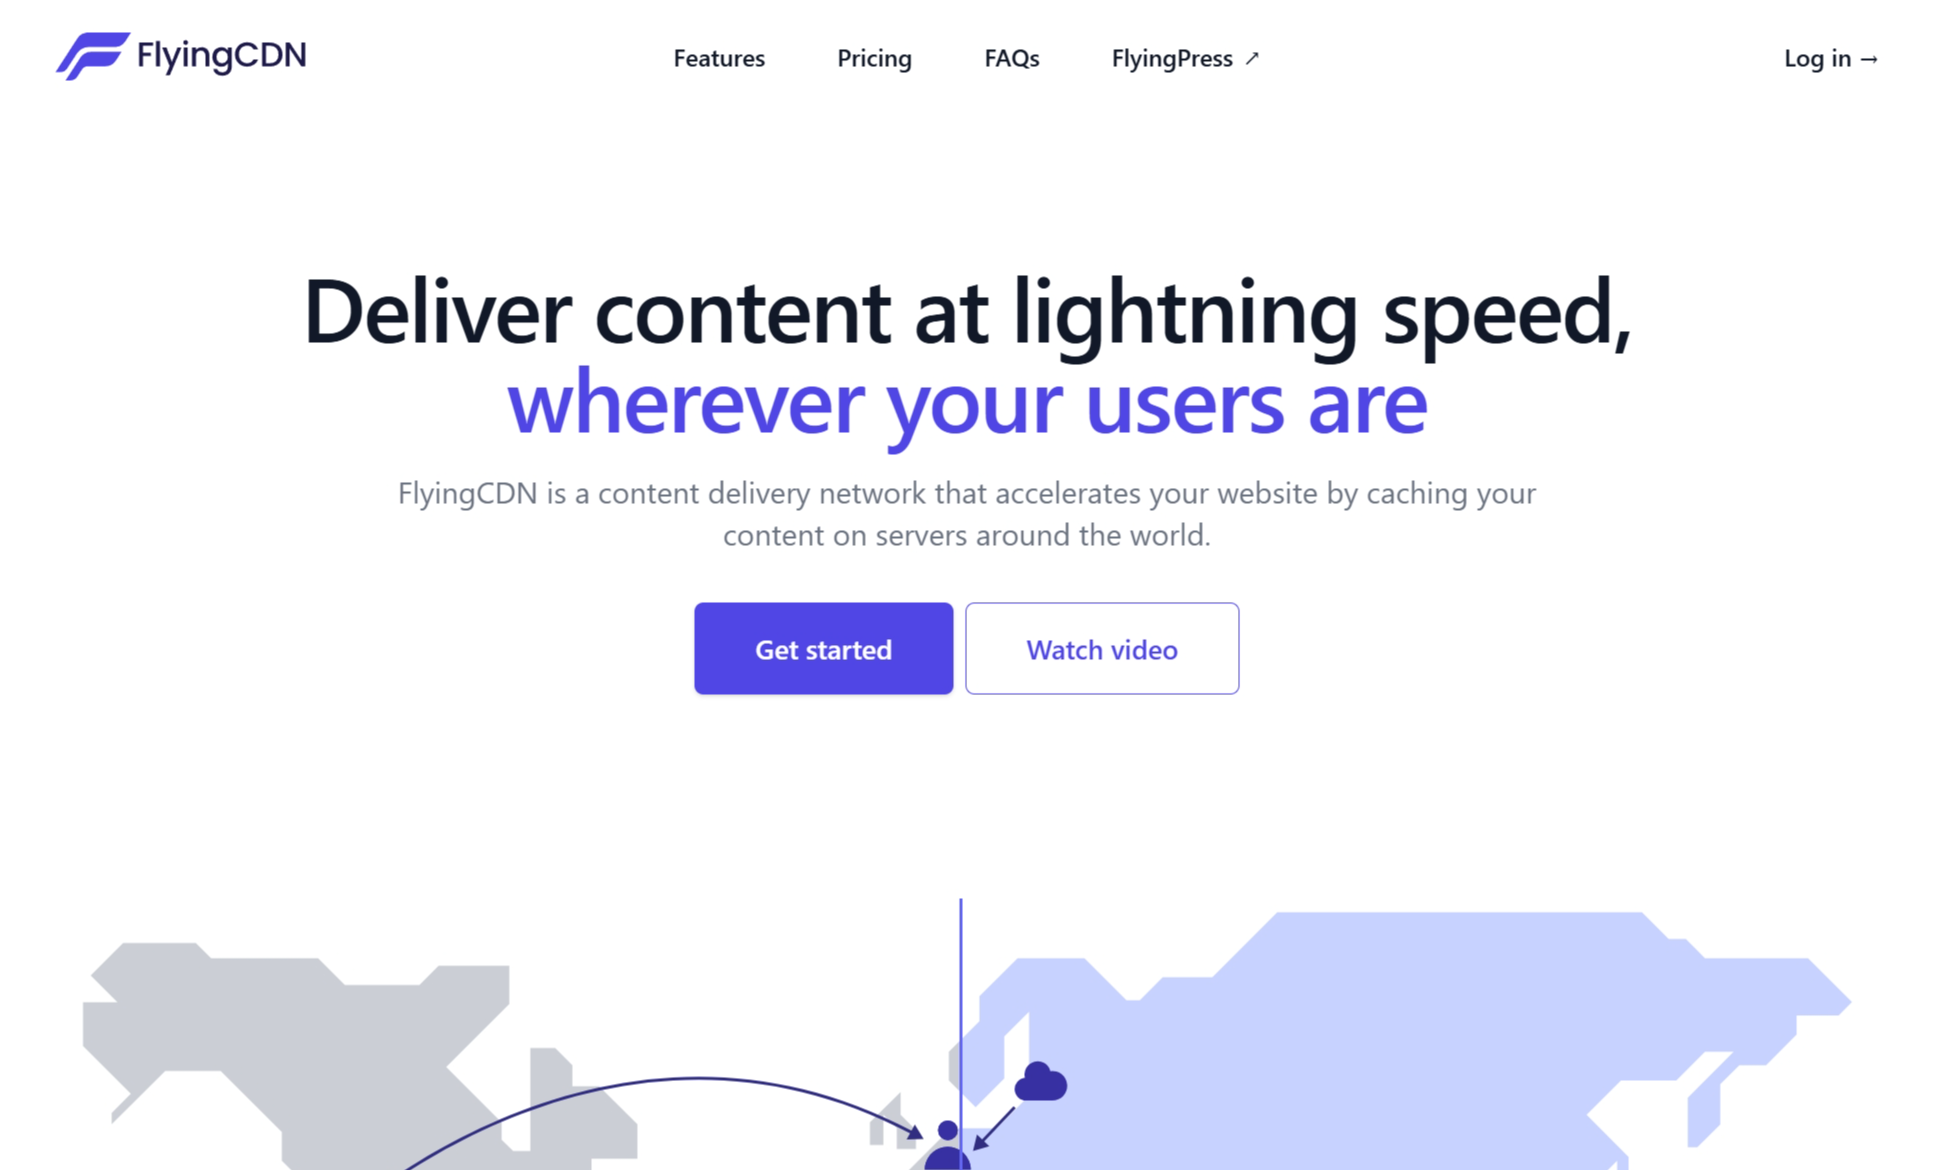
Apart from the plugin’s basic pricing, you can also choose to use the FlyingCDN, which is integrated with FlyingPress for even greater results. FlyingCDN is currently priced at $5.00 per month and includes CloudFlare Enterprise, a free wildcard SSL certificate, edge caching & image optimization, and unlimited pageviews and requests.
You can pay with your credit card, Amazon Pay, or using PayPal.
How to download and install FlyingPress
Buying, downloading, installing, and even setting up FlyingPress is a pretty easy and straightforward process, but backing up your website and deactivating any other cache plugin that you’re using is important before proceeding.
How to buy, download, and install FlyingPress:
- Visit the FlyingPress website.
- Click on the “Get FlyingPress“.
- Choose one of the plans depending on the number of websites you’ll be installing the plugin and click on “Buy Now“.
- Fill out all the available fields, including an email address, your full name, and your shipping address.
- Choose a payment method (credit card, Amazon Pay, and PayPal included) and click on “Purchase” to complete your order.
- Sign in to your FlyingPress account, go to Account, and download the FlyingPress plugin from the Dashboard.
- Sign in to your WordPress website’s Dashboard, and go to Plugins -> Add New.
- Click on “Browse“, select the zip file that contains FlyingPress’s files, and click on “Install“.
- Once the installation has been completed, simply click on “Activate“.
That’s it, you can now access the plugin’s settings page by clicking on the “FlyingPress” option that is located in your dashboard’s left sidebar.
How to set up FlyingPress in WordPress: A Beginner’s Guide
Setting up and finding all the features and options in FlyingPress is fairly easy, but as a beginner, you may feel overwhelmed with some of the plugin’s functions.
I’ll try to answer the most common questions that you may have as a beginner for every page and feature that FlyingPress currently includes, but if you have more questions you can drop your comments down below.
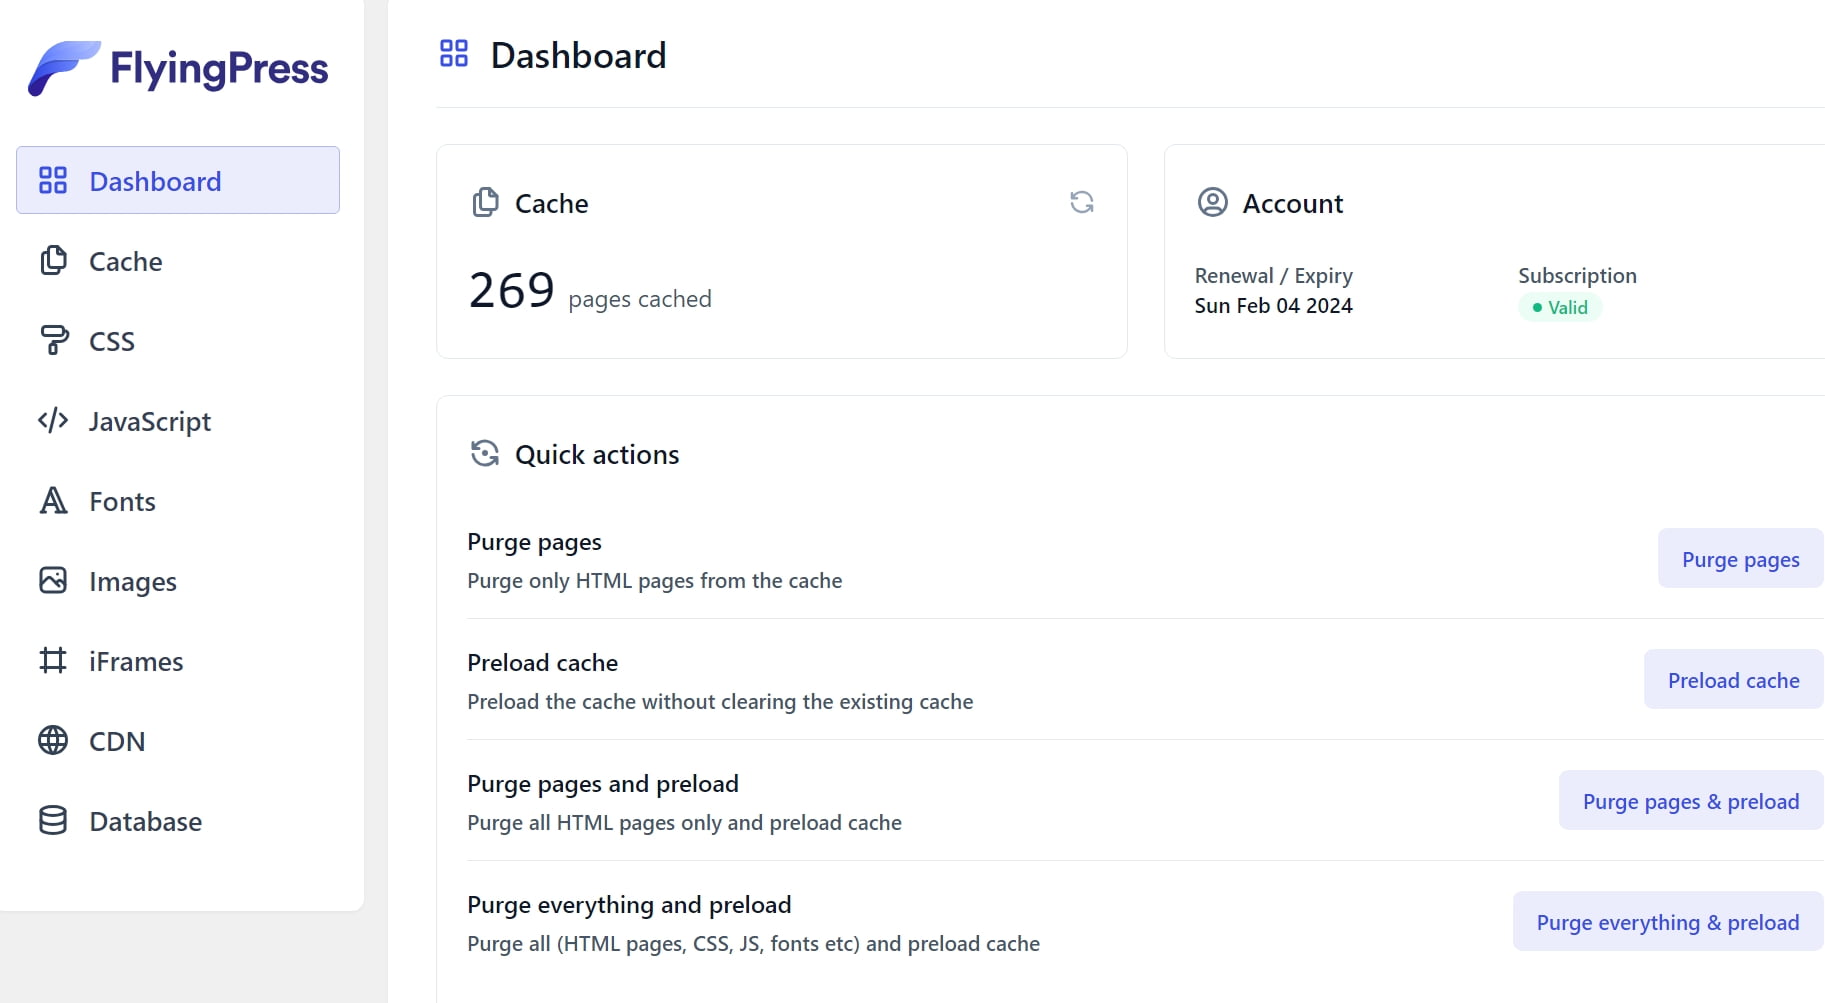
Dashboard
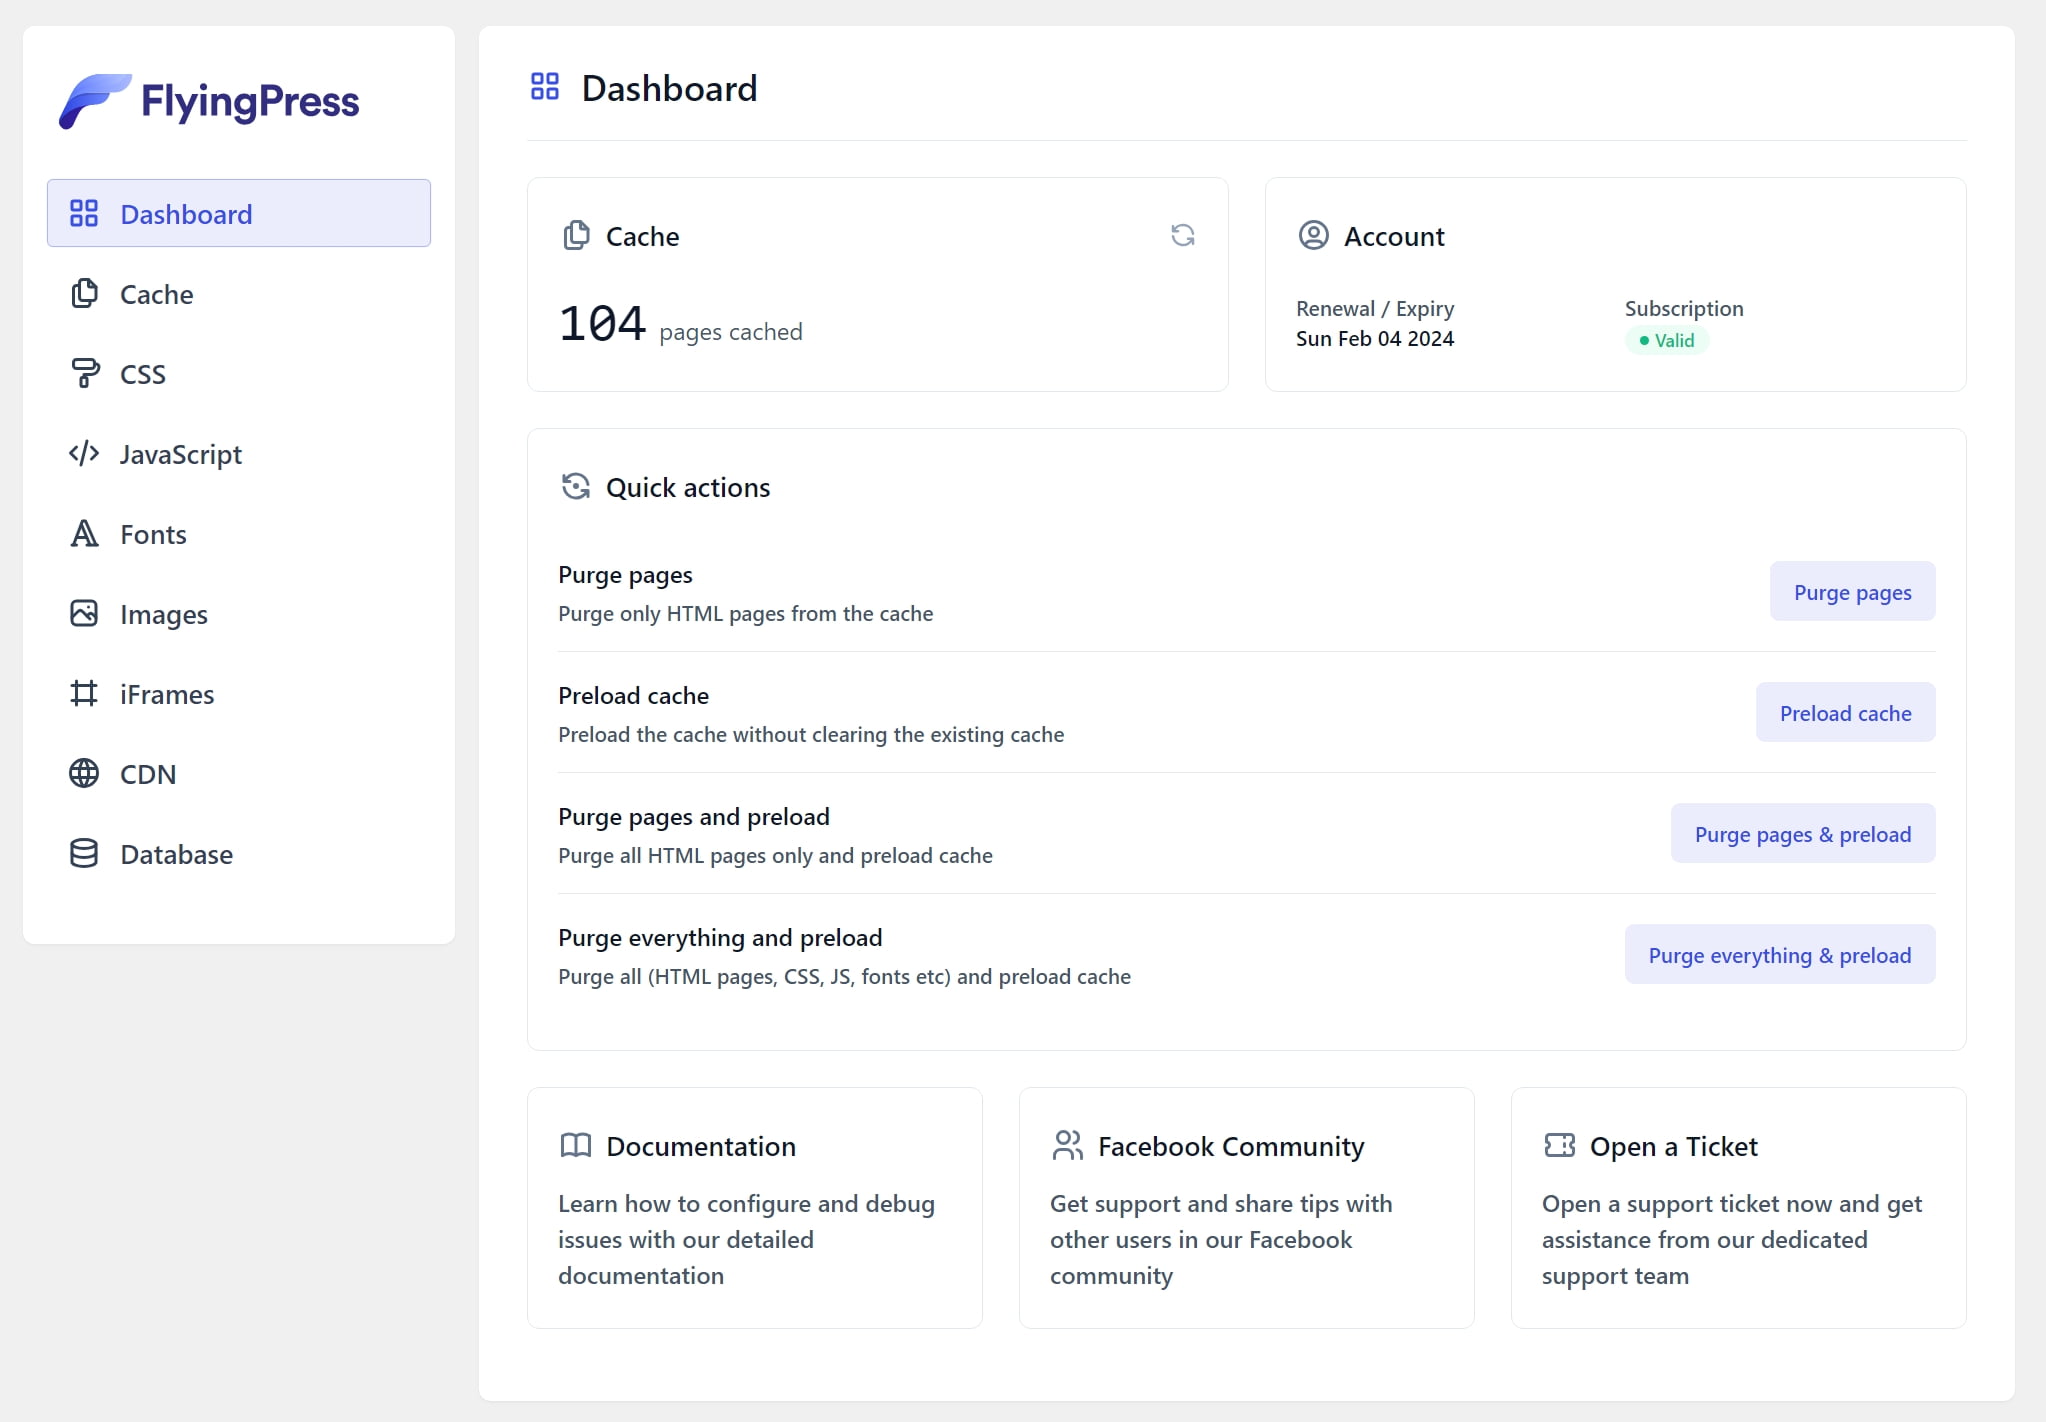
The “Dashboard” page in FlyingPress is where you see how many of your pages have been already cached, and if your account status is valid or invalid. Valid means that your licence is still active, and you can see the expiration date.
Just below you can find the “Quick Actions“, which basically lets you clear your website’s cache, preload it, purge and preload only the pages or everything. The same options can also be found on the top toolbar of your WordPress dashboard.
If you need any help, you can find the Documentation at the end of the page, or even a link to open a new support ticket in case you’re experiencing problems. There’s also a link to join their Facebook community, from which you can either ask your questions or for support, either simply stay updated with all FlyingPress latest news and more.
Cache Settings
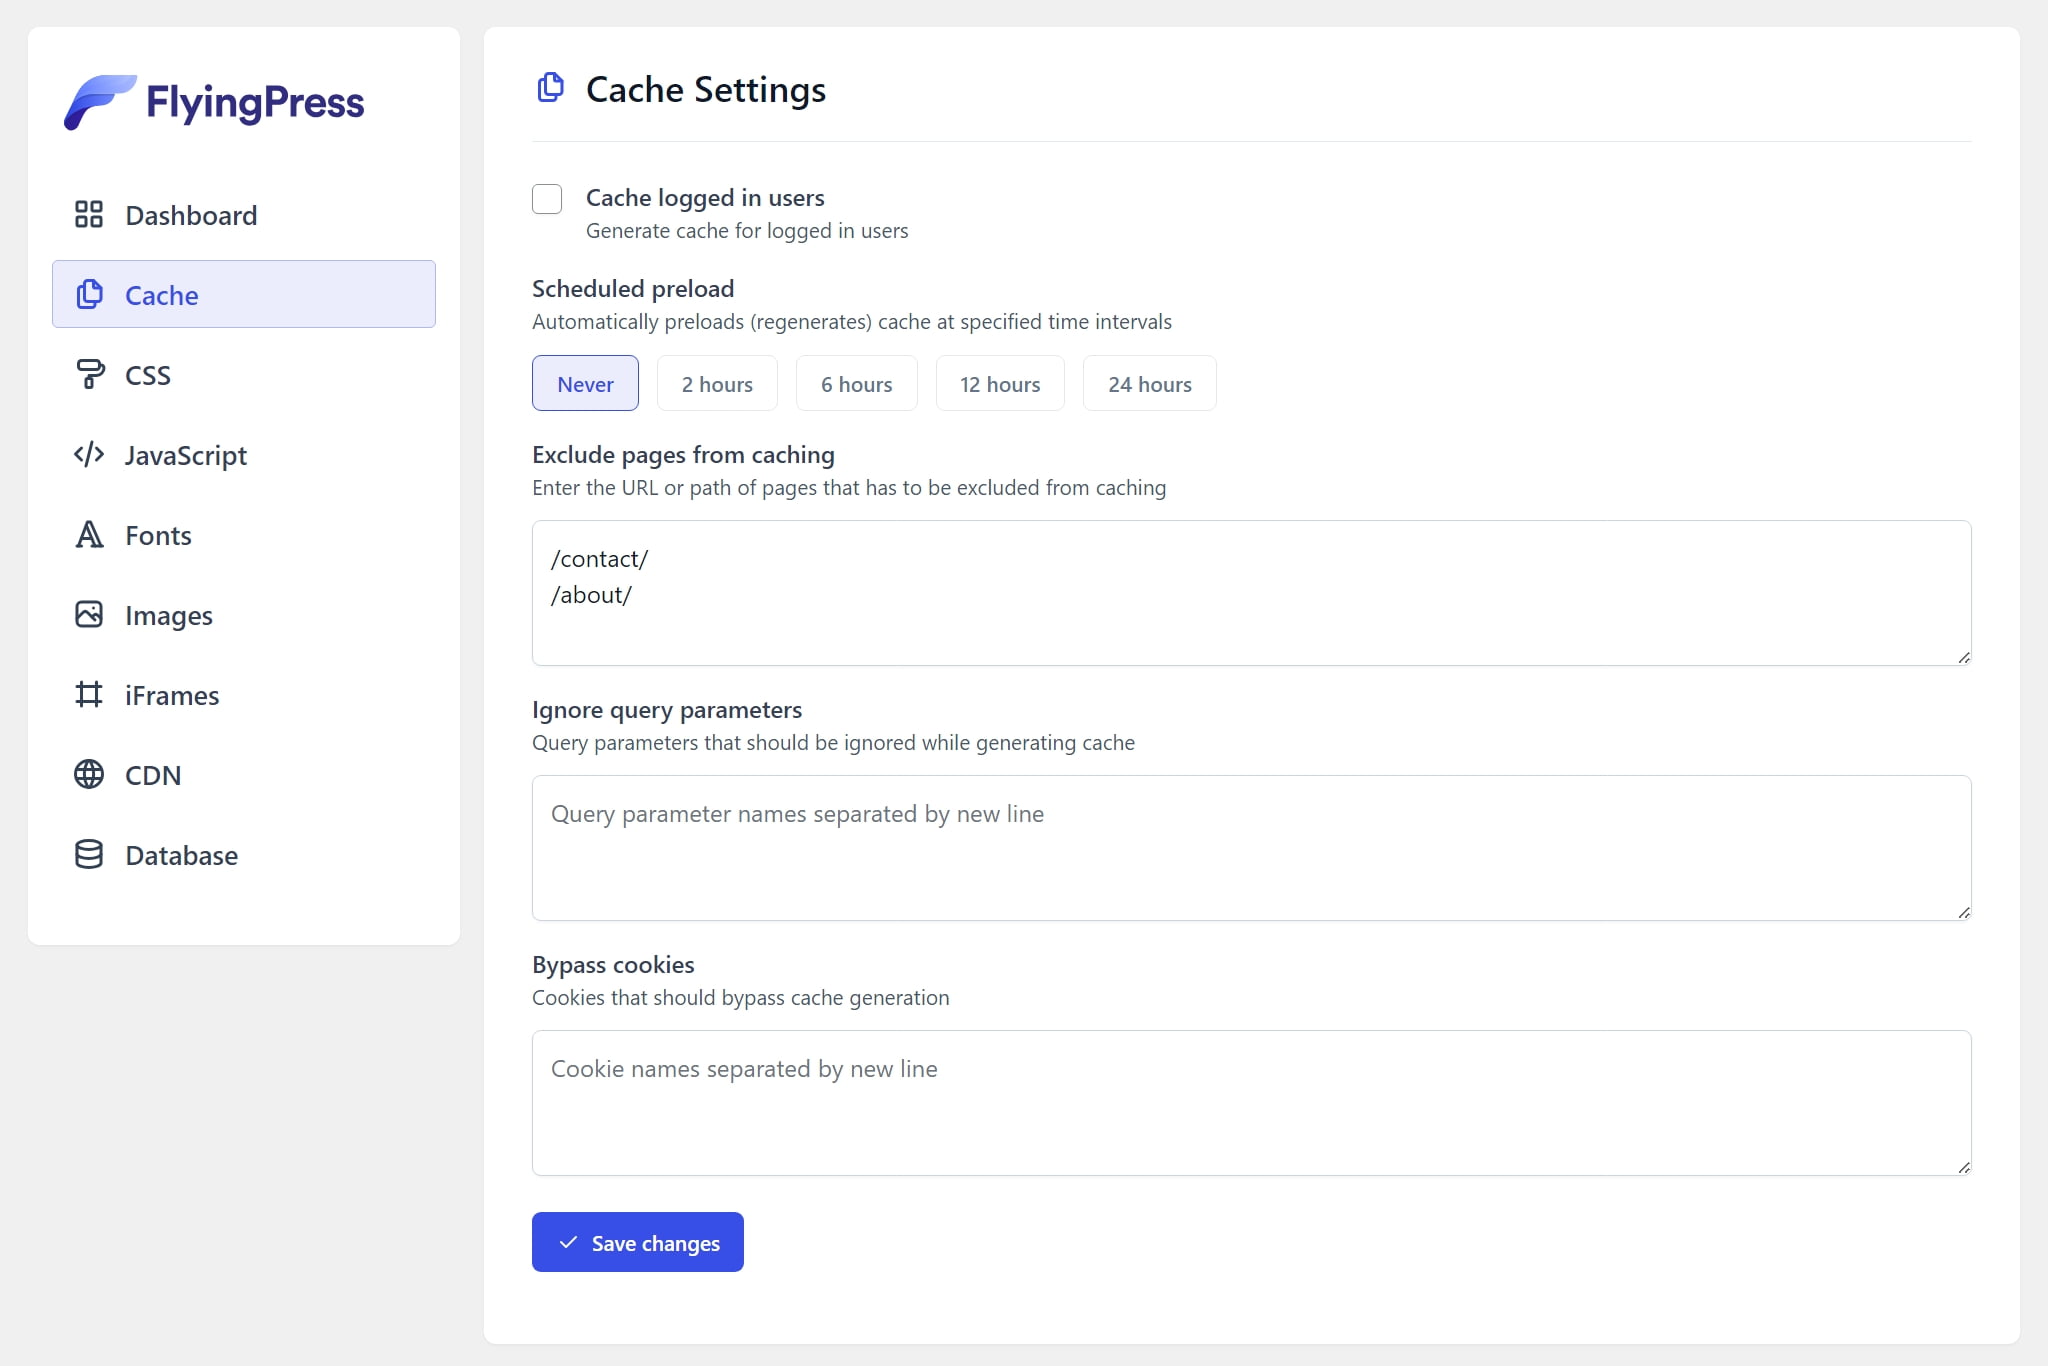
This is where things get a bit more serious, with our first options available. The first of them is the “Cache logged-in users“, which you’ll want to keep disabled if you don’t have locked content that only memberships can access. You can also enable it if you have some kind of an online community or forum that has members and locked content.
In the “Scheduled preload‘ section, for most websites setting this to “Never” is the best choice. But if you have a – let’s say – newspaper and you publish daily new content, adjusting this to automatically preload the cache every few hours may give you better results.
The most important feature on this page though is the “Exclude pages from caching” field. Here, you can add the URLs of the pages that you don’t want to be cached, which is especially important if you want to achieve even greater performance both for your visitors and your WordPress dashboard.
You can start by including the pages that automatically get updated from users, such as the /cart/ or /checkout/ pages for e-Commerce owners, or the /wp-admin/ and so on – depending on your website.
As you can see, there’s no reason to add the full URLs, only what’s after your domain name. For example, if you wanted to add the https://example.com/contact/ link to be excluded from the cache, you simply add only the /contact/. If you wanted all the pages that start with /contact/ to also be excluded, simply add the (.*) at the end: /contact/(.*).
If you’re a WooCommerce owner, then it’s important to exclude the /cart/ and /checkout/ pages, as they get updated often depending on every user.
Here are two lists with links that you can exclude, depending on your website:
Blogs and Websites:
- /wp-admin/*
- /wp-login.php
- /contact
- /sitemap.xml
- /sitemap_index.xml
- /?preview=true
- /wp-admin/customize.php
e-Commerce Stores:
- /wp-admin/*
- /wp-login.php
- /wp-register.php
- /contact
- /cart
- /checkout
- /account
- /my-account
- /order-tracking
- /track-order
- /sitemap.xml
- /sitemap_index.xml
- /?preview=true
- /wp-admin/customize.php
Now, remember, you only exclude specific pages from the cache, including those that get updated often, and mostly by other users. In the above examples, we’ve excluded the /wp-admin/ and /wp-login.php because they are dynamic and personalized for each user. If you have a contact form on your contact page, you should also exclude that page from getting cached.
When it comes to your sitemaps, they are used by search engines to crawl your website. They need to always reflect the current structure and content of your site. Caching could cause old or outdated sitemaps to be served to search engines.
By excluding these pages from caching, you ensure that dynamic content, personalized experiences, and time-sensitive actions are correctly handled by WordPress without compromising site performance or user experience.
If you’re not experienced, I’d suggest leaving the “Ignore query parameters” and “Bypass cookies” options as they are, except if you know what you’re doing.
CSS Settings
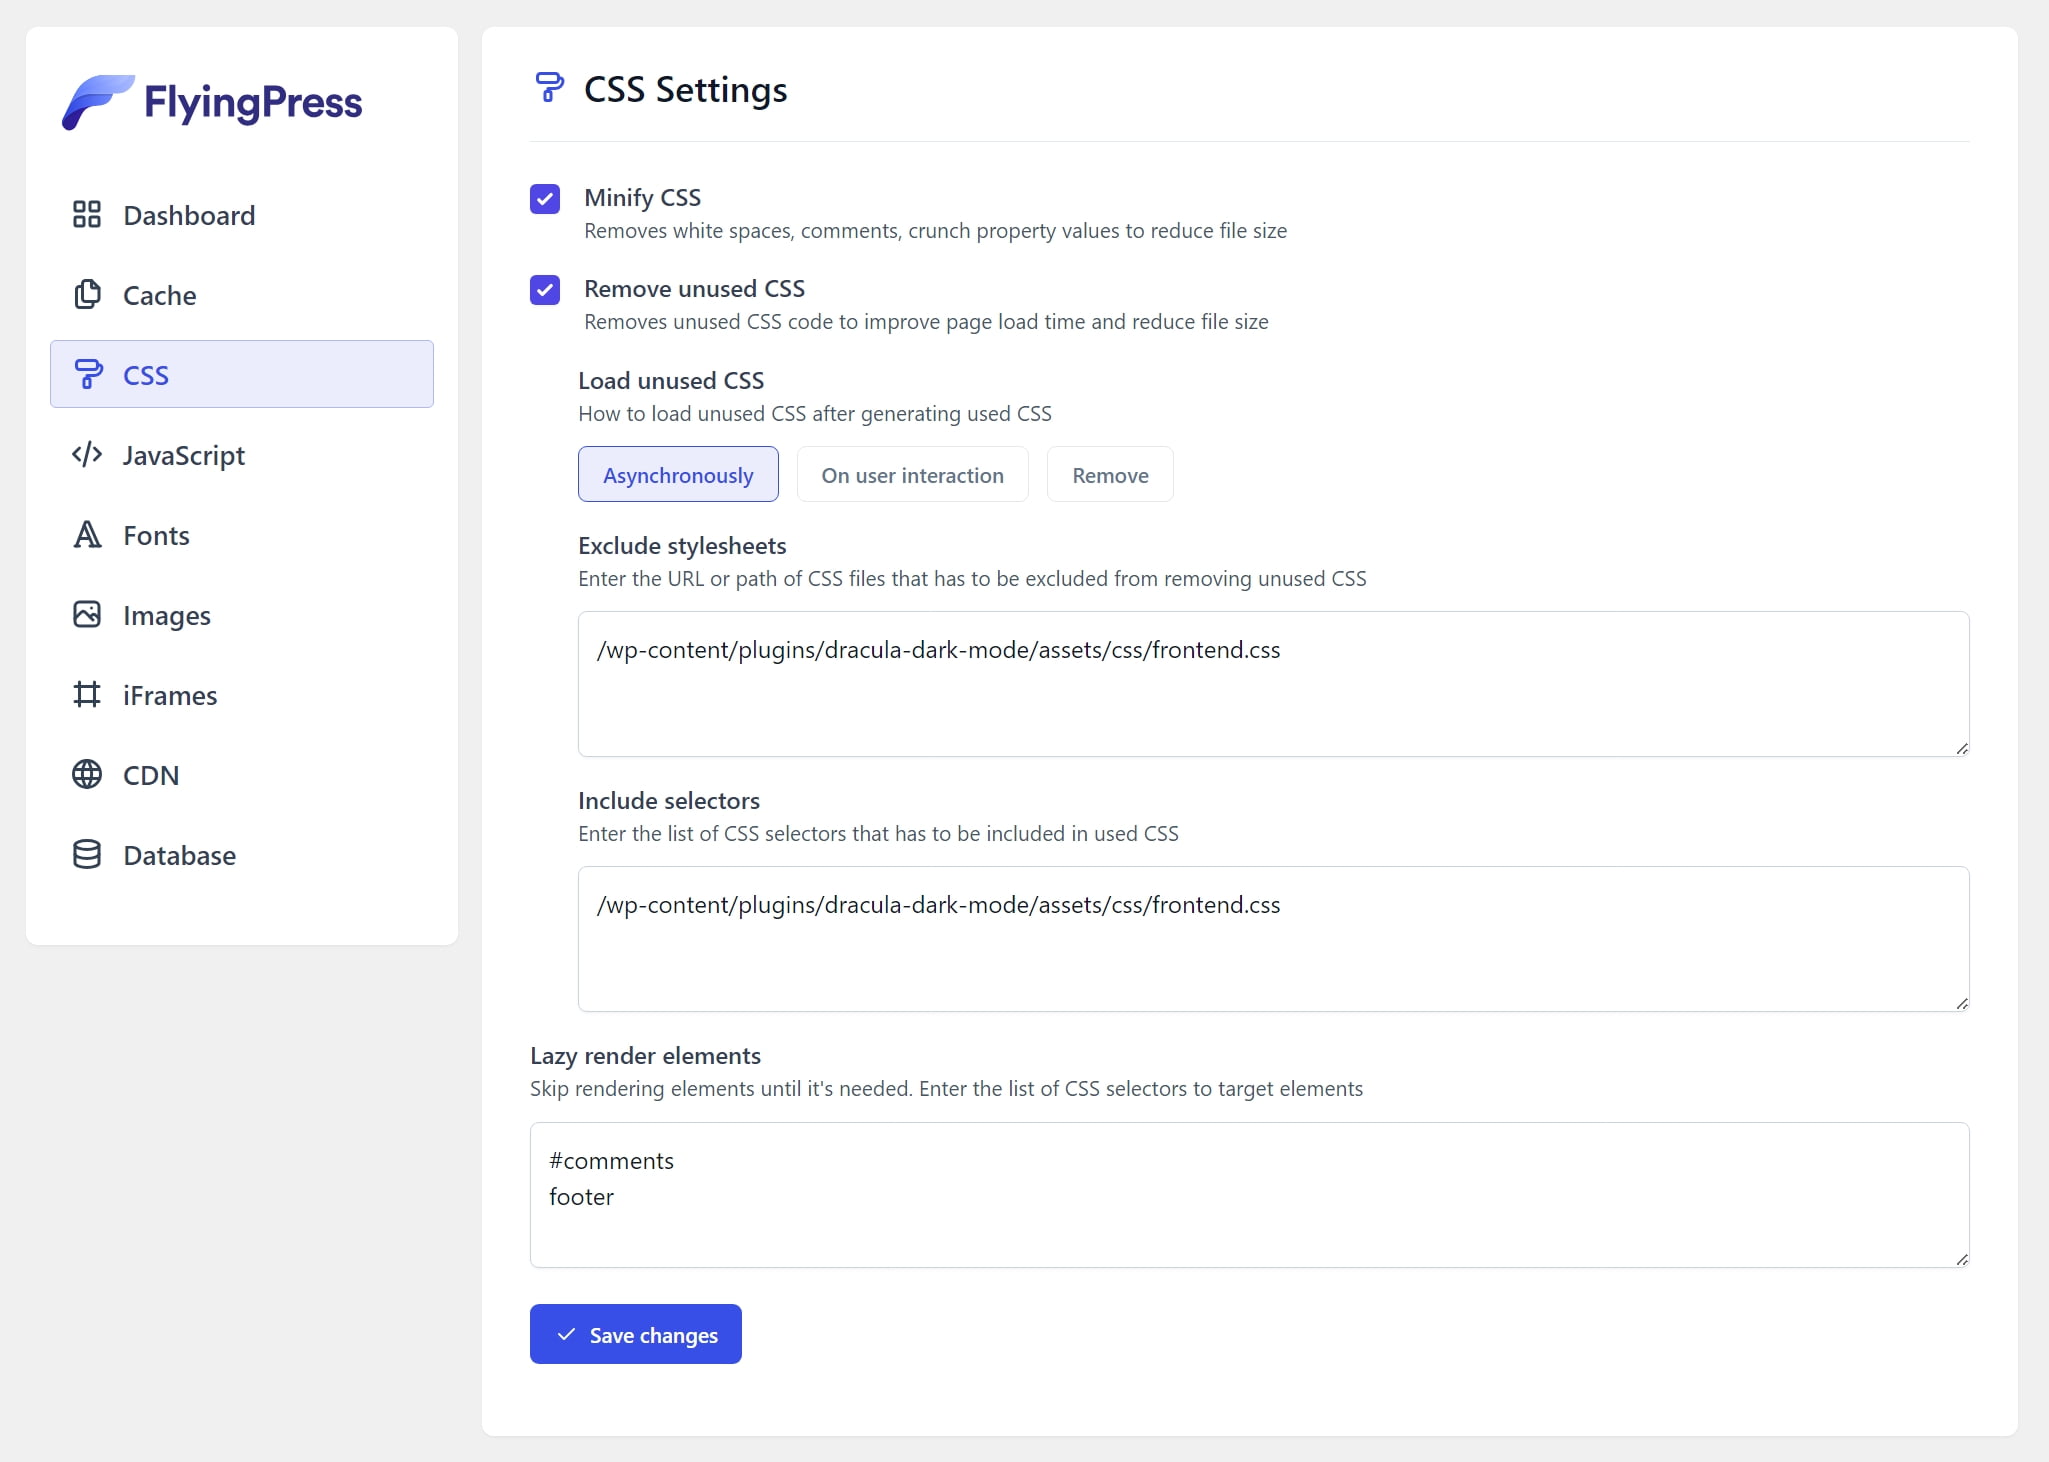
There are three options in the CSS settings page, to minify our CSS files and code, to remove the unused CSS code, and finally to lazy render our website’s elements. All three of them are especially important for achieving high-speed scores in Google’s PageSpeed Insights.
We’re in the deep waters now folks, meaning that your website’s design may brake after enabling those changes, but worry not, as you can get it back as it was by simply disabling them.
Start by enabling the “Minify CSS“. Once you have done that, clear your website’s cache from FlyingPress’s quick actions menu at the top of WordPress’s toolbar. Then check your website’s homepage and blog posts to see if everything is as it is supposed to be.
Assuming that your website’s design didn’t become a kid’s art, enable the “Remove Unused CSS“. Choose “Asynchronously” as a way to load the unused CSS, and hit the “Save” button. Clear your website’s cache once again, and check if everything’s all right. If they aren’t, the easiest way to solve all the issues is by contacting your theme’s developers and asking which files and selectors to exclude from FlyingPress.
You can then insert them in the fields that become available once you enable the “Remove Unused CSS” option. This way you’ll have everything set up and ready when it comes to CSS optimization. You can also ask the developers if you can fully remove the unused CSS – but that’s a bit more advanced.
JavaScript Settings
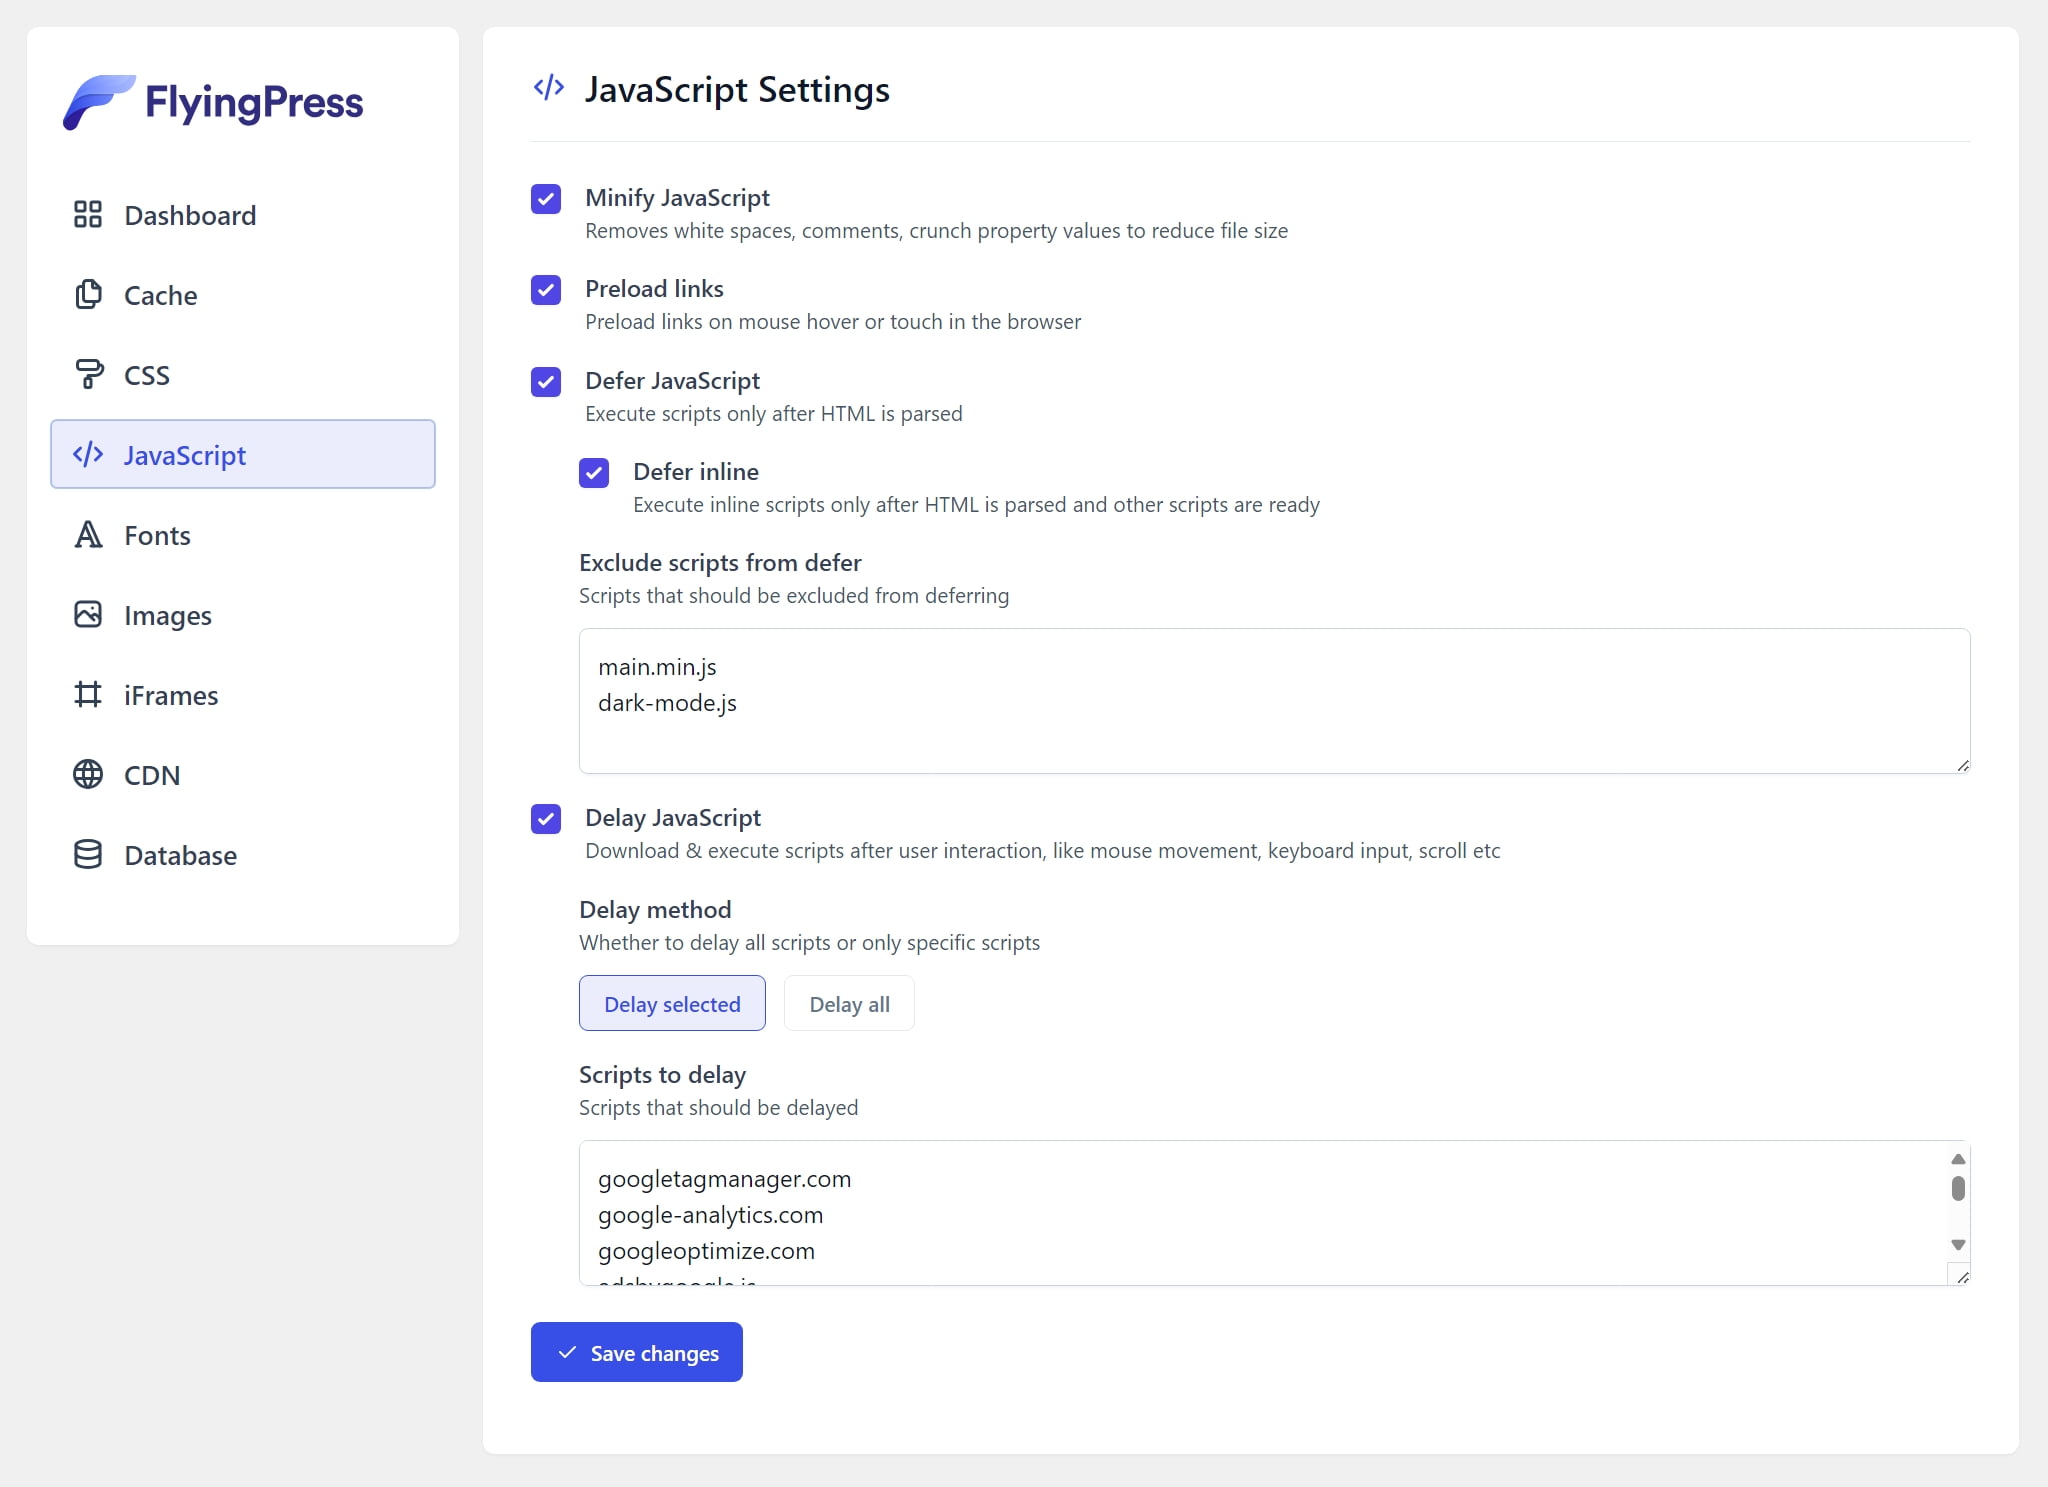
JavaScript is where things easily break, and that’s mostly because of the tons of different ways a theme or plugin can be built. As we did with the CSS settings, it’s all about enabling every feature, cleaning our website’s cache, and checking if everything’s okay.
You can start by enabling the “Minify JavaScript“, which tends to be the safe of options. If nothing broke, go and enable the “Preload links“. This will preload a page when a user hovers or touches it in the browser, which can significantly increase the load speed for your guests. Unfortunately, it will also use more resources from your server, especially if you get thousands of visitors daily, so make sure to check your server’s resource statistics after enabling this feature.
Both “Defer JavaScript” and “Delay JavaScript” can be enabled, and once again check your website after cleaning its cache. You can exclude the scripts you don’t want to get deferred or include which ones to get delayed, and FlyingPress will actually automatically detect and insert a few of them – based on the plugins that you’re using. If something breaks, you can contact the developers and ask how to exclude it, which is a great way to get the right answers and increase your website’s performance even further.
In the above example, as you can see I’ve excluded the main.min.js and dark-mode.js JavaScript files from FlyingPress’s defer, as my dark and light mode buttons – which I had placed in the header of my blog – stopped working after enabling the feature. Excluding them quickly fixed the issue, providing the best possible results in terms of speed optimization.
In the “Delay JavaScript” section, you can also use the “Delay all” option, but I’d suggest you keep delaying only specific JS scripts and not everything, as it may break things.
Font Settings

It may sound pretty simple, but optimizing your website’s fonts can actually increase the speed and provide higher scores in PageSpeed Insights. Thankfully, FlyingPress can handle everything automatically, which means you won’t have to install another plugin to do that for you – as we kept on doing before.
Start by enabling the “Optimize Google Fonts“, which will combine and self-host the Google Fonts that you’re using, improving the speed of your website. Clear the cache and check your website’s fonts, sometimes they may change, depending on your theme and plugins. If everything works as expected, continue by enabling the “Display fallback fonts“, which ensures that the text remains visible during webfont load.
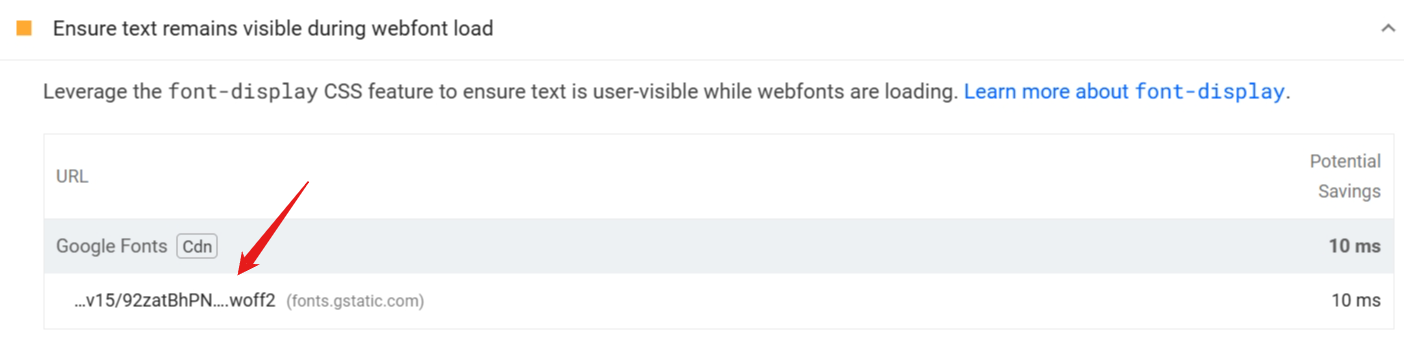
Preloading your fonts is also important, and you can do that by simply pasting all of your fonts’ URLs. You can find all those URLs by starting a site analysis on the Google PageSpeed Insights website.
Image Settings
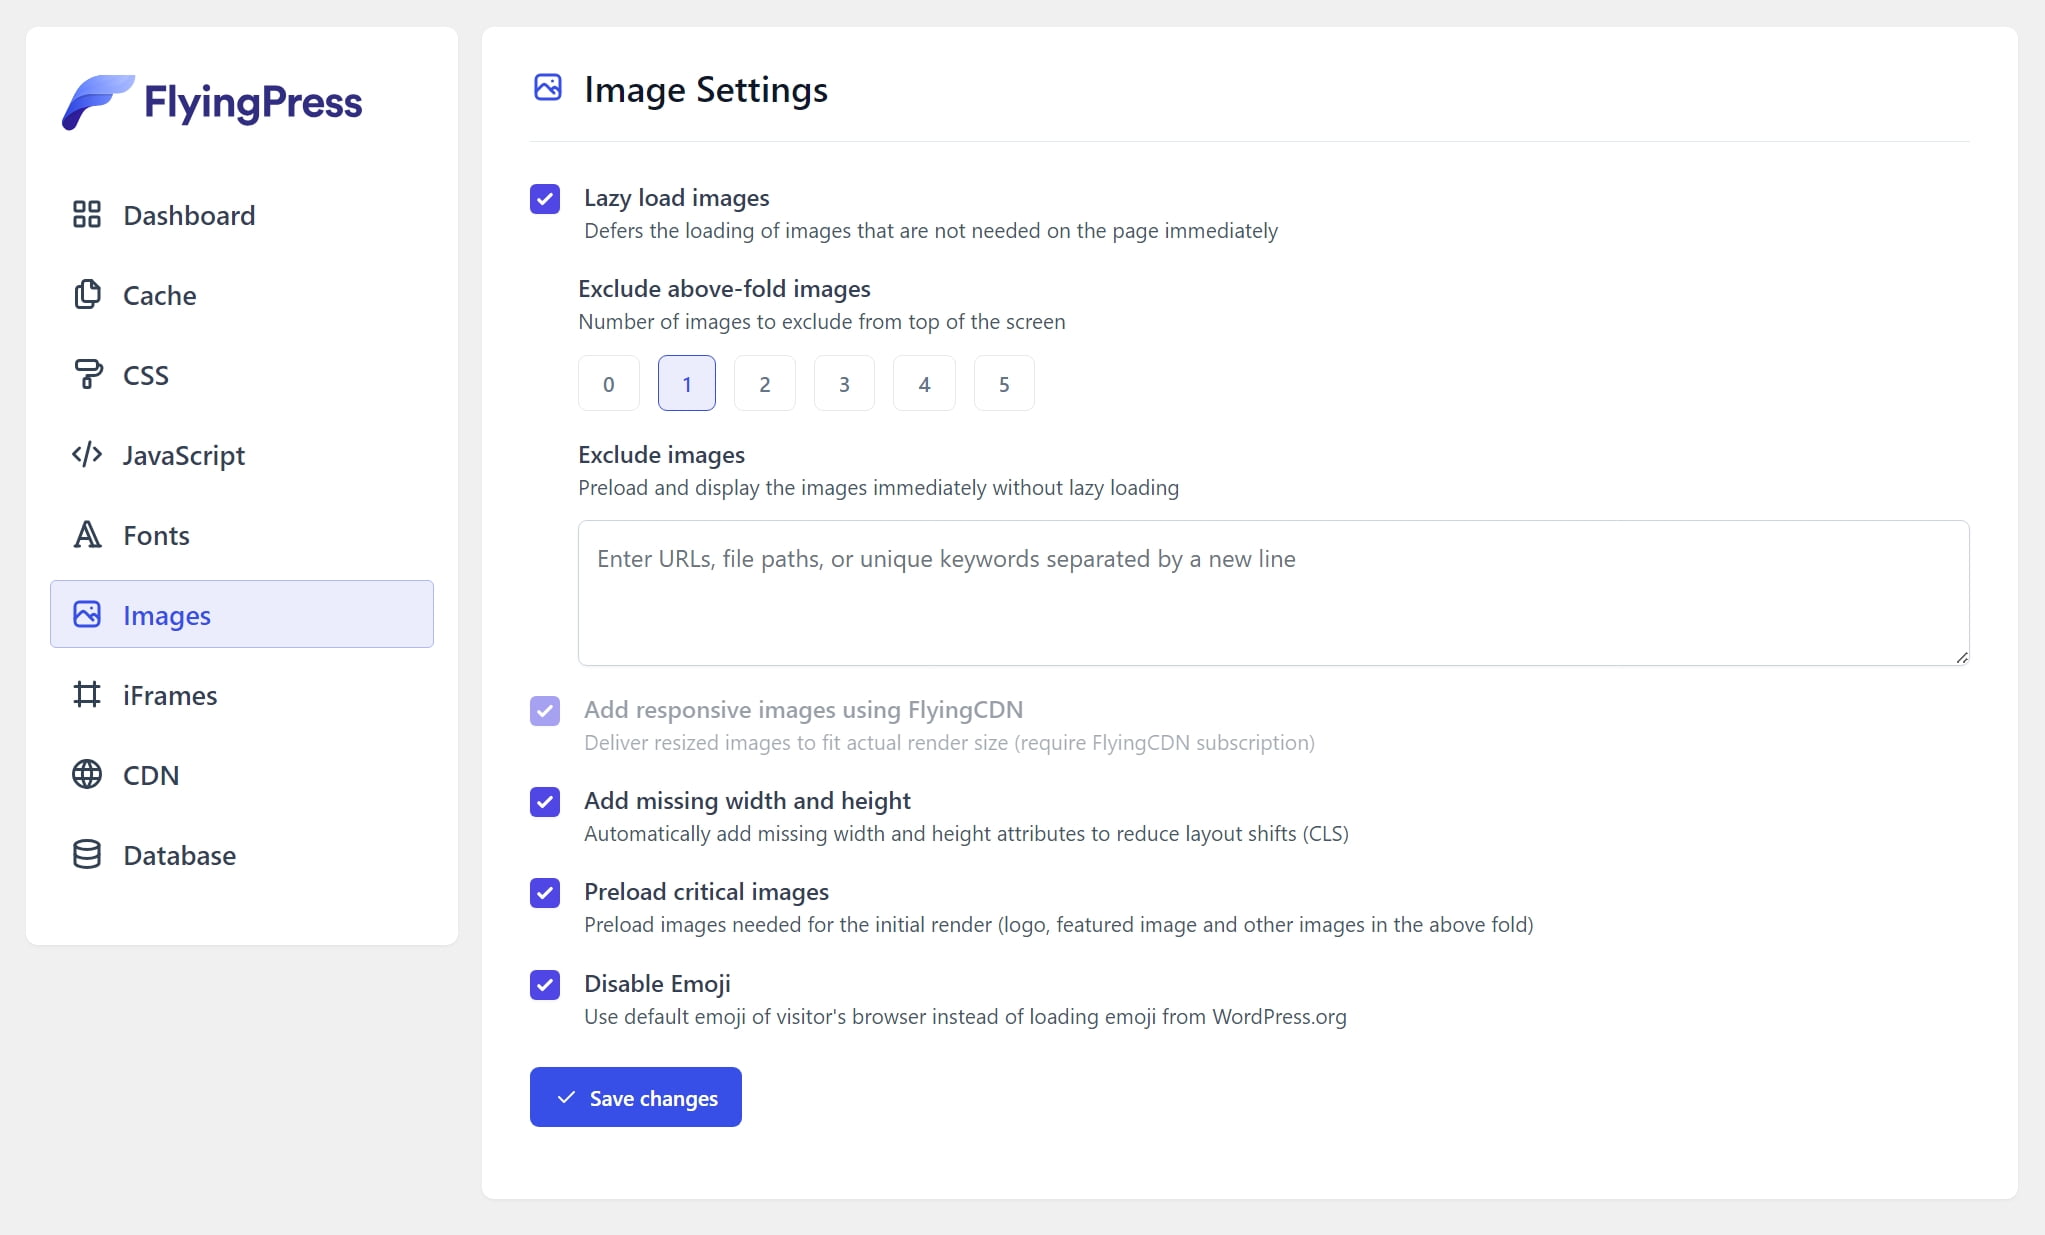
Although it may not seem like it, image optimization is most of the time the easiest to configure. You can simply go and enable all the options, including lazy loading your images, adding the missing width and height attributes, preloading the critical images (such as your logo) and disabling the Emoji (if you’re not using it).
Click on the “Save changes” button at the end of the page, clear your website’s cache, and check if all of your images are loading correctly. If your above-the-fold images or your slider’s pictures won’t load, try increasing the number in the “Exclude above-fold images” or completely disabling the “Preload critical images“.
iFrame Settings
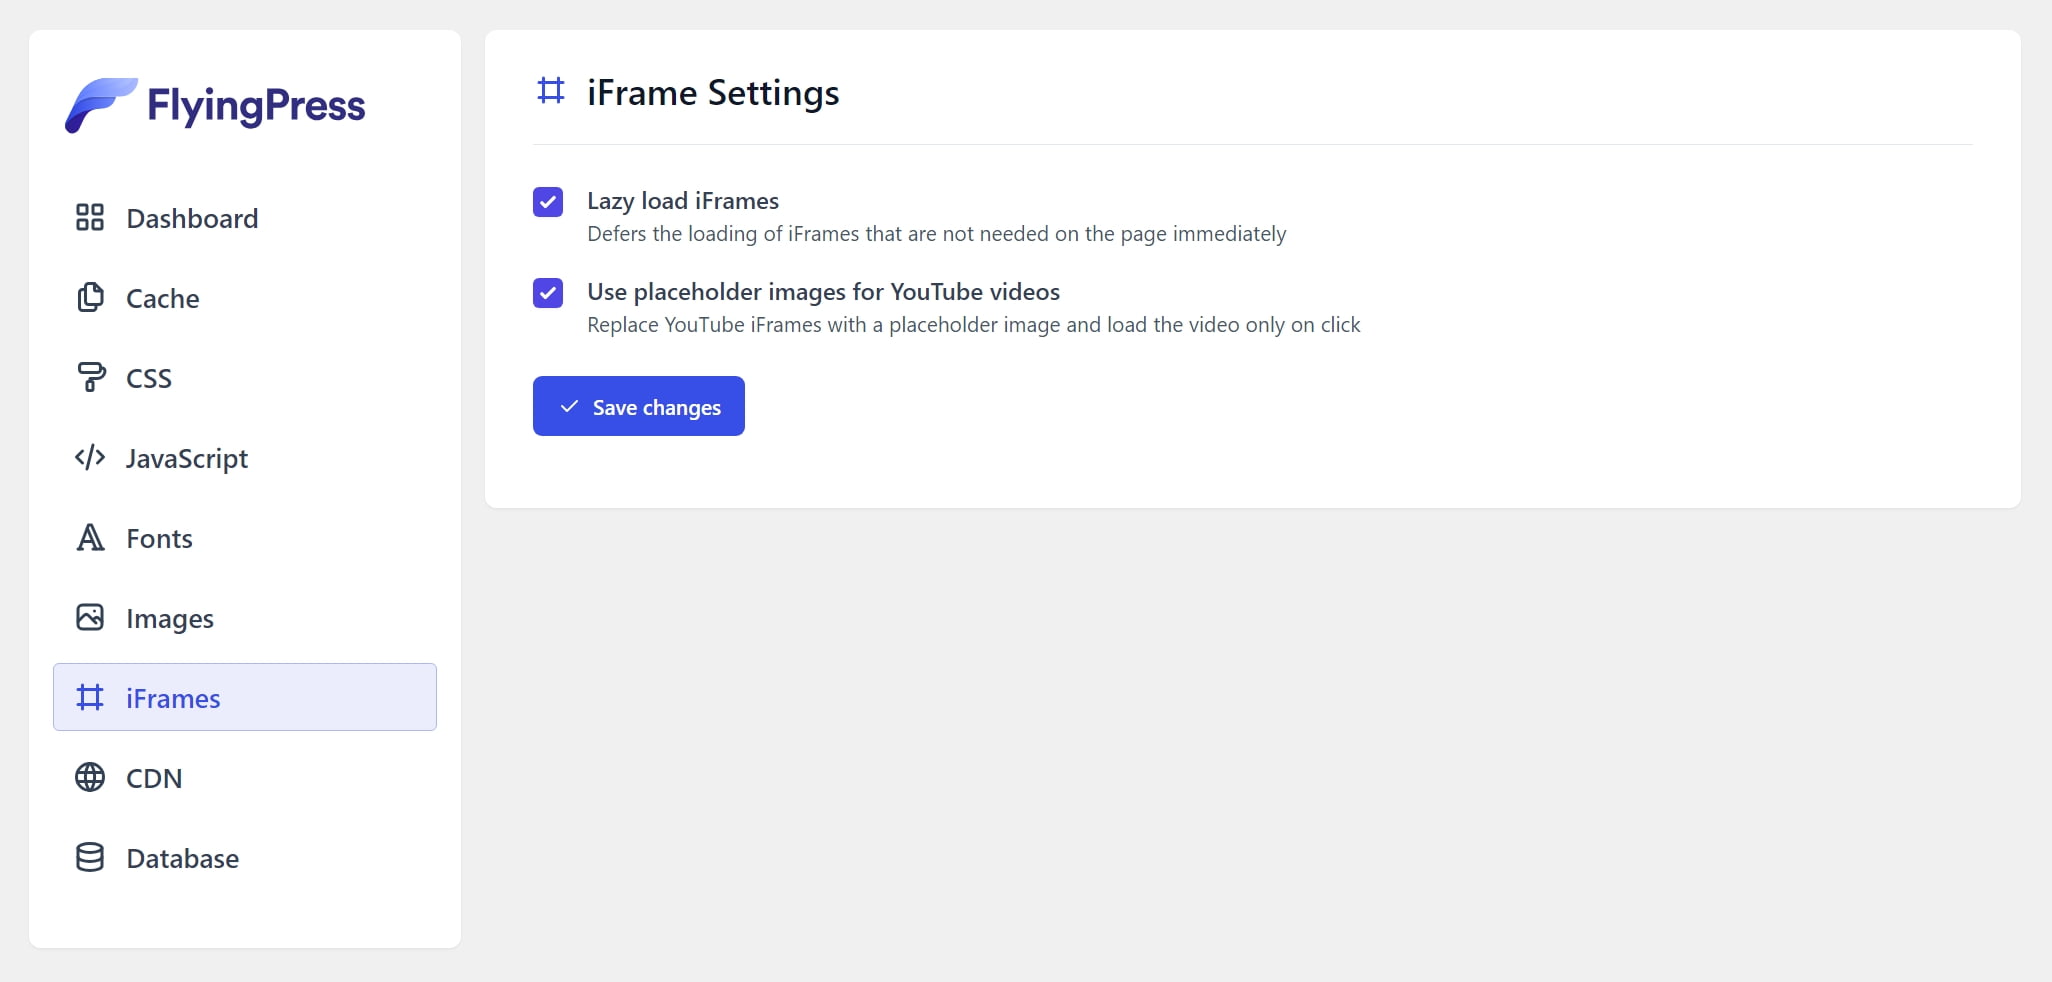
iFrame it’s probably the easiest page of them all. Simply activate the “Lazy Load iFrames” and “Use placeholder images for your YouTube videos” and check if your videos are loading (even if they are hosted on third-party platforms), and if parts of your website are working as expected, such as widgets or icons that you may have placed in places such as your sidebar.
The second option is important if you insert videos into your blog posts or pages, as it automatically replaces the YouTube iFrames with a placeholder image and the video is loaded once the user clicks on it. This means that instead of loading the whole video on the page, FlyingPress will only load a lightweight placeholder image, making the user experience faster.
CDN Settings
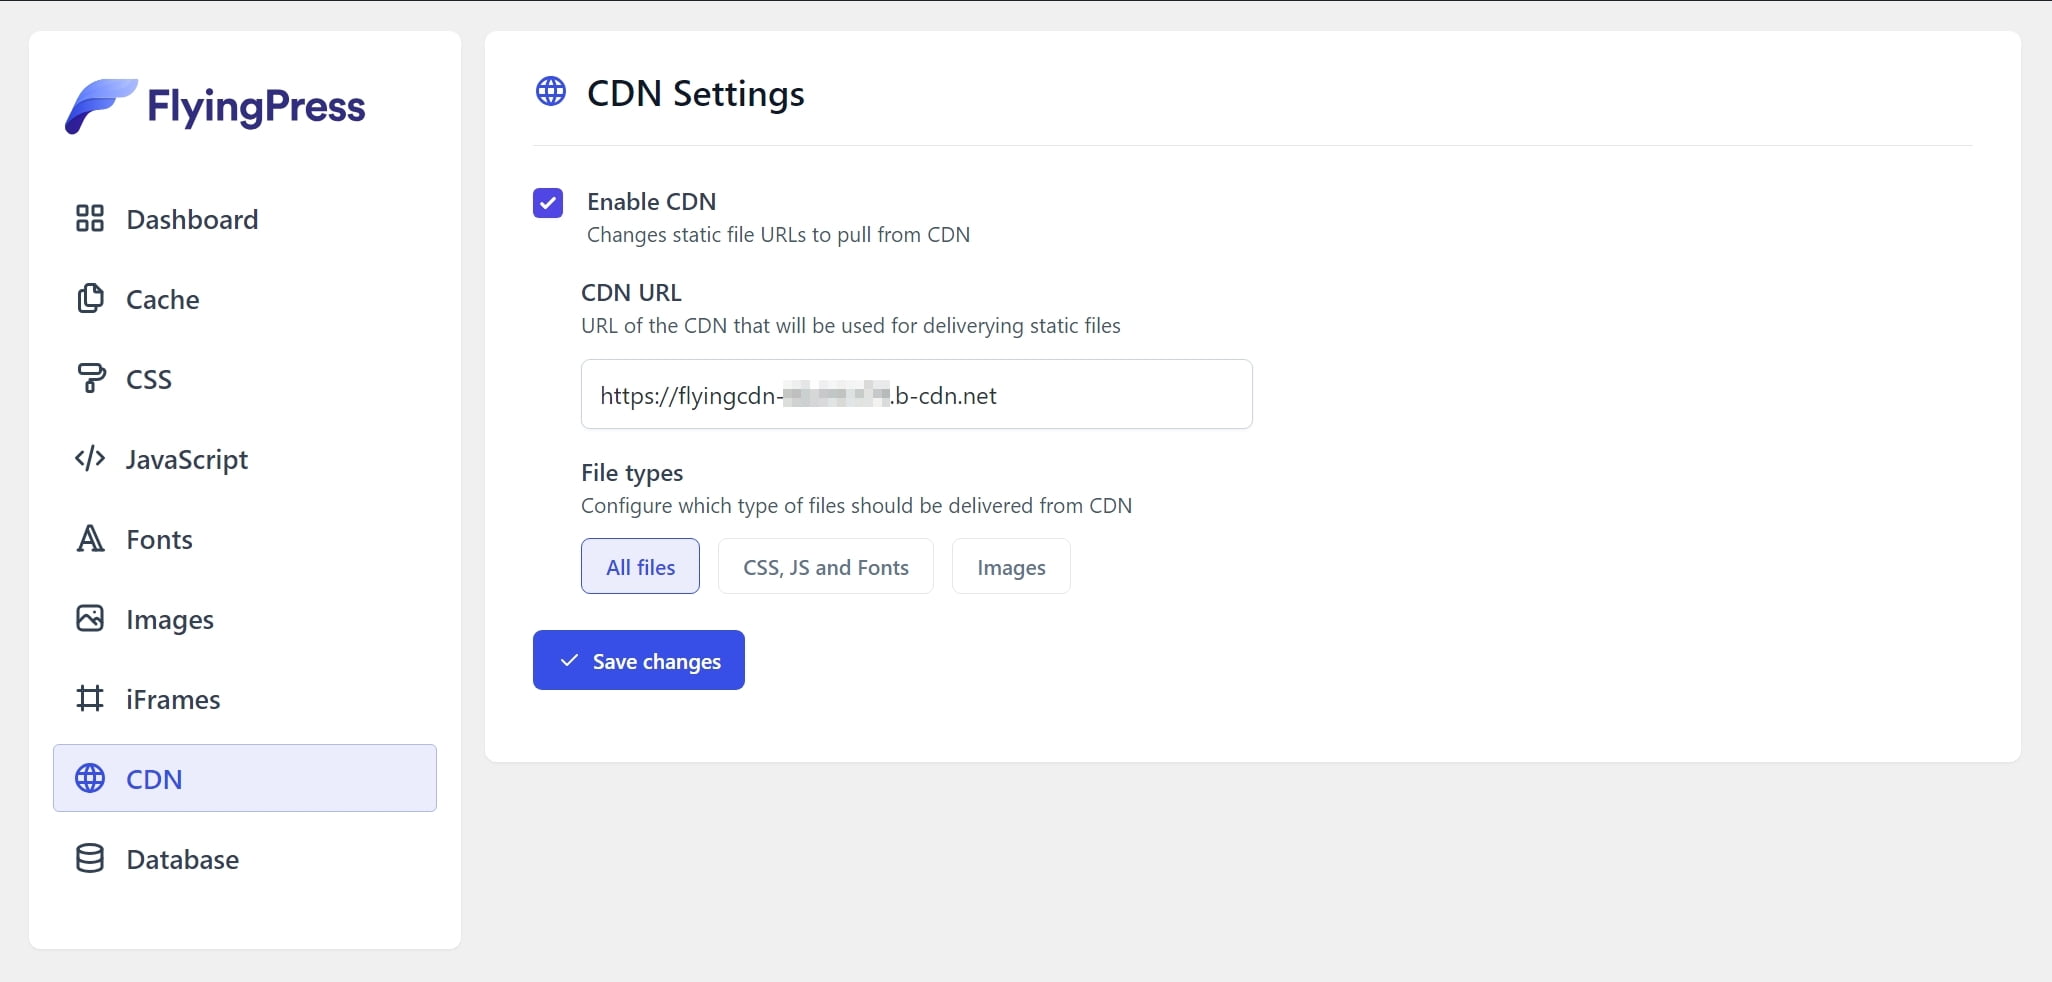
This is where you set up how the FlyingCDN will work on your website if you choose to add the monthly subscription to your site’s expenses. Once you selected and opted in for the CDN service from your account, simply enable the CDN service through the FlyingPress plugin, make sure the CDN URL is the right one, choose the “All files” option, and simply save your settings.
FlyingPress will serve your files through the closest server for every visitor that visits your website, quickly increasing the overall loading speed. Images should also load faster, especially if you have compressed them and converted them to WebP or AVIF format. If you face any issues with parts of your website not loading, or even your images, simply go back to the CDN settings and start by changing from “All files” to “CSS, JS and Fonts“, and if that doesn’t work, select “Images“.
It’s important to contact the FlyingPress support team if you’ve experienced other issues, as they’ll quickly help you understand what’s happening.
Database Settings
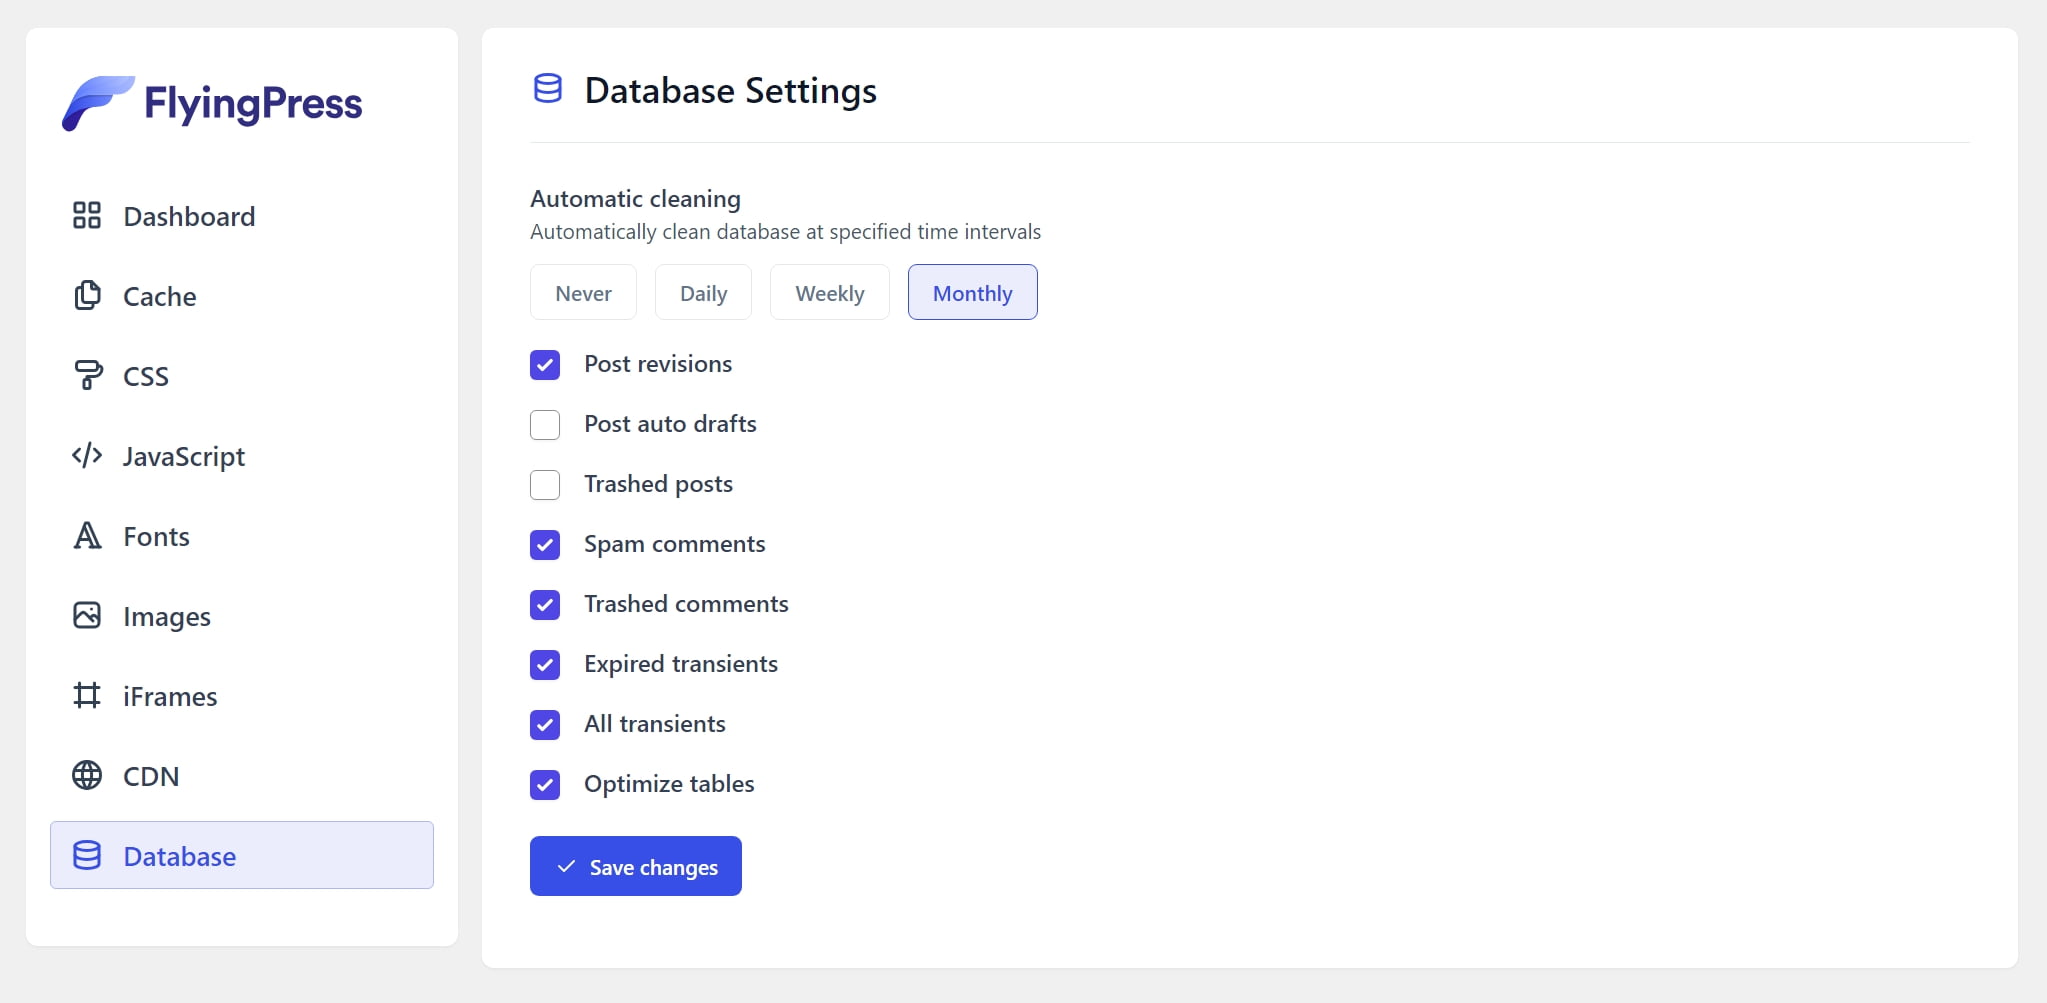
Last but not least, FlyingPress has a couple of options that we can schedule for automatic cleaning, which is pretty neat. The “Automatic Cleaning” feature, which you can set to never, daily, weekly or monthly, is exactly what every website owner needs to keep things clean and fresh without moving a finger.
Here’s a list of all the options that you can enable:
- Post revisions: A WordPress built-in feature that allows you to track and revert to previous versions of your posts and pages. This feature is incredibly useful when you need to undo changes or recover lost content.
- Post auto drafts: Like revisions, auto drafts store your most recent versions of your articles and pages as drafts every time you save the changes that you made. Useful if you want to restore a specific part.
- Trashed posts: Those are the posts that you have deleted. They are stored in the “Deleted” sections in “All Posts”, and if you aren’t going to be restoring them, there’s no need to even exist there.
- Spam comments: Deletes all the comments that you’ve selected as spam, or the ones that a spam plugin has detected and moved there.
- Trashed comments: Those are all the comments that you’ve deleted and you can restore them anytime. They’re mostly not needed.
- All transients: Transients in WordPress are a type of caching mechanism that allows you to store temporary data in the WordPress database. This data is stored with an expiration time, after which it is automatically deleted. Transients are particularly useful for improving the performance and speed of your website by reducing the need to repeatedly generate data that takes a lot of server resources.
- Expired transients: Those are not needed anymore and they only take space.
- Optimize tables: A well-optimized database reduces the load on your server, which can be particularly beneficial for high-traffic websites. Over time, your database can accumulate overhead and become bloated with unnecessary data, such as post revisions, spam comments, and transient options. FlyingPress can easily optimize and clean them all.
- Save changes: It saves the plugin’s changes (just kidding).
Basically, if you update your website daily and publish lots of content, you can set it up to automatically clean and optimize everything every week. In most of my blogs, I just leave it at a monthly rate, which gives me a safe environment to work and restore any change that I am doing, while every month all of those changes are cleaned up from FlyingPress.
Keeping our WordPress website fast and optimized
Although after installing and setting up FlyingPress you can literally forget it and move on with your life – well, apart from cleaning your website’s cache every time you make changes and you want them to immediately affect all users – it’s always crucial to keep checking your scores.
Every now and then, simply run a simple analysis test using PageSpeed Insights to make sure that your website is in a good state. You can also watch your speed scores from within the Site Kit, which is Google’s official plugin for WordPress.
If you face any issues or you’ve followed all the optimization tips and you’ve successfully enabled almost every feature that FlyingPress provides, but you’re still getting low scores in PageSpeed Insights, start by checking what’s left. What other recommendations has Google given you once they’ve completed the analysis? Have you cleared your cache and rechecked?
Start by solving every issue one by one. If there are specific JavaScript files for example that taking too much to load, think about disabling them or delaying their execution until the visitor interacts with the page. You can always contact FlyingPress’s support team for any questions that you may have or any issues that you may experience, and your theme and plugin developers should also come in handy when optimizing our website to its fullest.
Personally, I’ve opened countless tickets and sent a huge amount of emails over the years to plugin and theme developers to help me better understand which files I could include or exclude from FlyingPress, WP Rocket, and any other similar cache plugin, focusing on using every single feature and option for ultra optimization.
Sometimes the best way to increase our website’s speed and simply by removing anything that it’s not necessary. Too many posts loading on the homepage, ads being displayed in many parts of the website, widgets and action-to-calls loading everywhere, and even high-quality images and videos can severely impact your site’s performance and speed scores. Start by removing anything that you don’t generally need, and then start optimizing everything else.
What I liked (and didn’t) the most about FlyingPress
I purchased FlyingPress the first month it was released. Although I am not using it anymore on any of my blogs, as I’ve manually configured most things and I’m using the LiteSpeed cache plugin as my blog is hosted in Hostinger, is still one of my favorite options when it comes to caching and optimization WordPress plugins.
This is one of the first plugins that I install on any of my clients’ websites after I’ve finished designing them, and it works perfectly in each one of them, from blogs and portfolios to e-commerce and marketplaces. It has all the basic options that you’ll need to improve your overall speed, and thankfully it will help you pass all Google’s Core Web Vitals.
If it doesn’t, think about making more extreme changes, such as choosing a faster, optimized, and lightweight theme, avoiding using too many plugins, migrating to a faster server, making sure you’re using a CDN service, and that all of your images have been converted at least to WebP file format, if not AVIF, which is more preferred for speed.
What I didn’t like was the way FlyingPress was detecting my sub-folders. In one website where I had over 4 other WordPress installations running as sub-folders for various purposes, FlyingPress was unable to detect any new sub-folder I was creating, meaning that I had to contact the support team every time – which they went and added the new sub-folder as a domain in my license.
Apart from that, it’s a stable plugin that works great both for simple blogs to more advanced and complex websites, including e-commerce, marketplaces, memberships, etc.
Conclusion: Is FlyingPress right for you?
If you already have a WordPress site with a good speed score which passes Google’s Core Web Vitals, then using FlyingPress or any other similar plugin is not necessary. You can keep the current one and simply check your speed every now and then to make sure you don’t get any new recommendations or red flags.
But if you’re website lacks in speed and you’ve tried everything with free plugins, then FlyingPress can ease your pain. With a modern and easy-to-use interface that has nothing to envy, and with all the caching and optimization features that you’ll need, it’s a great tool to increase the speed of your WordPress site with a few clicks.
Which caching and optimization plugin are you currently using and what’s the status of your website’s speed? Have you ever used FlyingPress in the past? And if so, what was your experience and are you still using it? Let me know in the comments down below.