Coming from a world where Windows and Linux are the kings, where most hardware is compatible without lifting a finger, and both operating systems can share the same shortcuts and similar configurations, macOS was a big surprise.
- 1. Get a USB hub or a SuperDock (you’ll need it)
- 2. The best keyboard money can buy
- 3. A mouse that you won’t replace
- 4. We all need the extra storage space
- 5. Replace your HDMI cable with this one
- 6. Dock & Stand with NVMe SSD Enclosure
- 7. The perfect monitor for your needs
- 8. A solid Surge Protector or a UPS
- 9. Hate the Mac Mini M4’s power button? Get a new one!
I got the Mac Mini M4 a couple of months ago, and if there’s anything I was constantly seeing online but never crossed my mind when I was purchasing the device, it was one little thingy; anything Apple-related is like using Arch Linux, sure, it’s minimal and bare bones, but it needs more if you’re getting serious with it.
Whether you’re considering getting yourself a new Mac Mini M4 or looking for gift ideas for someone who owns one, those are the best accessories that I found and I’m using on a daily basis – only the things that really made the difference with this device.
If you haven’t already, you can grab the Mac Mini M4 straight from Amazon:
Apple 2024 Mac Mini (M4 Chip with 10‑core CPU & 10‑core GPU)
At just 5 by 5 inches, Mac mini is designed to fit perfectly under a monitor and is easy to place just about anywhere.
If you own an older model, please make sure to check your Mac Mini’s tech specs to make sure that each gadget, accessory, or any other product is actually compatible. The list below will mostly include items that are fully compatible with the Mac Mini M4, not older models.
1. Get a USB hub or a SuperDock (you’ll need it)
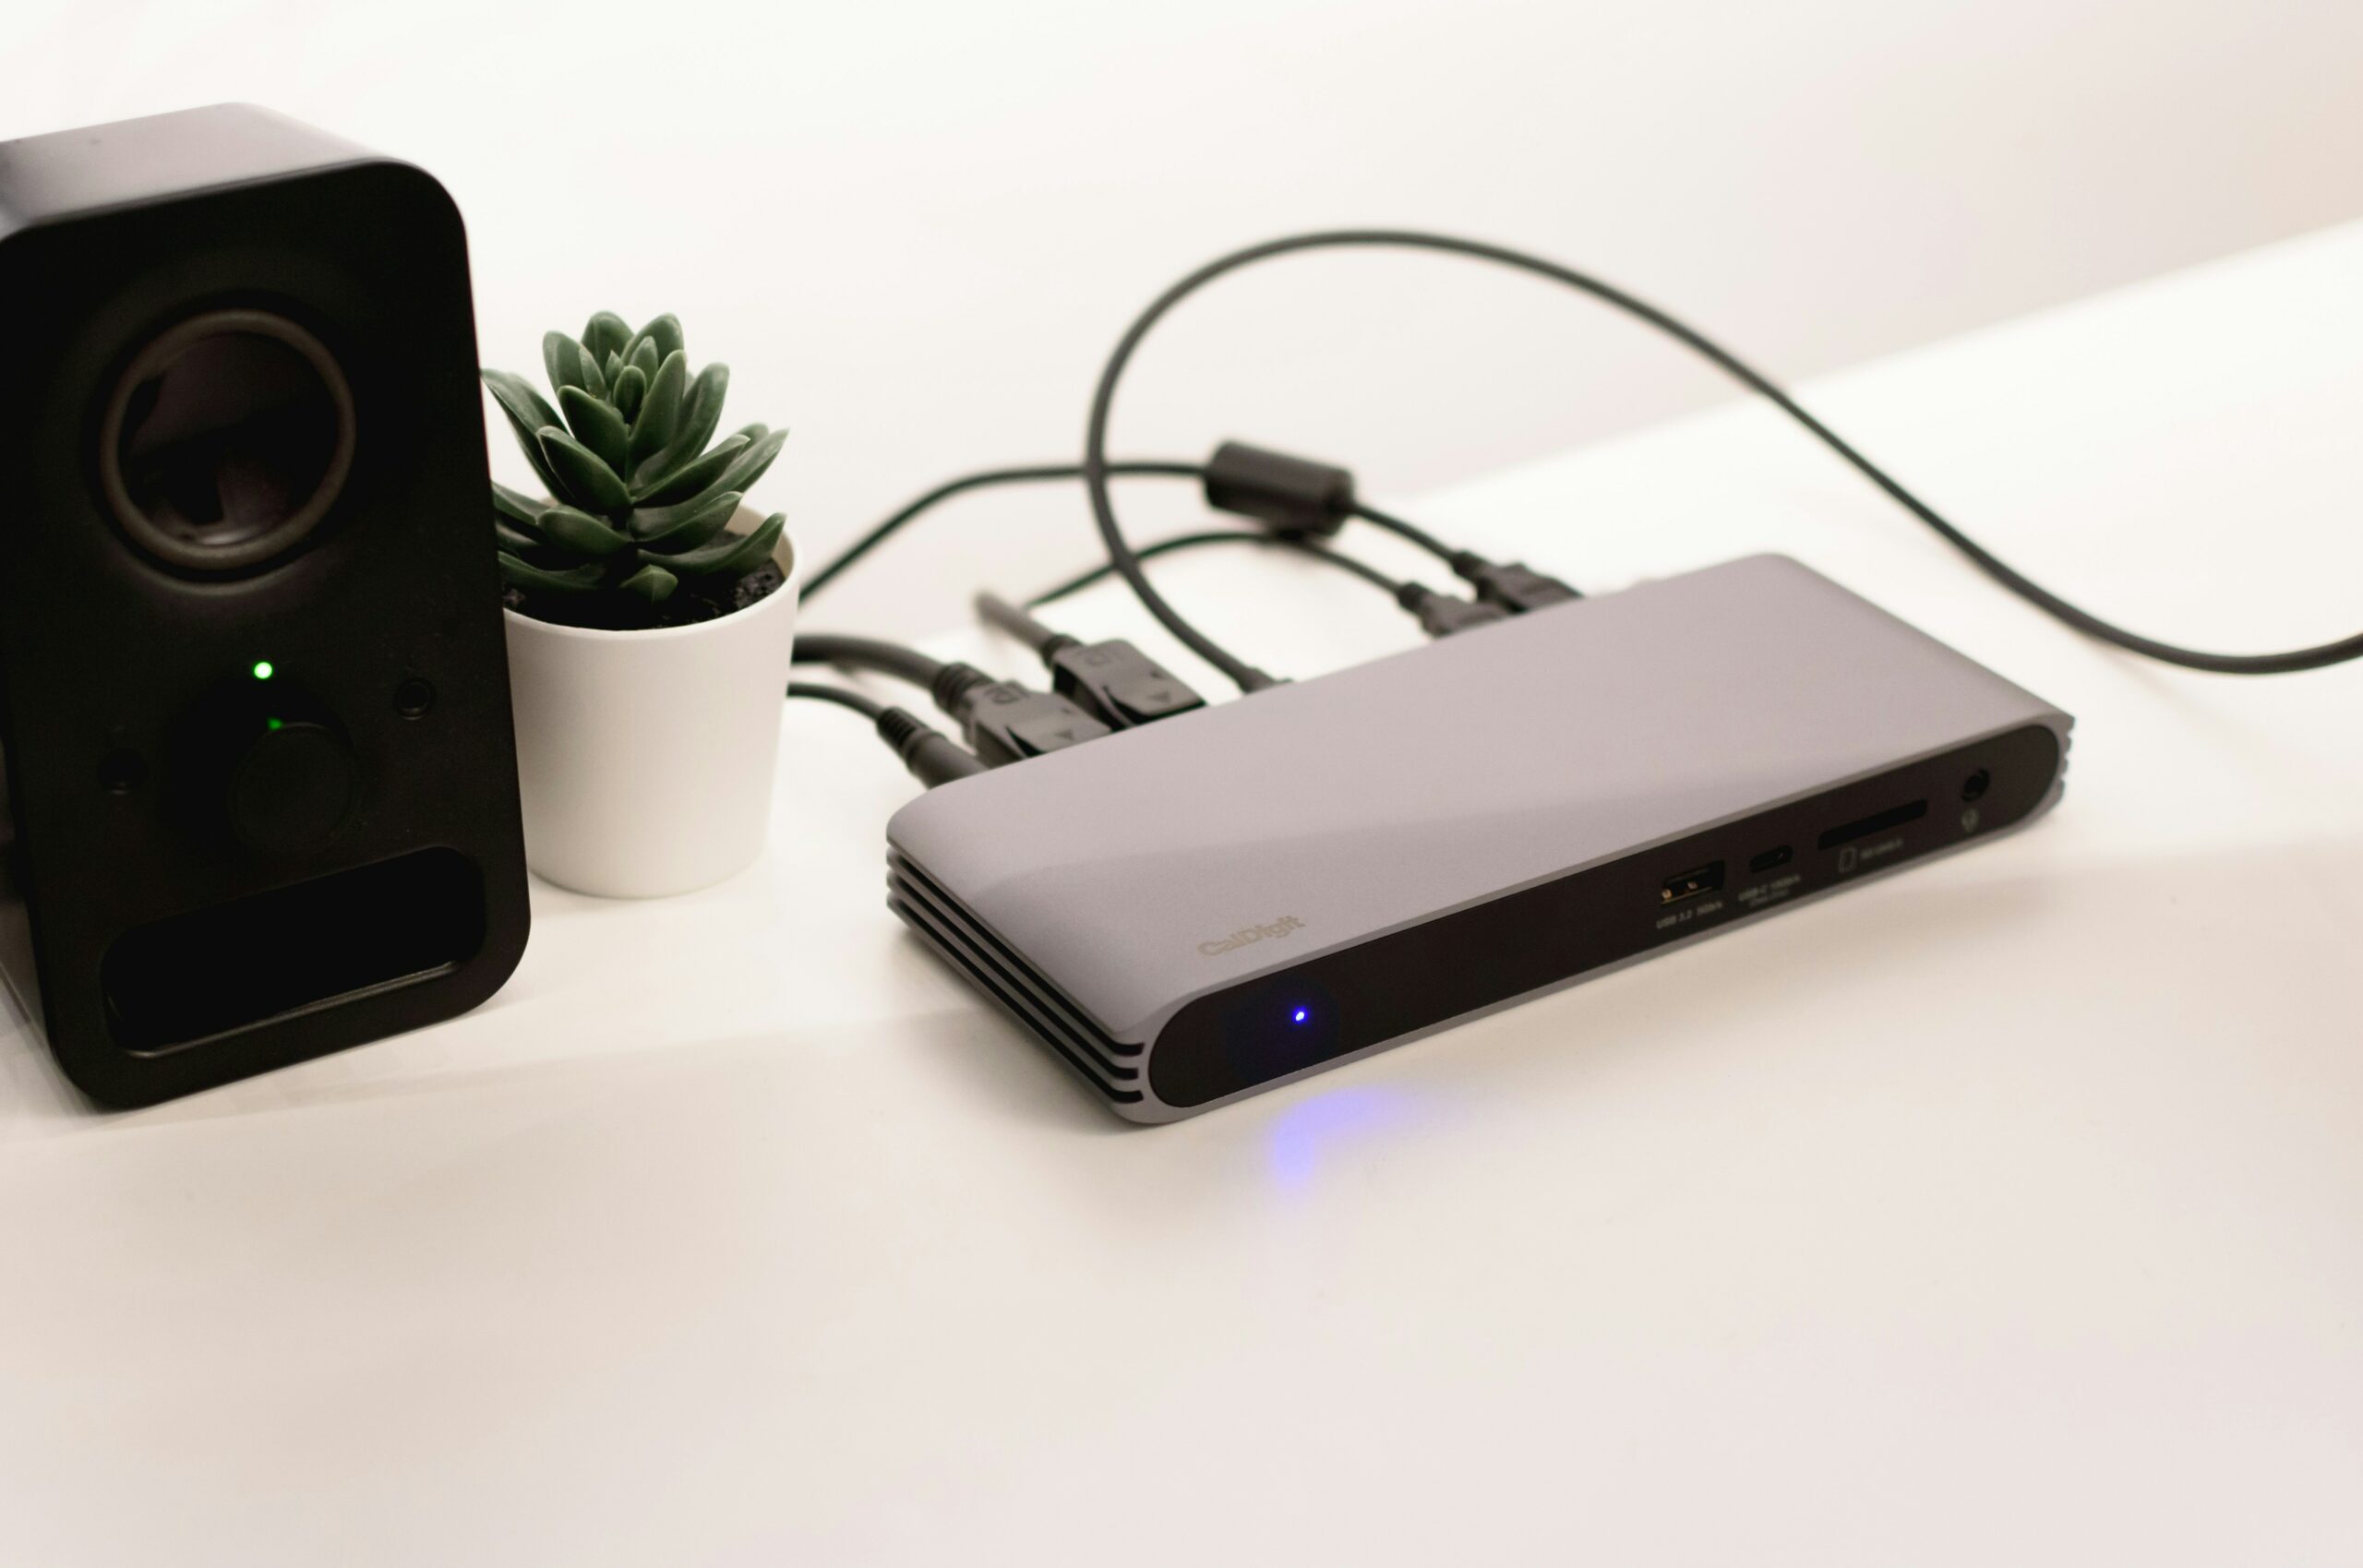
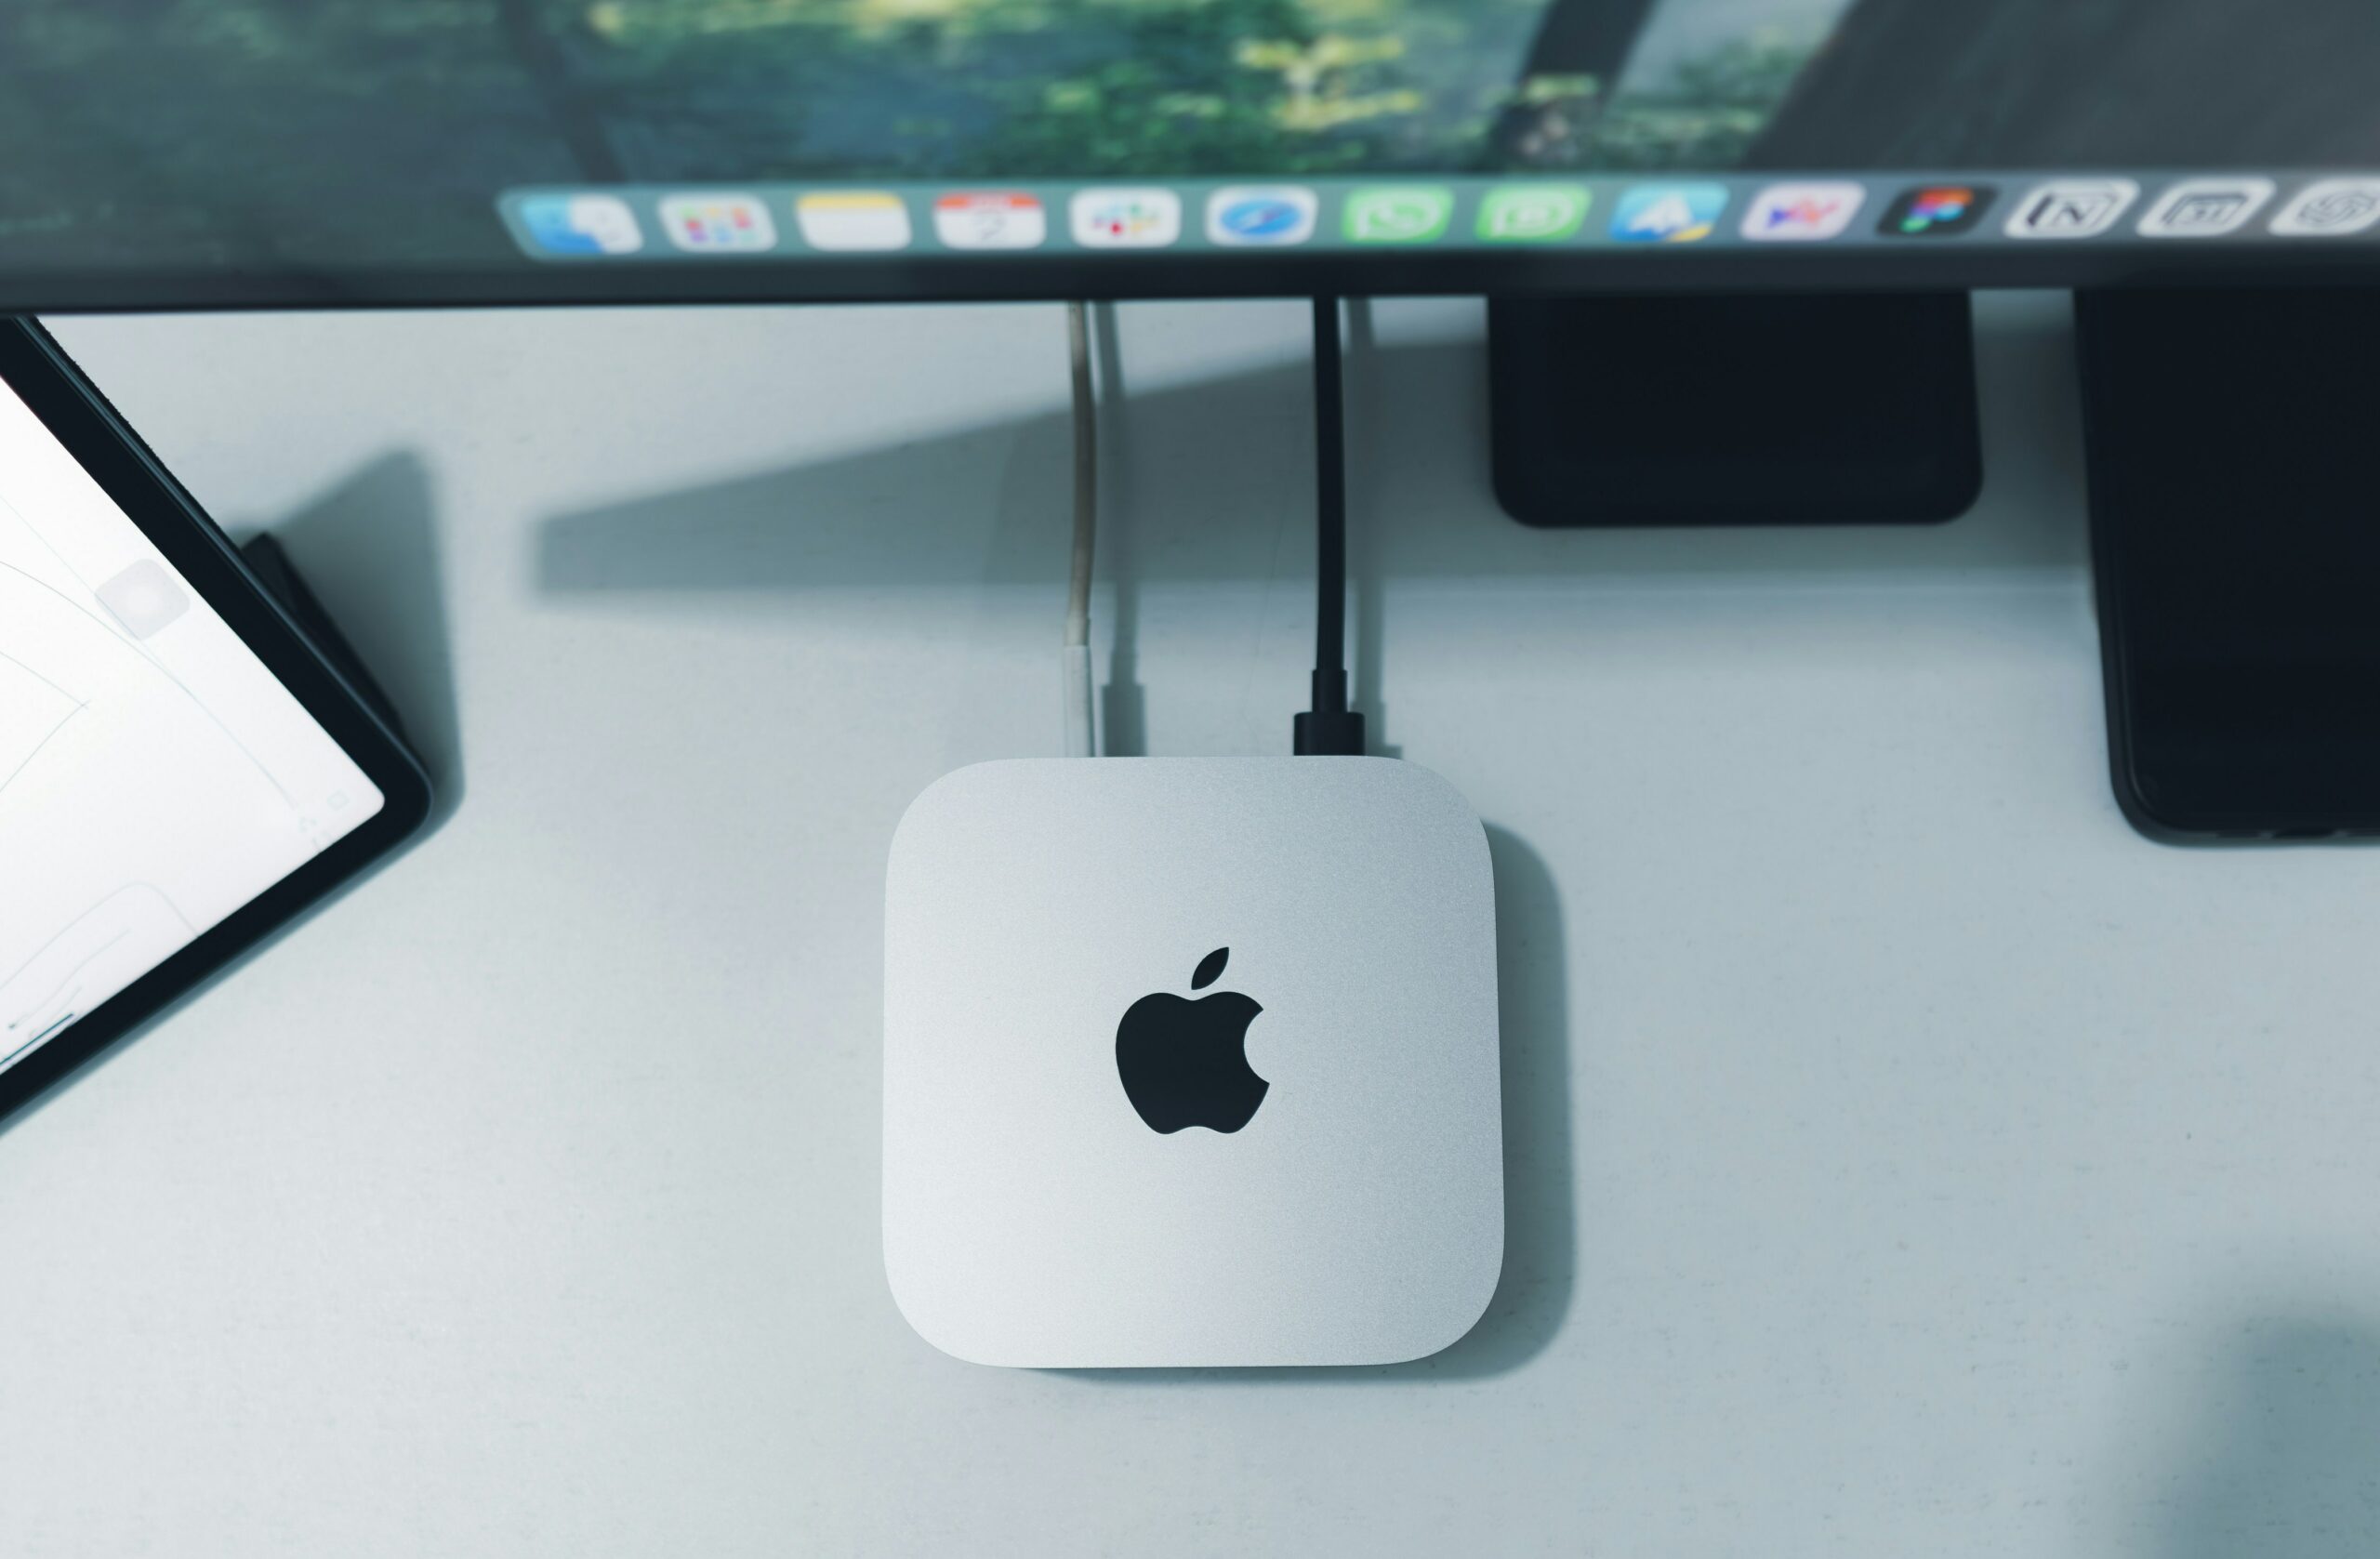
When I first ordered the Mac Mini M4, I completely forgot about one of the most important things: It doesn’t have any traditional USB-A ports. What’s the issue here? Well, I couldn’t connect either my mouse or my keyboard to begin with, so getting a USB Hub was a one way road to start working with this thing.
Now, a good USB hub is, fortunately or unfortunately, a bit expensive. I got mine for €45,00, and I paid that much after getting a cheaper one at €16,00 that couldn’t connect both my keyboard and mouse. Meanwhile, the one that I got can handle both things easily, and I can easily connect another USB device along with my DSLR’s SD card at the same time.
While a USB hub is a great solution for individuals with no extra needs, if you’re looking for more options and flexibility, getting yourself a SuperDock may just resolve all your problems. This is by far the best solution for people who want to connect multiple disks or other storage devices and quickly access them.
Best SuperDocks and USB Hubs
Extend your ports with as many as you want.


Editor’s Note
Always make sure that your USB Hub or SuperDock is compatible with your Mac Mini device. If you’re unsure, use an AI Chatbot or Assistant to help you understand if a product is (or will be) compatible with your device.
2. The best keyboard money can buy
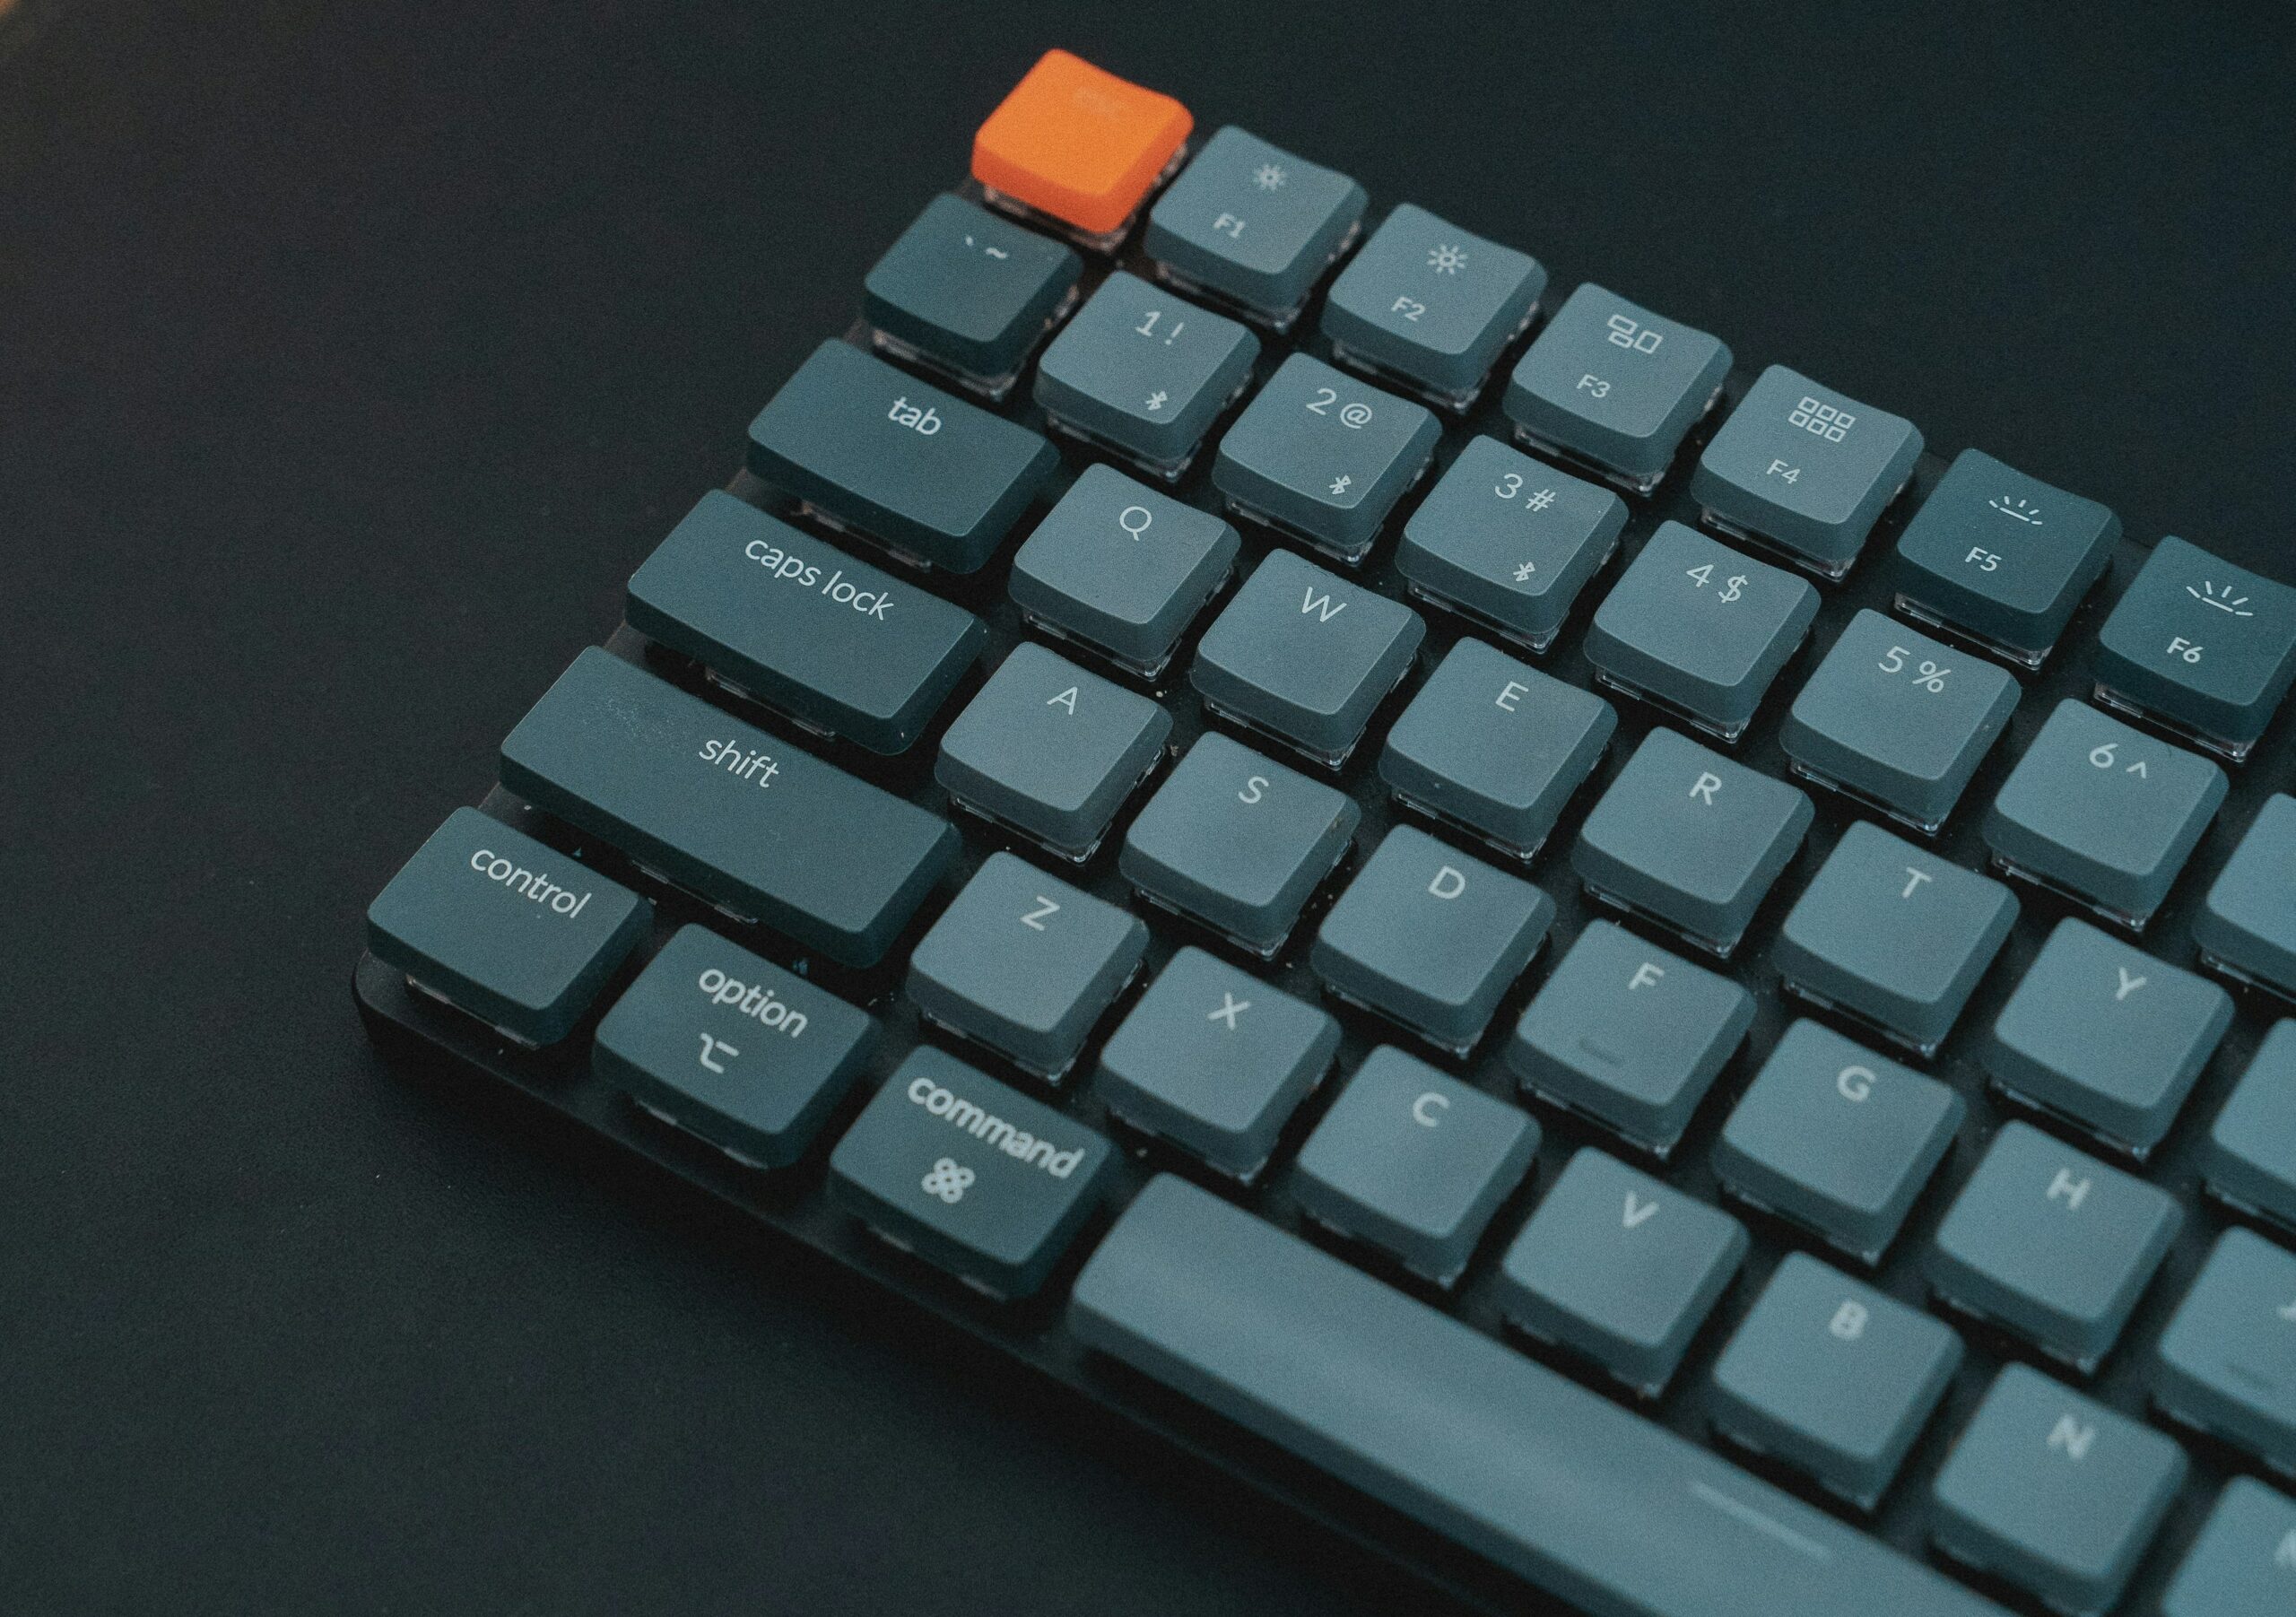
When I got my Mac Mini M4, I used the device along with my HyperX gaming keyboard. While it connected and worked flawlessly, I started seeing some issues after a week of use. The first one was a weird one: My HyperX keyboard was unable to quickly switch between my languages, and the CAPS button sometimes worked while others didn’t.
This wasn’t an issue with my keyboard; I tested multiple times with Windows and Linux, and it worked like a charm, but with macOS, it didn’t. Even at this moment of writing, it works without any issues, but whenever I try it with Apple’s operating system, it’s slower, laggy, and unable to quickly detect what I am doing.
Don’t get me wrong, I could just as easily live with my keyboard, but the HyperX is not exactly the ideal choice for writers or macOS users, so I did what any normal tech-savvy guy would: I asked Redditors which was the best keyboard for my Mac Mini M4, and the answer was as clear as the clear sky you see in the morning while enjoying your holidays in Greece.
Say hello to Keychron. This is a company that makes some of the best (if not the best) keyboards for Windows, macOS, and Linux users. It has a huge list of different keyboards that you can get, some with removable keys and LED lighting, others for gamers, and some for writers, depending on anyone’s needs.
You’ll have to do your research, of course, but whatever your choice, you’re in good hands. And like a user once said about Keychron, “prepare for analysis paralysis” -except if you have a higher budget and you don’t care about getting a switch tester first to test and feel all keys.
3. A mouse that you won’t replace
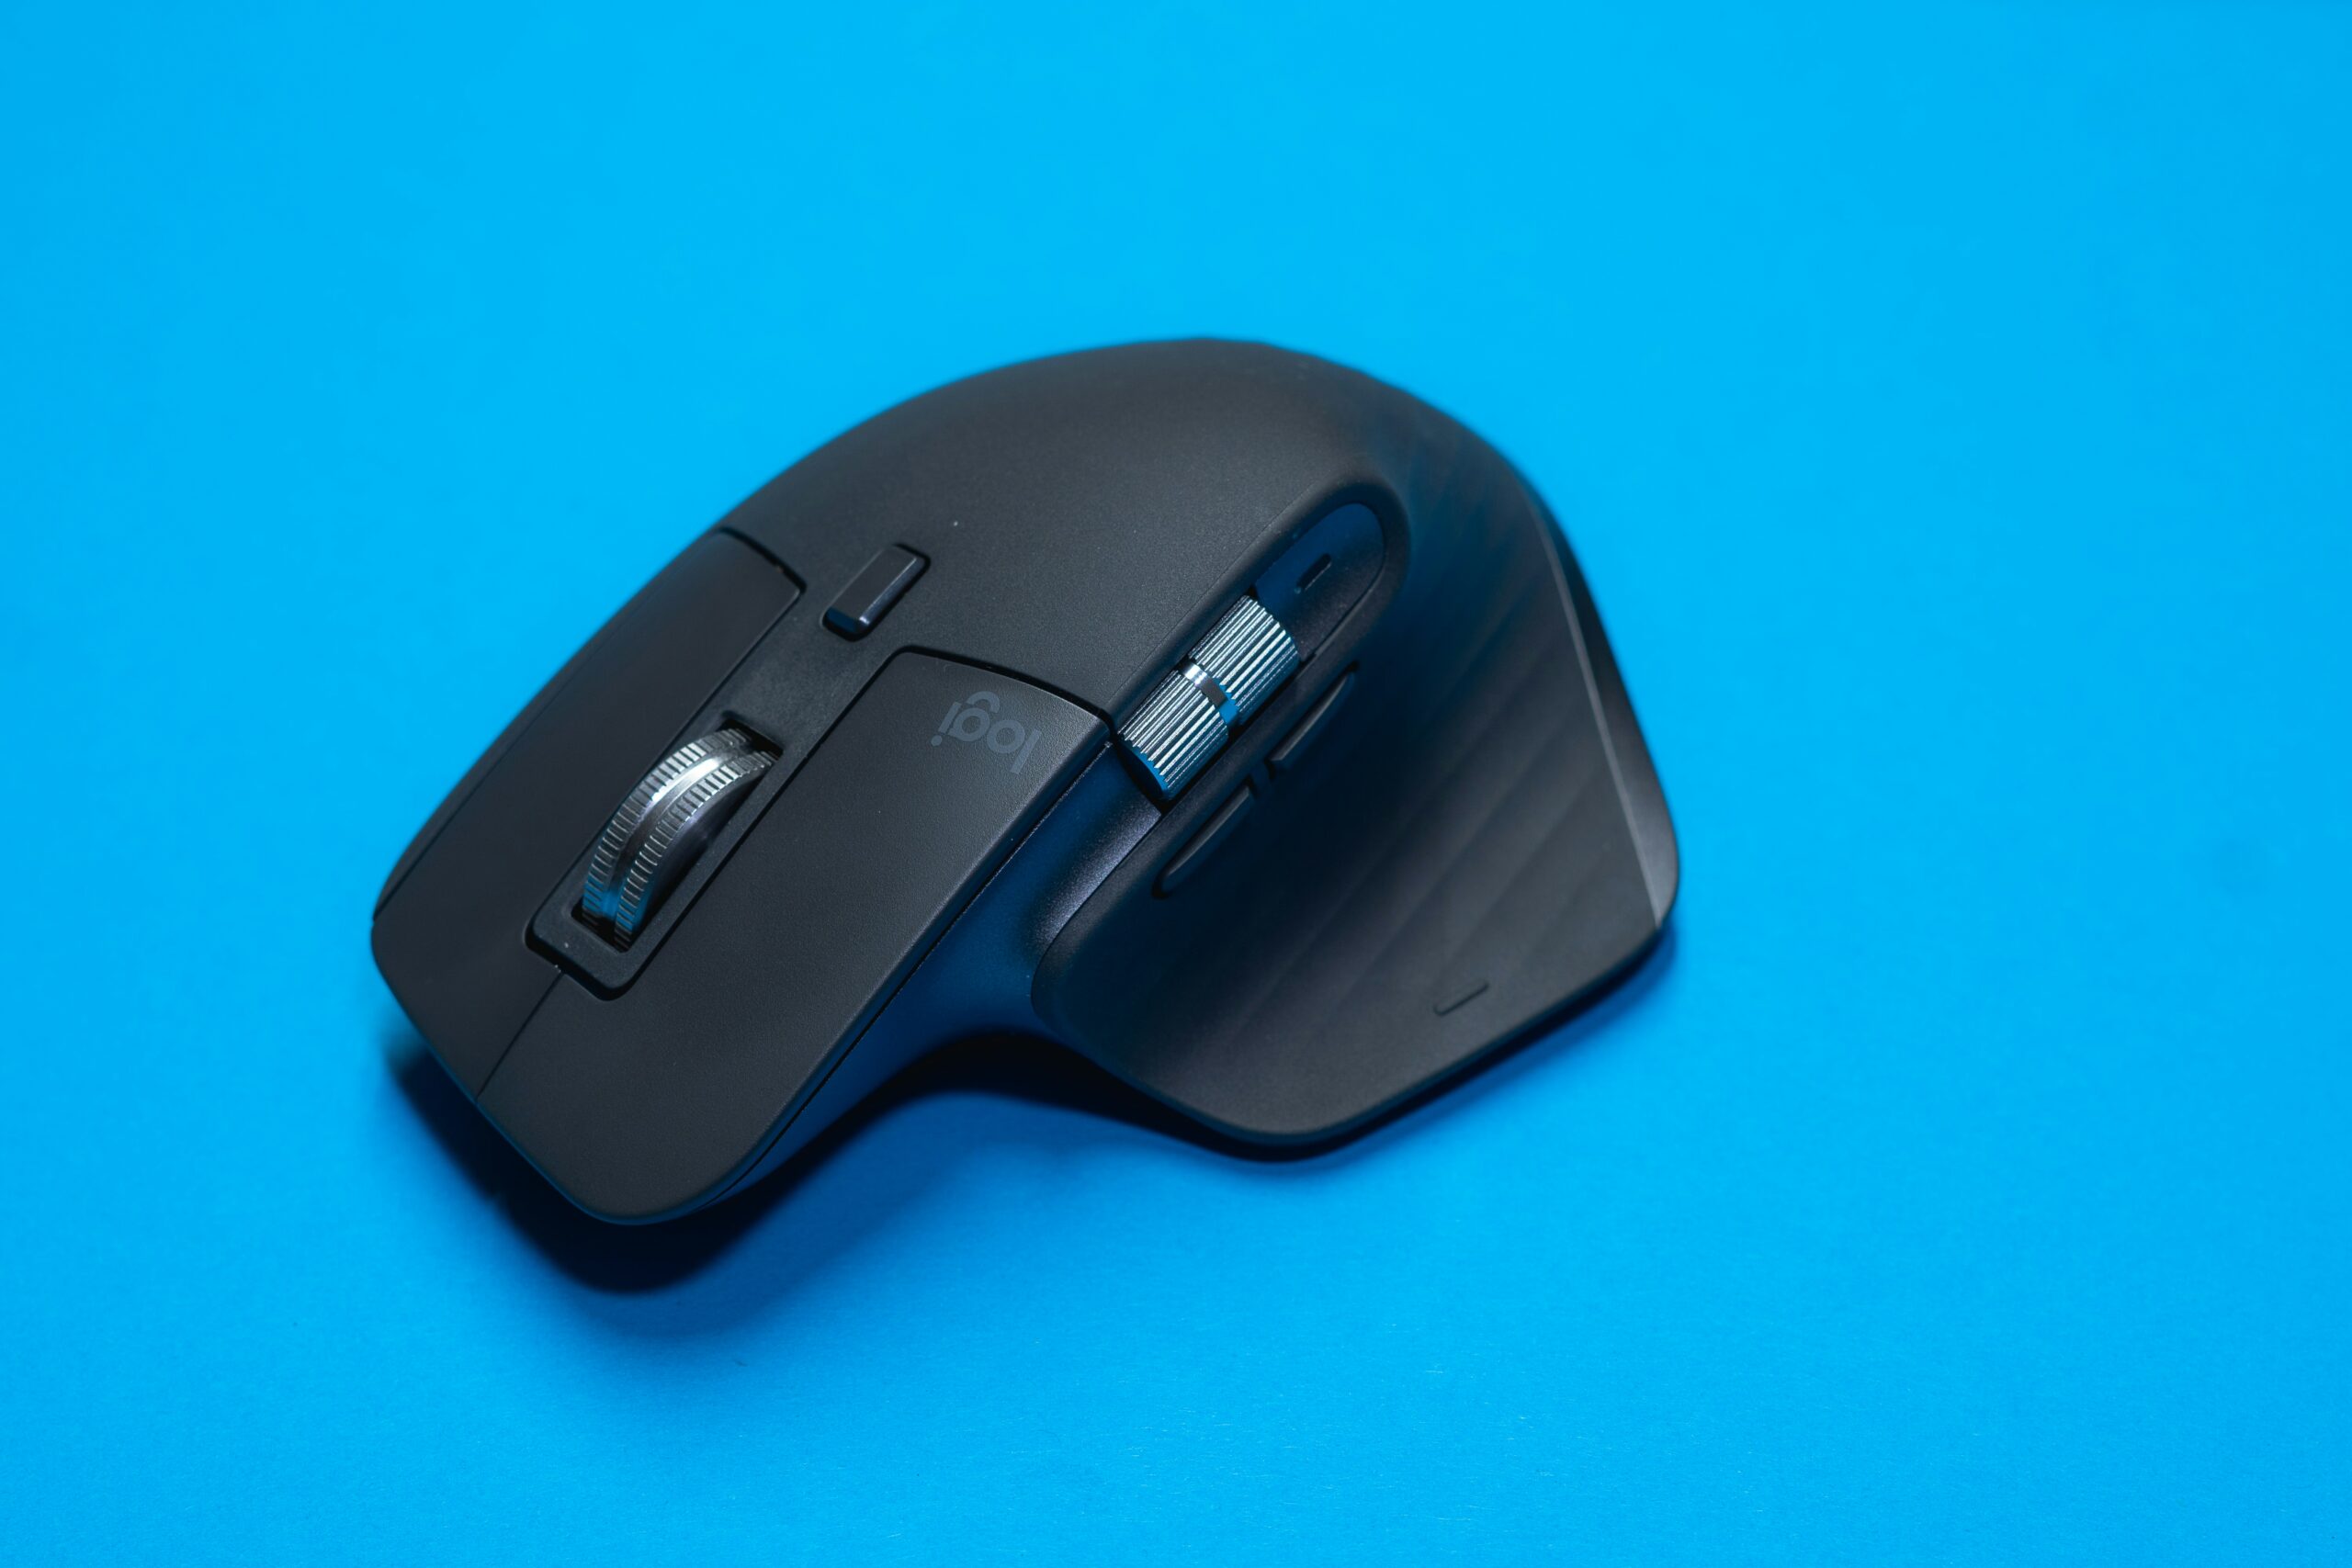
Here’s the thing: I quite liked my Razer Basilisk V3 RGB gaming mouse. It works great with Windows and Linux, it’s beautiful, you can adjust its RGB lighting, and it has six different keys that I can configure and use however I like. Unfortunately, though, that wasn’t the case with my Mac Mini.
My Razer gaming mouse was struggling a lot. None of its buttons was actually working, apart from the right and left buttons, along with its scroll wheel. The back and forward buttons didn’t work, and the same was happening whenever I tried to move my scroll wheel to the right or left (which, on Windows and Linux, all buttons can be customized).
Based on my research and all the feedback I got (thank you, Redditors), the only logical option was the MX Master 3S. Its clicks are quiet, it feels amazing on my hands (especially considering that I hate small mouses), I can quickly customize all of its buttons, and it works great with all my operating systems.
If you’re traveling often, you can also grab yourself a compatible case for your MX Master to protect it from scratches.
Apple’s Magic Mouse is also a very popular choice for people with Mac devices, but to me, it wasn’t as robust as I wanted to be, and something didn’t feel right when I was holding or using it. The company also placed its charging port on the bottom side, meaning that you can’t use the mouse if it goes out of battery.
The perfect Mac Mini mouses
Get the Logitech MX Master as a robust solution, or grab the Apple Magic Mouse for simplicity.


4. We all need the extra storage space
When I first saw that I had to pay an extra whopping $200 just to get the Mac Mini M4 with 512 GB instead of 256 GB, I decided not to. I mean, if I have to get at least a few things to make my Mac Mini usable, when what’s the point of spending so much more just for space?
With a little bit of searching, I found out that you can actually connect an external disk, and even select it as an installation method whenever you install new apps. Great, now I just needed a big, really fast, and small disk that I could take with me everywhere. And, of course, that was no other than the newest Samsung 9100 Pro SSD with 2 TB of space.
I could have easily chosen something cheaper, but that thing is such a performance beast, that I couldn’t just bypass it and go with an older model. And for the same price, I didn’t just get a 512 GB solution, but a 2 TB one, which I can quickly connect and disconnect on all of my desktop PCs and laptops.
Now, there are many options when it comes to external storage space, depending on what disk you’ll be getting. For example, if you got an M.2 and you’re looking for a lightweight solution (especially if you’re traveling often), then you could go with the Dockcase Explorer Edition as a quick solution.
If you want something more advanced, such as a Docking Station that can handle multiple disks, there are hundreds of available options. Some are great for HDDs, others for SSDs, and the newest ones for M.2. Typically, most models will give you the option to choose how many bays (ports) you want. Do keep in mind that not all USB hubs and Docking Stations come with the right connection cable – so make sure it’s gonna be compatible with your Mac Mini.
Upgrade your Mac Mini M4’s storage
Get yourself an external M.2 NVMe SSD for more free space that you can carry everywhere.


5. Replace your HDMI cable with this one
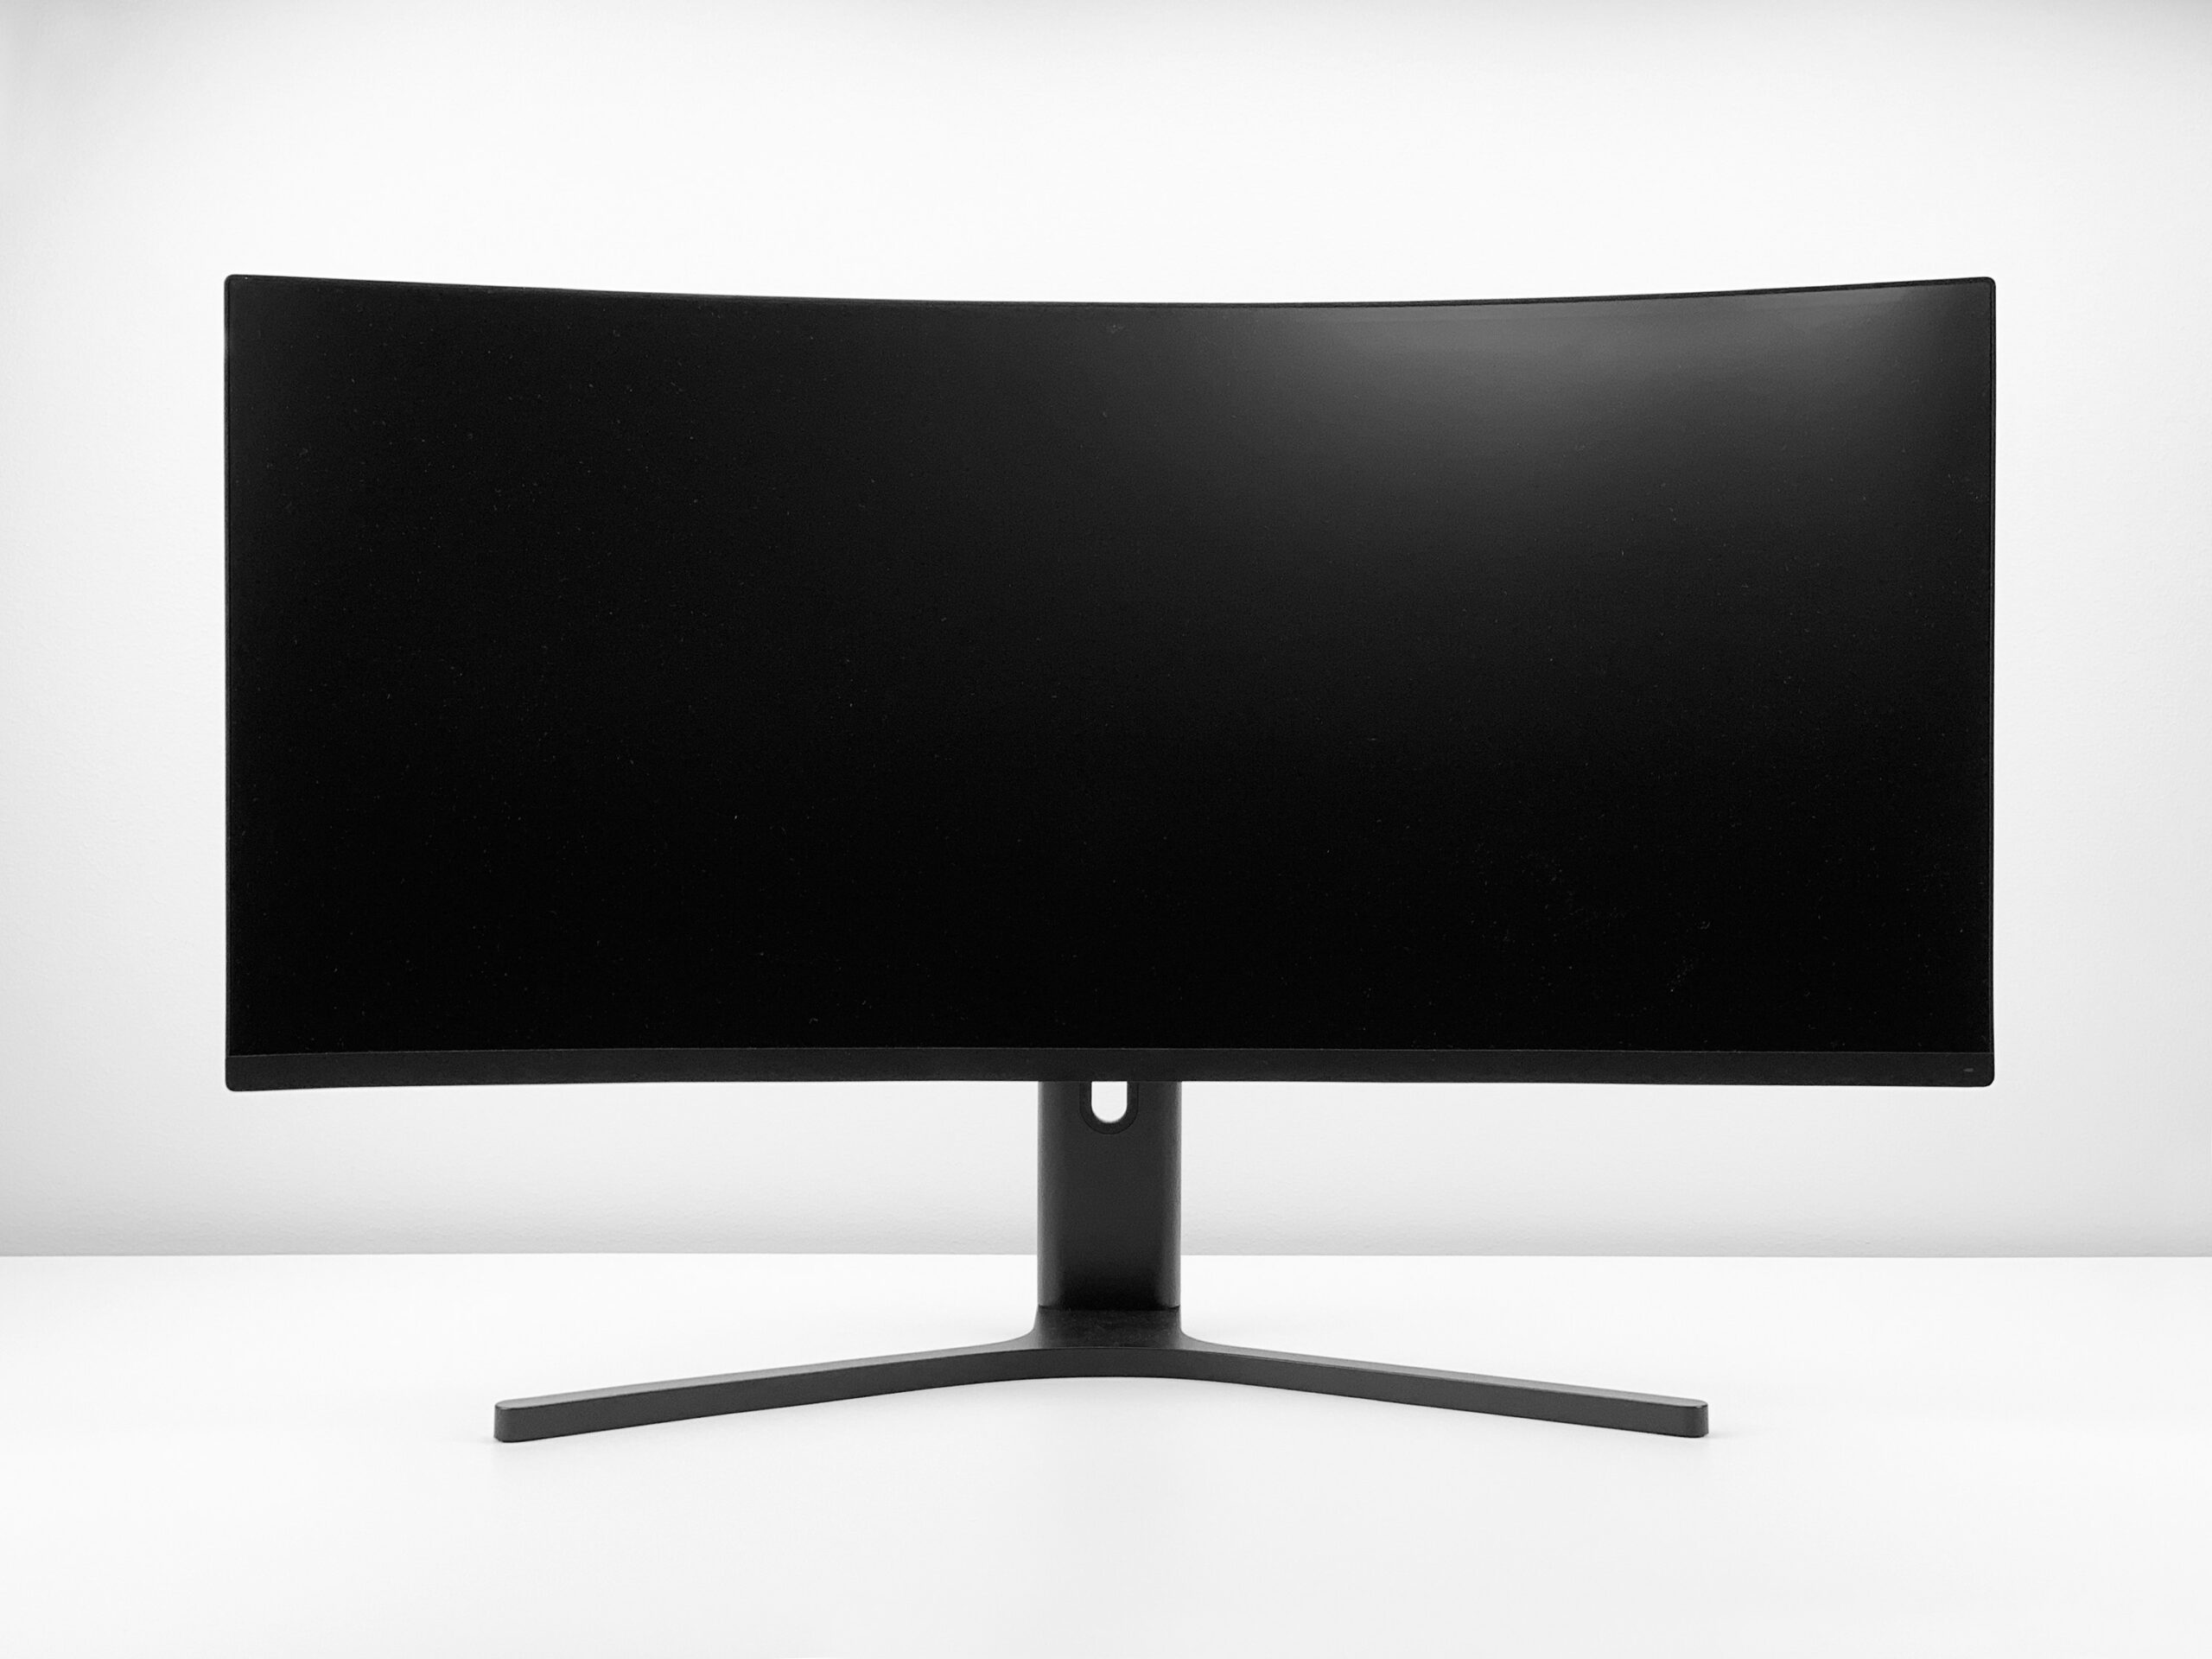
When I first booted macOS, the first thing that I did after checking and installing all the latest updates was to check how many hertz my monitor was running at. I have the Xiaomi Mi Curved 34″ gaming monitor that runs up to 144 Hz. On macOS, though, it was only running at 60 Hz.
Considering that it was running just fine on Windows and Linux at 144 Hz, I initially thought that it was a setting, a graphics driver update, or something software-related. I quickly found out that I was using a simple HDMI cable, which couldn’t possibly run at 144 Hz. So I got a new one, only to find out once again that a better one wasn’t actually enough. With the newer HDMI cable, my monitor was running at 100 Hz.
I kept on searching, and that’s when I finally found out what was happening. You see, while my HDMI port supports up to 8K @ 60 Hz or 4K @ 240 Hz, it doesn’t for ultrawide screens with
3440×1440 resolution. Wait, what? Therefore, to drive a 3440×1440 display at 144 Hz, I had to get a DisplayPort (via USB-C or Thunderbolt).
In short: If you want the highest hertz, you should use a USB-C / Thunderbolt to DisplayPort 1.4 cable (or adapter) that supports the high bandwidth needed for 3440×1440 at 144 Hz or higher.
Get a USB-C/Thunderbolt to DisplayPort 1.4 for higher refresh rate


6. Dock & Stand with NVMe SSD Enclosure
If you’re getting it for yourself, thank me later. If you’re getting it as a gift for a friend or someone special, thank me later. This beautiful thing is an all-in-one stand for your Mac Mini that does three jobs: It gives you extra ports (USBs, card readers, etc.), lets you add a fast M.2 NVMe SSD inside it with up to 8TB of extended storage, and makes your setup look cleaner since it sits right under the device.
Think of it like giving your Mac Mini a hidden “upgrade pack”. You can add more storage (which is mounted on your Mac) and more ports without compromising the Mac Mini’s design aesthetic. Of course, this Dock and Stand doesn’t include an SSD (which you’ll have to buy
separately), but I’ll add some very fast and reliable options in a minute.
To better understand this product, here’s a table that explains its features:
| Feature | What it does for you | Why it’s useful |
|---|---|---|
| Extra ports / hub functions (11-in-1) | Adds USB-A, USB-C ports, SD/TF card reader etc. | If your Mac Mini doesn’t have enough ports (or you want easier access), this gives you more connectivity. |
| NVMe SSD enclosure / internal storage expansion | You can insert an M.2 NVMe SSD (various sizes) into the dock, and it operates at high speed (up to ~10 Gbps) | This is like “giving your Mac Mini more internal fast storage” without having to open it up – good for video files, backups, etc. |
| Speed / transfer performance | Because it supports USB 3.2 Gen 2 (10 Gbps) and is optimized (with UASP, etc.), data transfer can be very fast for big files, video editing, etc. | You won’t be bottlenecked badly when moving large data around. |
| Design & integration | It is made to match the Mac Mini’s shape, has anti-slip pads, even a bottom groove for the Mac’s power button so you don’t have to lift it, shielding to reduce WiFi interference, etc. | Keeps your desk tidy, makes the Mac Mini look clean and integrated. |
| Power, shielding, stability | It draws power either from the Mac Mini or an external adapter (if you have many devices plugged in). It also has conductive paint on parts to shield 5G WiFi so it doesn’t interfere. | Avoids your WiFi signal dropping, ensuring stable operation of connected devices. |
But wait, how about heating issues? Thermal or heat dissipation might matter because packing an SSD + hub + many ports in a small device will generate heat. Thankfully, this specific “gadget” has addressed that, and to make things even better, it comes with an anti-slip Pad Stably based on Silicone to protect your Mac Mini. The UGREEN Dock & Stand has only one 4cm cable, which is perfect, because I hate cables and I prefer not seeing them at all.
If you have a DSLR like me, it also has SD and TF 3.0 ports on the front, along with 2 USB-A (10Gbps) ports, perfect for most occasions. On the back, you’ll find 2 USB-A ports (5Gbps), 1 USB-A port (10Gbps), 2 USB-C ports. (10Gbps), 5V USB-C Charging Port, and the 1 USB-C Host Cable that goes to your Mac Mini. Last but not least, the M.2 NVMe SSD storage goes on the bottom, and you get up to 10Gbps of speed for it.
UGREEN Dock & Stand and Samsung 990 EVO Plus SSD
Combine these two products and get an extended 1TB (or more) fast and affordable SSD.


7. The perfect monitor for your needs
Choosing the right monitor for your needs depends upon hundreds of different things, including how much room you have in your home office, your budget, and technical personal preferences such as getting a monitor with high hertz for gaming or smoother experience.
Personally, I’ve had enough with smaller monitors, and especially with expensive ones. Sure, you may get better colors, more hertz, and even software capabilities, but in the end of the day, your eyes won’t see much of a difference, except if you’re a professional videographer or photographer or anything that requires the best of the best when it comes to colors.
For me, the choice was clear: The Xiaomi Mi Curved 34″ Gaming Monitor was the perfect fit for my needs. Whether I’m coding, surfing the web, writing, podcasting, editing my videos, gaming, or casually multitasking, I have enough room to do everything, but not too much that it’ll cover the whole room. It also comes with 144Hz, so it’s a great choice for gamers, too. Xiaomi’s newest model comes with 180Hz and 1ms, along with FreeSync.
What made the biggest difference to me was, of course, its size and ultrawide resolution at 3440ˣ1440, which is perfect for having multiple windows and apps split on the same screen. That was a lifesaver when it comes to researching, because I can use each window for a different purpose.
Whatever your choice, your Mac Mini should probably handle every monitor easily and without any pre-configurations. Just make sure to check on Apple’s official website for your model and check its limitations in resolution.
Nothing beats this beast at this price range. And if you want your monitor even further from your eyes (or closer to them) while saving a lot of space in your office, you can combine the Xiaomi Curved monitor with the Arctic X1-3D extendable gas arm. It supports monitors up to 40″ ultrawide, and can handle up to 10 kg/22 lbs. And don’t worry about cable management, it covers that, too.
An affordable minitor + minitor arm
Get a beautiful and large-enough monitor for your Mac Mini M4, along with a strong and high-quality monitor arm to save space and keep things minimal.


Editor’s Note
I got the ARCTIC X1-3D arm back on May 2025, and I’ve been using it since then. It holds the screen beautifully, its minimal design is ideal for my taste, and it handles the cable management almost perfectly. The Xiaomi Curved monitor is more than I ever wanted, and its menu interface is easy and quick to work with.
8. A solid Surge Protector or a UPS
Look, I have a few stories when it comes to being unable to work because you’re having power outages. I’ve had a dedicated server once with 30 websites fully hacked, and while I was trying to fix everything, restore, and fix the security holes, my whole neighborhood lost power. That outage lasted for over 8 hours, and during that time, the electricity was coming and going every few minutes.
When I came back home, electricity was back, but my desktop PC wouldn’t open. I quickly saw that my PSU was dead. I replaced it with an older one that I had lying out in storage, and it started working. Something similar happened to a friend of mine. She had a laptop with a damaged battery that didn’t work, so she used her laptop by constantly having it plugged in. After a power outage, her laptop stopped working, and the motherboard was fried.
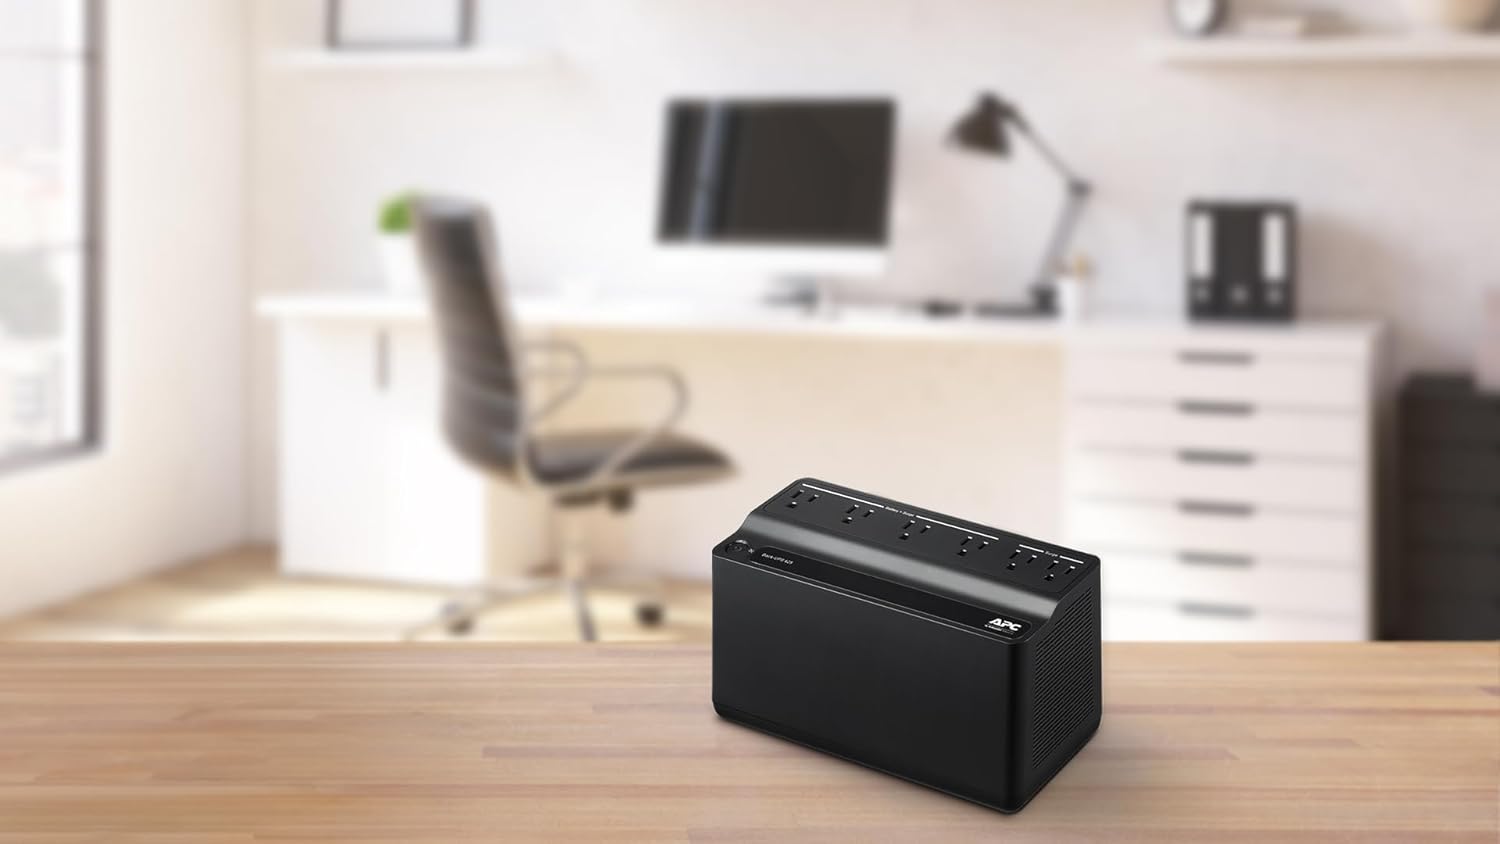
This is where a solid Surge Protector or even a UPS can save the day.
The Surge Protector will protect your devices (Desktop PCs, laptops, TVs, consoles, etc.) from voltage spikes (surges) that can happen during lightning strikes, power grid switching, or power outages in general, which can damage your electronics. It contains components (usually MOVs – Metal Oxide Varistors) that divert excess voltage safely into the ground wire instead of into your devices.
By doing that, though, it sacrifices itself over time, and after a few big surges, it may be “used up” without you knowing it, meaning that you’ll have to replace it after a few uses.
A UPS, on the other hand, provides temporary power during outages and often includes surge protection, plus power conditioning. UPS has a battery that kicks in instantly whenever the main power drops or fluctuates, which is perfect for keeping your devices safe. Of course, it won’t last forever, as an affordable UPS will last you from a few minutes to an hour max. If you need even more power, you’ll need a larger unit.
| Feature | Surge Protector | UPS |
|---|---|---|
| Protects from surges: | ✔️ | ✔️ (usually built-in). |
| Protects from sags/brownouts: | ❌ | ✔️ (line-interactive/online UPS). |
| Provides backup power: | ❌ | ✔️ |
| Lifespan: | Works until MOVs wear out. | Batteries last ~3–5 years. |
| Cost: | Cheap (€10 – €40). | Expensive (€80 – €1000+). |
| Good for: | TVs, consoles, chargers, basic protection. | PCs, servers, routers, NAS, critical devices. |
Think about those two as your protection: A surge protector is like a simple soldier’s helmet, sure, it will protect you from sudden hits, but it won’t keep you moving. A UPS, on the other hand, is like a tank, protecting you and keeping you going. Your budget will play a key role in your choice here.
Protect your devices with a simple device
Get a UPS for ultra protection and a few more minutes of working, or a simple surge protector that won’t let your electronics fry.


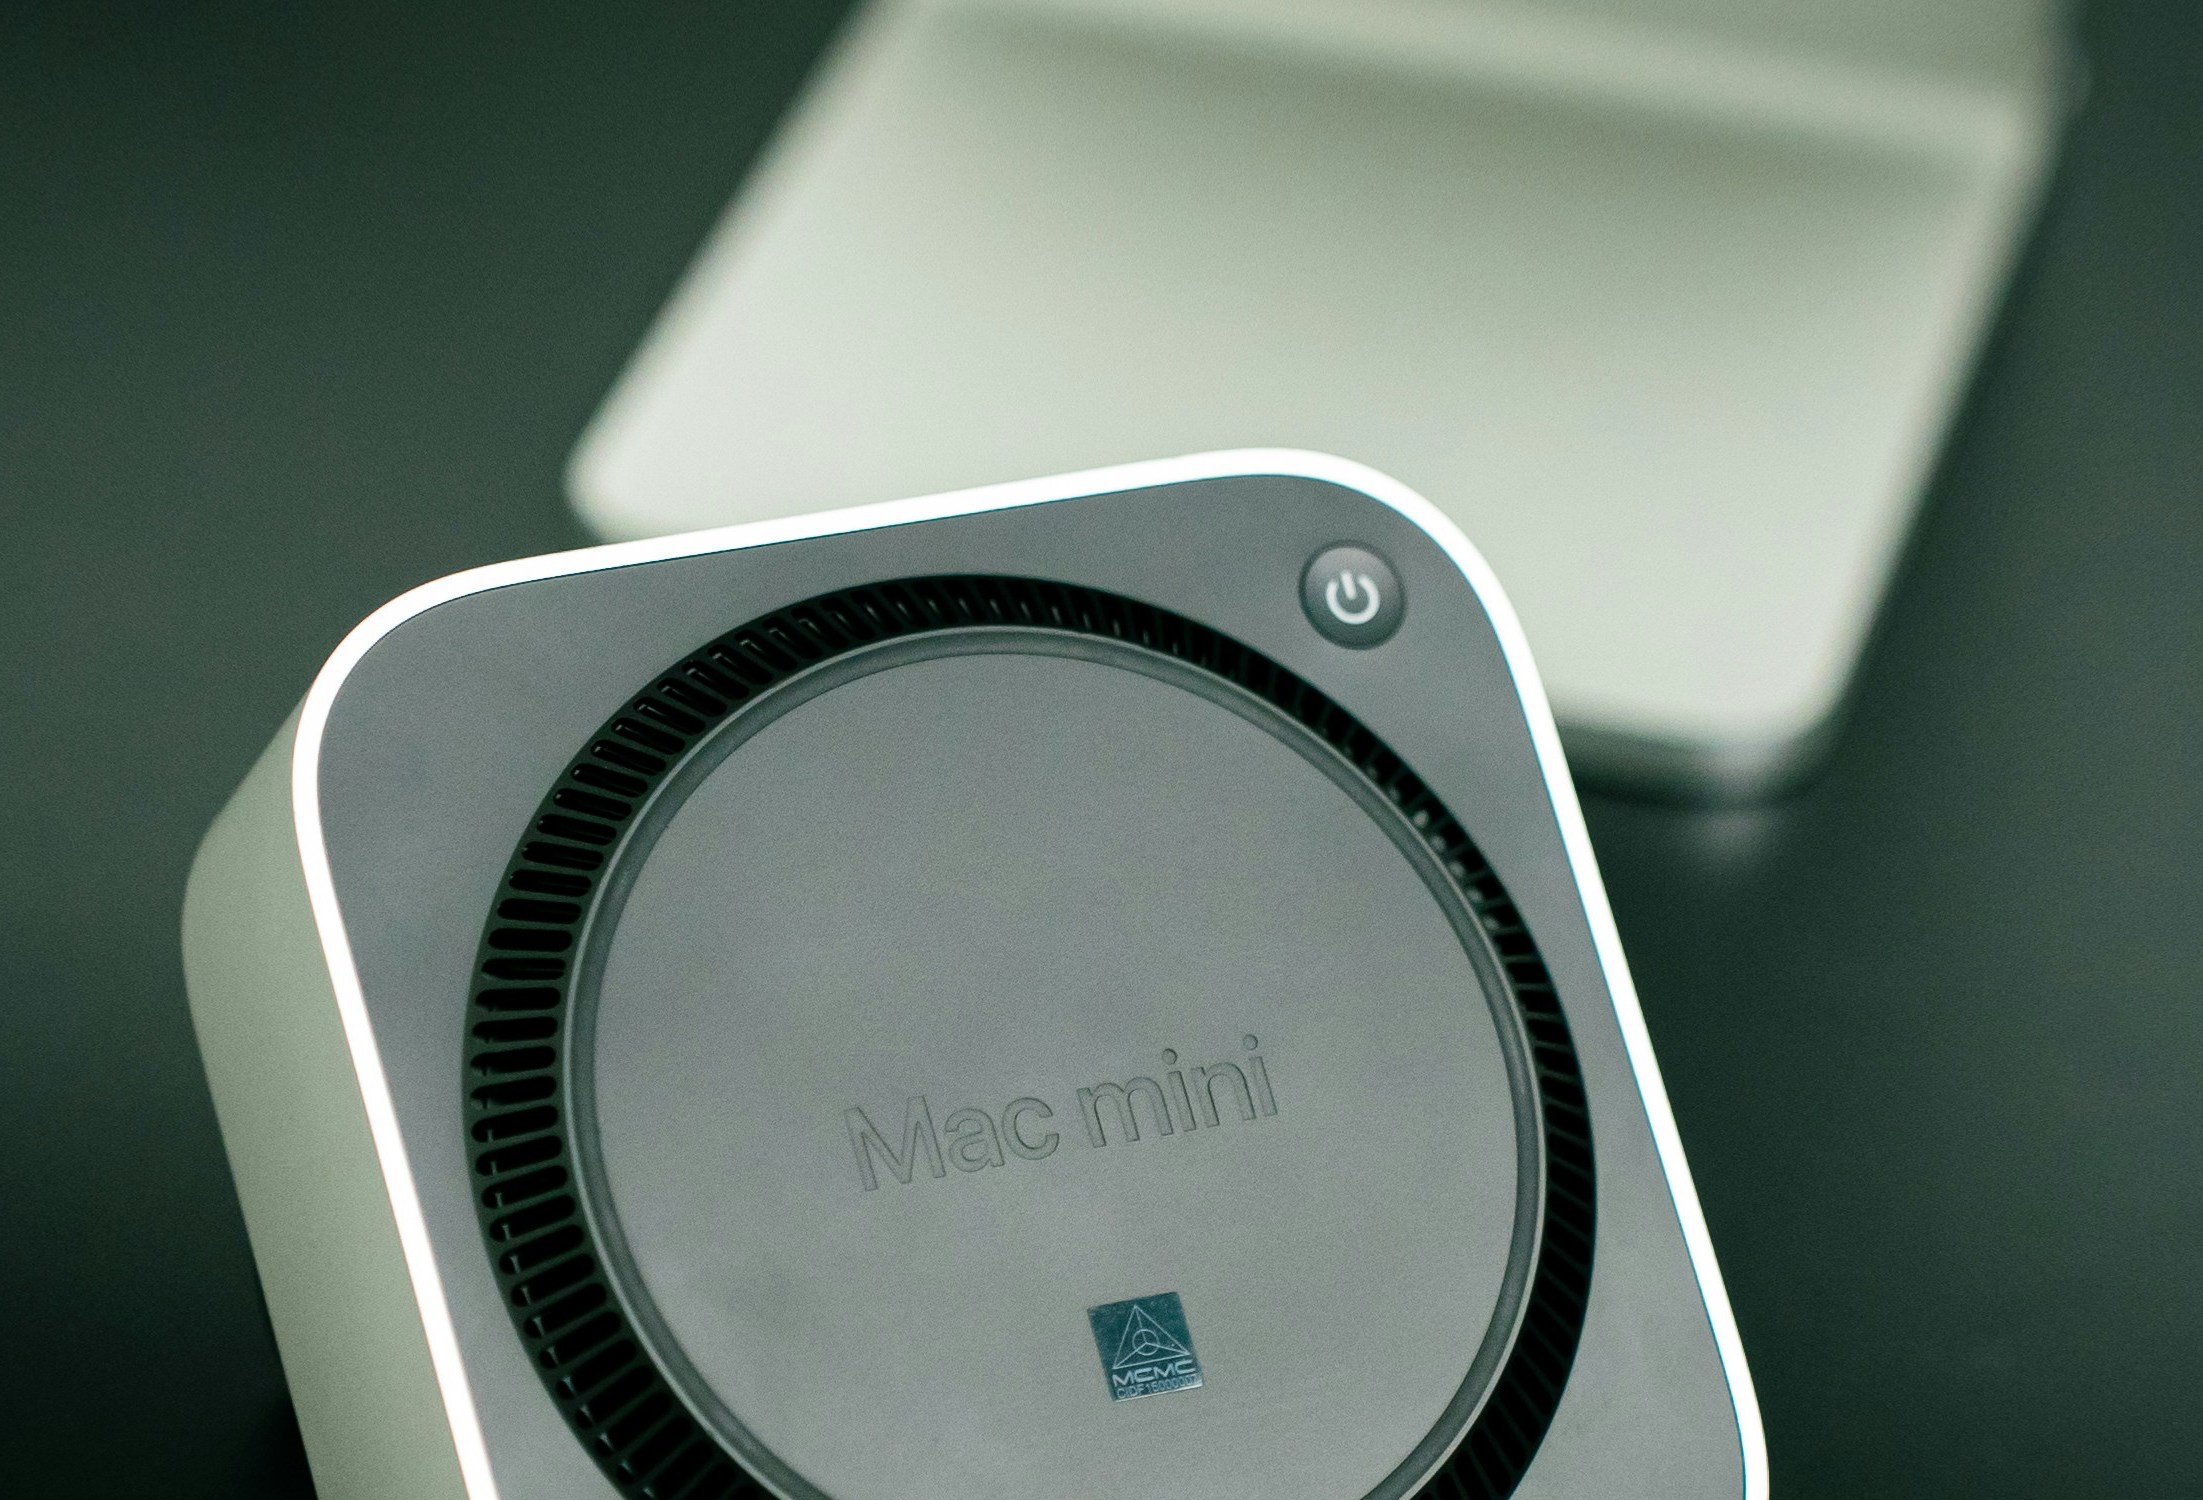
9. Hate the Mac Mini M4’s power button? Get a new one!
Personally, I don’t keep my Mac Mini M4 in sleep mode. I like powering it off at night, letting it rest. Although I don’t really mind the power button being placed on the bottom left of the device, it becomes annoying pretty quickly. But even so, I didn’t mind, and never really gave it a second thought, until I saw a recommendation by some guy on Reddit.
Did you know that, for less than $20,00 bucks, you can get yourself an external power button that sits beautifully on the top left corner of your Mac Mini M4, giving you the ultimate satisfaction, every single day. It’s also made by high-quality aluminum alloy and matches well with the device’s design.
Here’s how it looks:
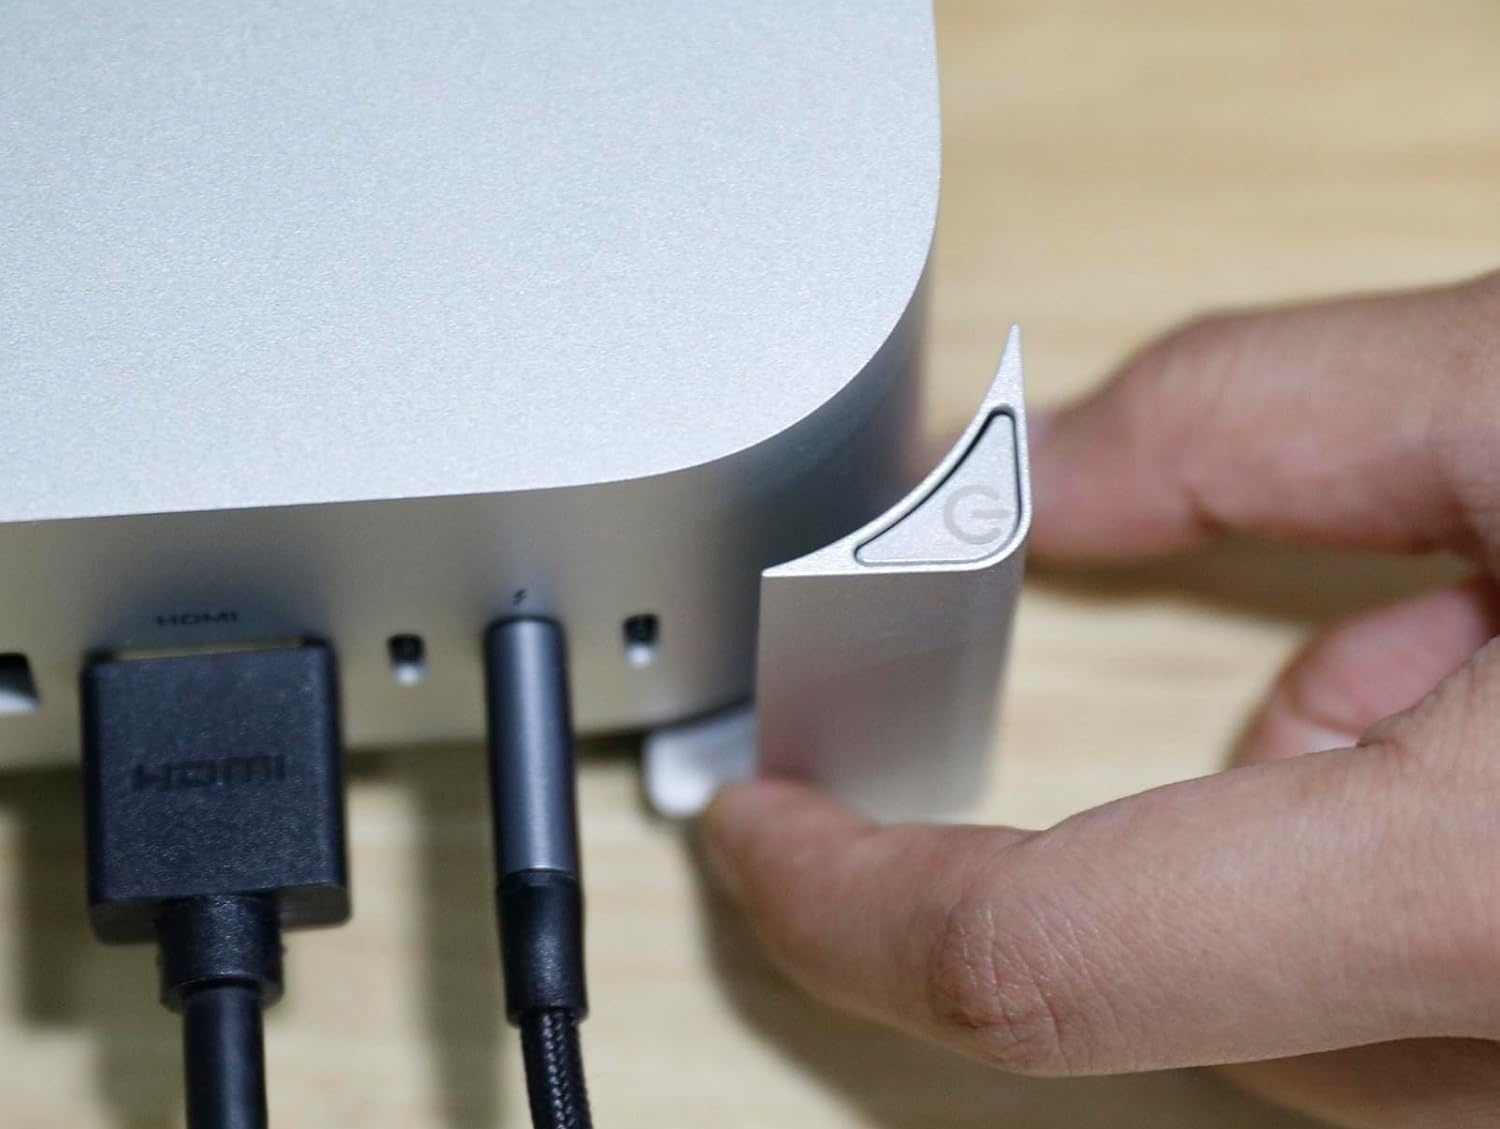
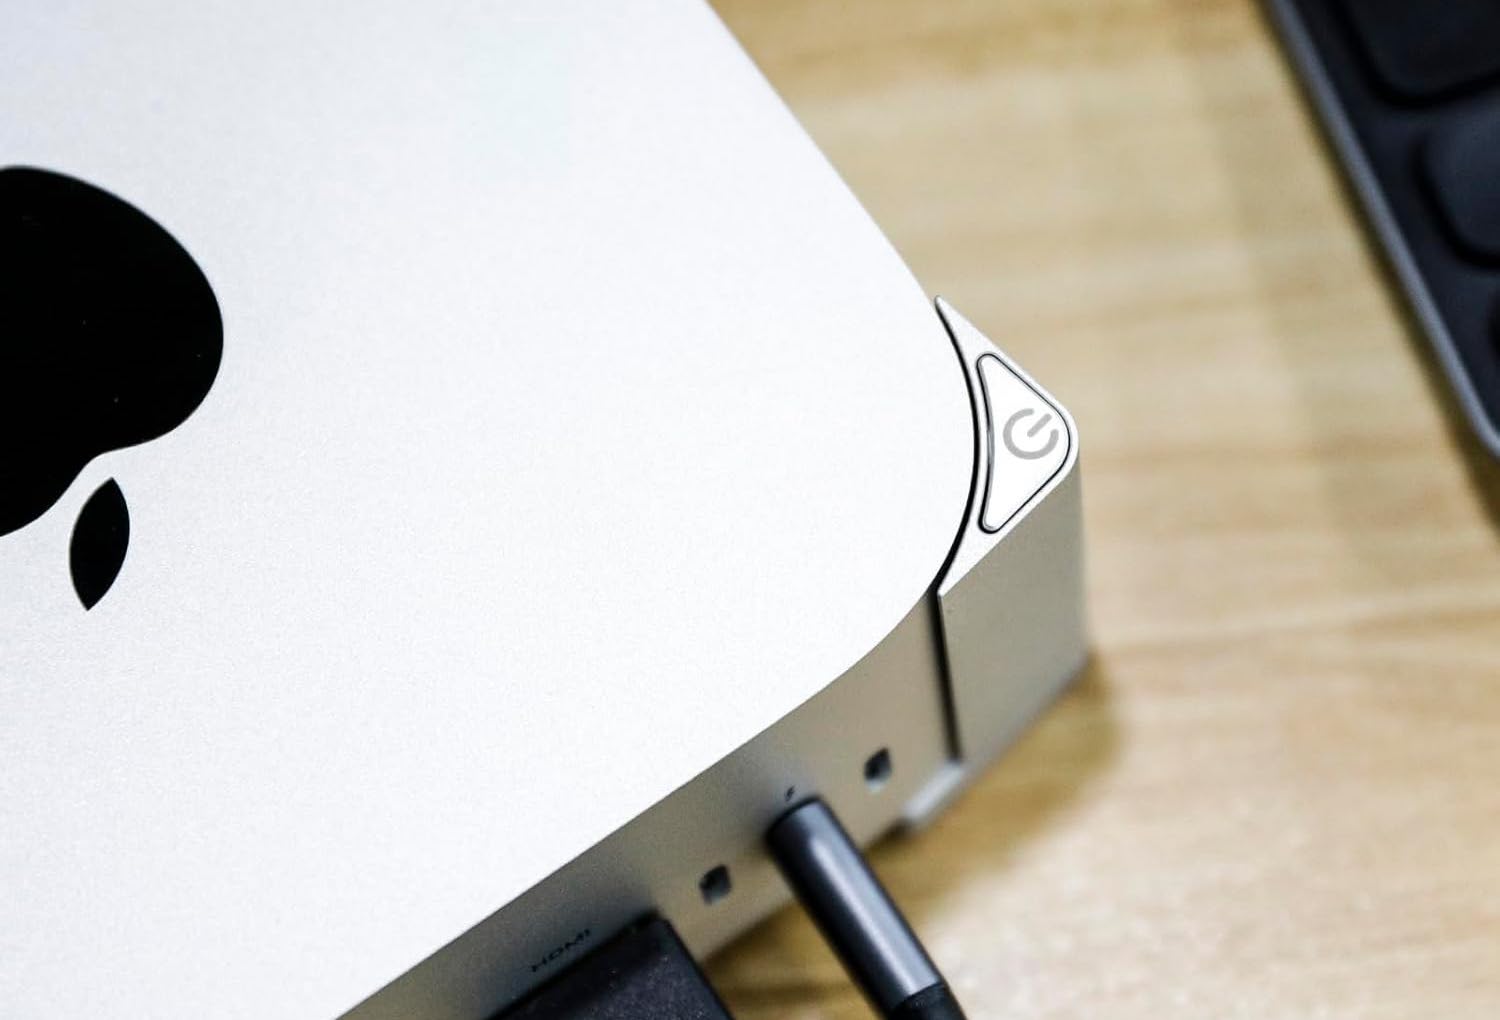
This little external power button has such a minimal design that you won’t even notice it during the day (the color is Space Gray)- and it only weighs 27.22 g. Unfortunately, though, it’s not without its problems. For starters, there’s nothing holding the power switch in place against the Mac Mini M4, which makes it easy to fall while pressing it.
Best Power Button for the Mac Mini M4
This external and minimal power button fits well on top of the Mac Mini M4.

There are many gadgets and accessories for the Mac Mini M4, many that will make your daily life (or someone else’s) way more comfortable. There’s no owner of this device (or its older predecessors) who doesn’t need at least a couple of those products.
For me, getting a USB Hub, an external M.2 disk, and the Keychron keyboard for writing was the three best purchases I’ve ever made for my Mac Mini M4 – and if I had to get one as a gift, I’d ask them (sideways) what their experience with the device is and if they got anything extra for it.
If you’re a Mac Mini owner, let me know in the comments down below which accessories you think are the best for this device, and what was the best and worst product that you ever got for your Mac Mini.