Did you know that you can install as many WordPress installations as you want locally on your computer, completely for free? XAMPP is a free tool that helps you install and run WordPress locally, which is perfect if you want to get familiar with the CMS’s interface, run tests, or even start re-designing your website.
- What is XAMPP?
- Why use XAMPP to install WordPress?
- Choosing XAMPP with the right PHP version
- How to install XAMPP and WordPress
- Download XAMPP from Apache Friends
- Download the latest version of WordPress
- Start installing XAMPP
- Setup XAMPP
- Choose which components to install
- Choose where to install XAMPP
- Select a language
- XAMPP is ready to get installed
- Wait until the installation is completed
- Allow the Apache HTTP Server to your network
- Avoid opening XAMPP for now
- Make XAMPP always run with administrator privileges
- Launch XAMPP and start Apache and MySQL
- Extract and rename the WordPress folder
- Rename the wp-config.php file
- Adjust the wp-config.php file
- Move the files to the htdocs folders
- Check if everything works
- Create a MySQL Database from phpMyAdmin
- Install WordPress: Select a language
- Add a site title and create an account
- Login to your WordPress site
- WordPress installed and ready to test
- Fixing common errors with XAMPP and WordPress
- WordPress asks for FTP Credentials to install plugins and themes
- Conclusion: A perfect way to test WordPress
I’ve been using XAMPP on both Linux and Windows for many years now, setting up various websites for clients, personal projects, re-designs that I worked on, as a testing environment to install plugins and themes, and even as a solution for my personal local-based journal.
If you’re a beginner, I’ll explain more in-depth about what is XAMPP and how you can install and set it up on Windows, but if you’re an advanced user looking to solve a specific issue, you can skip most sections of the article.
What is XAMPP?
XAMPP is a free and open-source application that has been created by the talented folks at Apache Friends. It is available for Windows, macOS, and Linux, and it’s a software package that bundles everything you need to set up a local server environment on your desktop PC or laptop. It fully supports Apache for web servers, MySQL for databases, PHP, and Perl.
Whether you’re a content creator, such as a blogger, or someone who wants to learn how to use WordPress without the fear of breaking everything or paying for a domain name and a server, or even a developer who wants a testing environment, XAMPP is the ultimate tool. It lets you install as many WordPress installations as you want, and while they aren’t accessible by anyone other than you, you get to run the whole platform and use all of its features – including installing plugins and themes.
If you’re a beginner who has no idea about WordPress, XAMPP, and local installations, this guide will help you install and set up XAMPP with WordPress on Windows, and it will teach you how to create multiple installations for different projects. XAMPP is a pretty easy and straightforward app which comes with a few options and features that you can easily learn how to use.
Why use XAMPP to install WordPress?
There are many reasons why would anyone want to use XAMPP to install WordPress. First and foremost, it’s completely free, which means you aren’t adding anything extra to your budget. Second, it will only take a few minutes to set up everything and then access them with a couple of clicks, and thanks to being locally hosted, everything will load almost instantly.
If you haven’t used WordPress in the past and you’re interested in creating a website using the CMS platform – which to me, is a great move – XAMPP will give you the opportunity to learn the platform and all of its features and options before investing for a domain name and a web hosting plan. And yes, you can migrate everything that you created with XAMPP to your server once you’re done – and there are many ways to do that, including some that are almost automatic.
Tip: If you’ve designed a website using XAMPP and you’ve purchased a domain name and a web hosting plan, you can either use the UpdraftPlus backup plugin to backup your website and restore it from the online environment, or simply copy-paste your files and then import the MySQL database.
If you’re a web developer and full-time blogger like me, XAMPP is great if you want to run multiple WordPress testing environments, and it’s also a great way to start building websites without the need for an online server. I constantly combine this method with OBS Studio, recording videos of the website’s design and functionality and sending them to my clients as a first preview.
And if you’re already a blog or website owner and you have WordPress installed on a server, you can use XAMPP for those unfortunate moments when you’re experiencing issues with your internet connection and you want to keep writing. Gutenberg lets you copy all the blocks from a page or blog post, and you can simply paste it into your online environment once your internet connection is back.
Choosing XAMPP with the right PHP version
If you’re a web developer or a full-time blogger, you already know the importance of PHP versions. PHP is the language on which WordPress has built its whole foundation, and it’s one of the main programming languages that developers are currently using to build themes and plugins for the CMS platform. XAMPP also supports PHP, and that’s why we’re able to fully run the platform using this tool.
If you visit the official website to download XAMPP, you’ll be asked to choose which version of PHP you want XAMPP to be downloaded with, and if you’re a beginner, that may be a trick. Choosing the latest version of PHP means that you get the most out of performance, security, and bug fixes, but that may result in more issues with themes and plugins that may not support the newest versions of PHP.
Usually, choosing the latest version of PHP means that you’re a developer or a website owner who simply what to test the latest updates, run tests, or make their themes or plugins compatible. If you just want to learn about WordPress and test everything in a stable environment, choosing an older version of PHP is pretty much the best way to go.
At this moment of writing, there are three available versions of XAMPP: One that comes with PHP 8.0.30, one with PHP 8.1.25, and one with PHP 8.2.12. Choosing PHP 8.1.25 is the best option for speed, stability, compatibility, and essentially security (although you’re hosting the website locally).
How to install XAMPP and WordPress
Installing and setting up XAMPP on Windows is fairly easy, and you can be done with it within a few minutes – even if you haven’t done that before.
-
Download XAMPP from Apache Friends
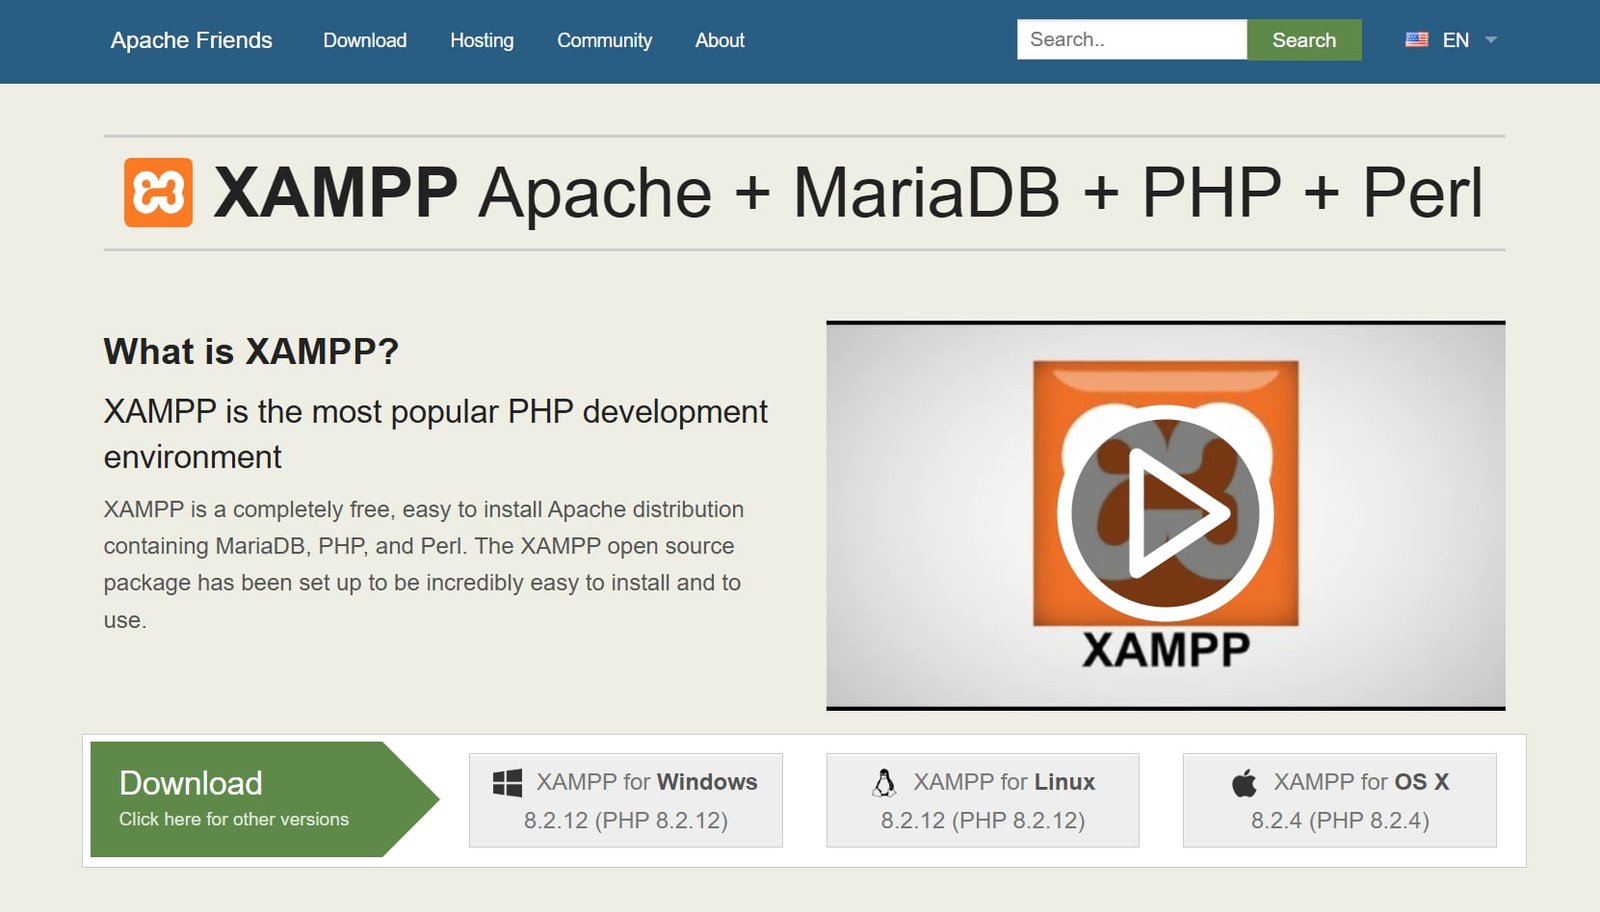
Head over to the Apache Friends website and download the latest version of XAMPP, with the PHP version that you want. The software is pretty lightweidth by its own, so don’t worry if you get the impression that your old machine may not run it.
-
Download the latest version of WordPress
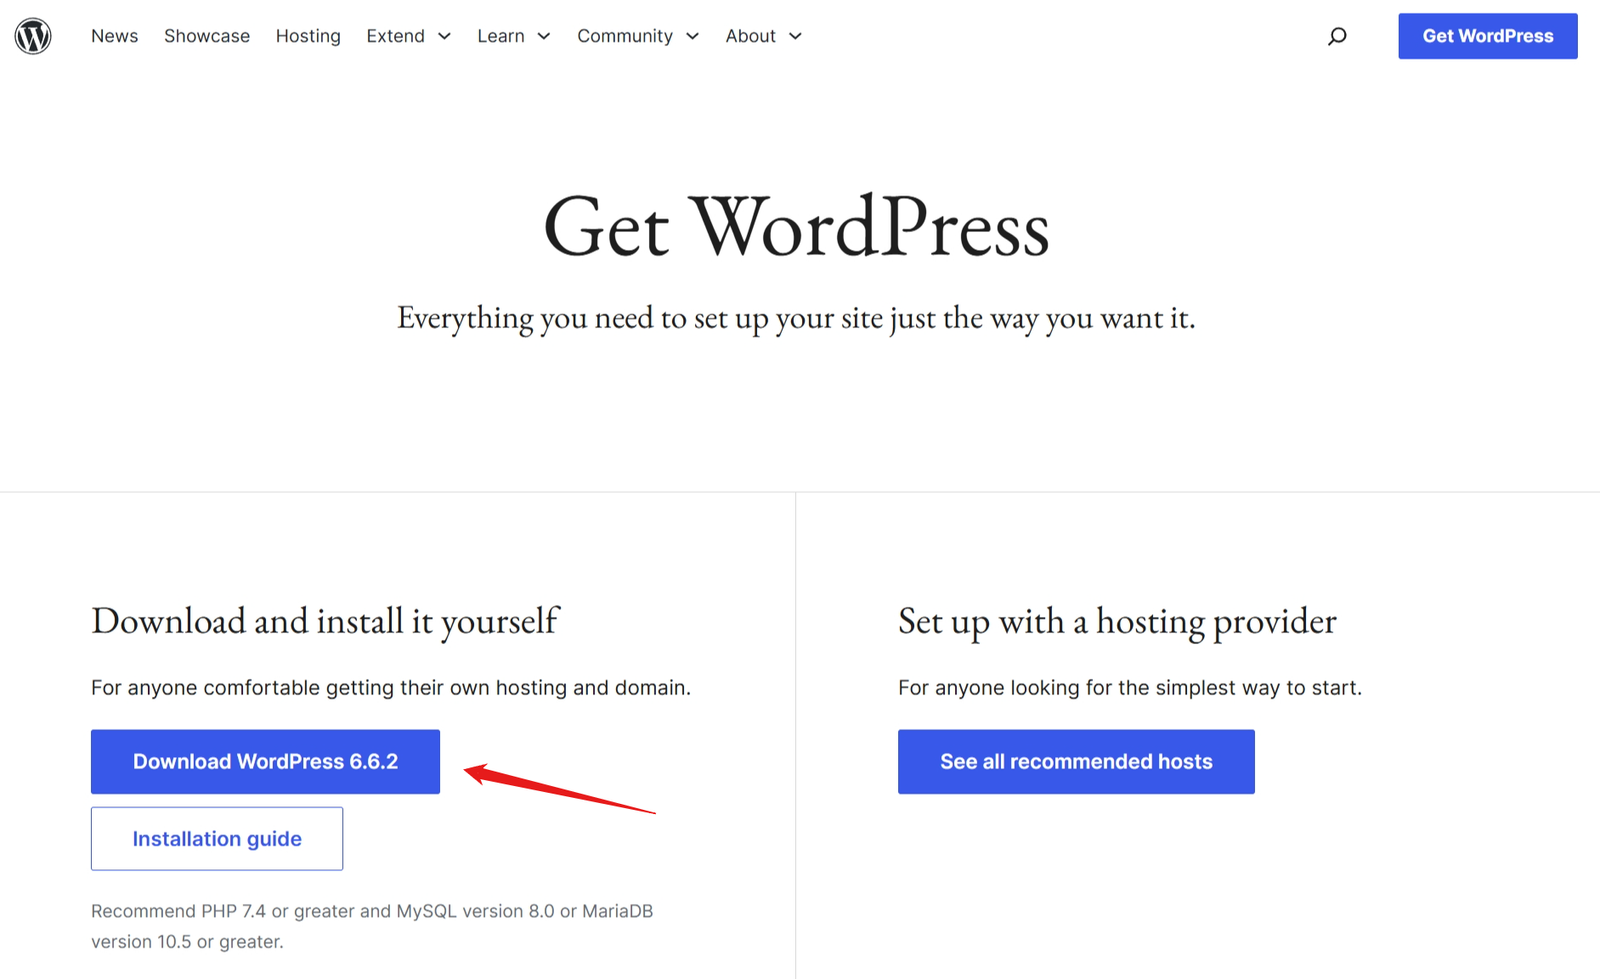
Next, we will need the latest version of WordPress. Head over to WordPress.org and click on “Download WordPress 6.6.2” (which is the current latest version). The files will be compressed in a zip file, so make sure you extract them by right-clicking and selecting “Extract here“. If you don’t see the option, you can download WinRAR or 7-Zip.
-
Start installing XAMPP
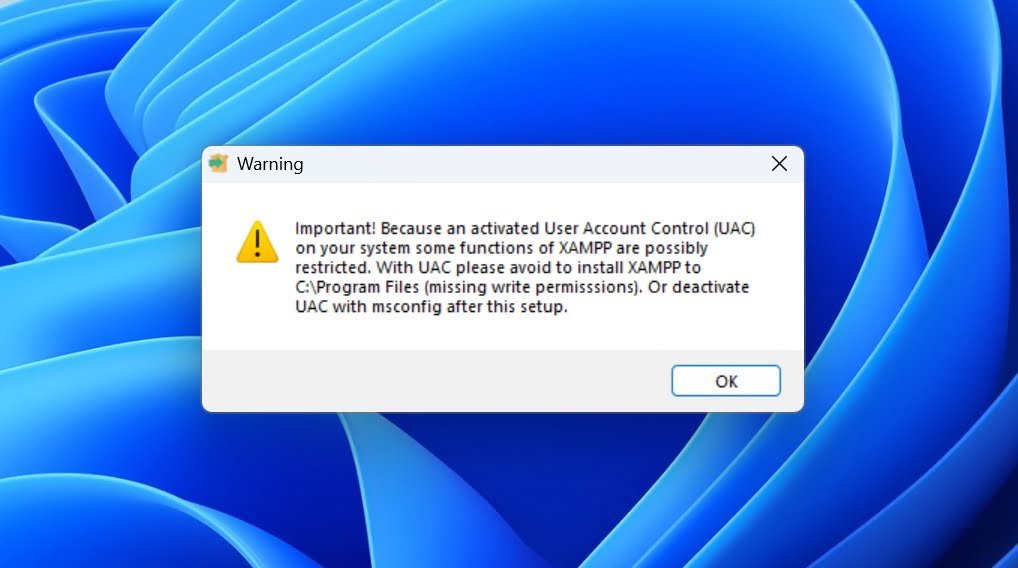
Once XAMPP has been downloaded, launch the .exe executive file. It will ask you to give it administrator privileges, go ahead and click on “Yes“. You’ll most probably get a warning saying that because of an activated User Account Control (UAC) the tool may be missing some permission. Click on “OK” to proceed.
-
Setup XAMPP

XAMPP provide its own installation wizard, which basically means that the whole process will be handled automatically. Click on “Next” to continue.
-
Choose which components to install

Apache, MySQL, PHP, and phpMyAdmin are the only components we need to install and run WordPress locally using XAMPP. There’s no need to install anything else and make the application heavier. Click on “Next” to continue.
-
Choose where to install XAMPP

Next up, you’ll have to choose the folder in which XAMPP will be installed. It is recommended to leave this option at its default. But if you do choose to install it in another location, make sure you remember where that was. Click “Next” to continue.
-
Select a language
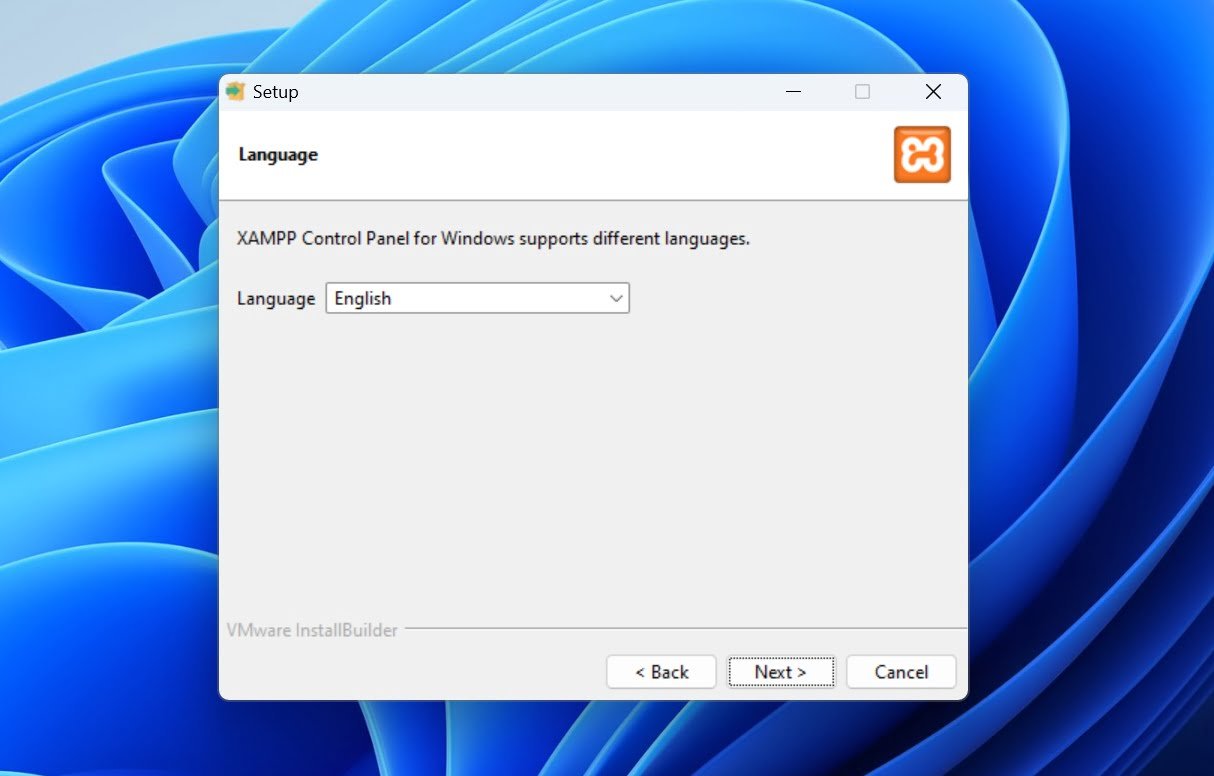
Choose in which language you want XAMPP to be installed, and click “Next” to continue.
-
XAMPP is ready to get installed
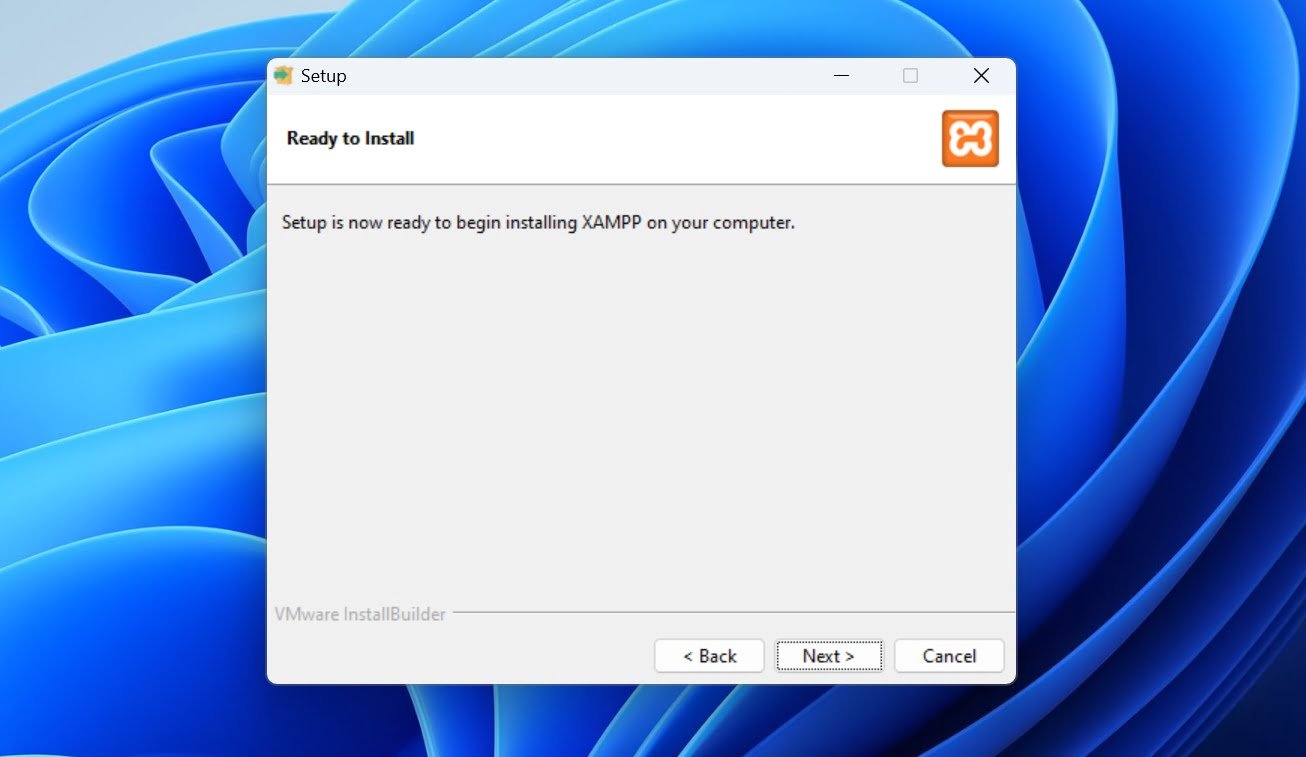
In the next window, simply click on “Next” to start XAMPP’s installation.
-
Wait until the installation is completed
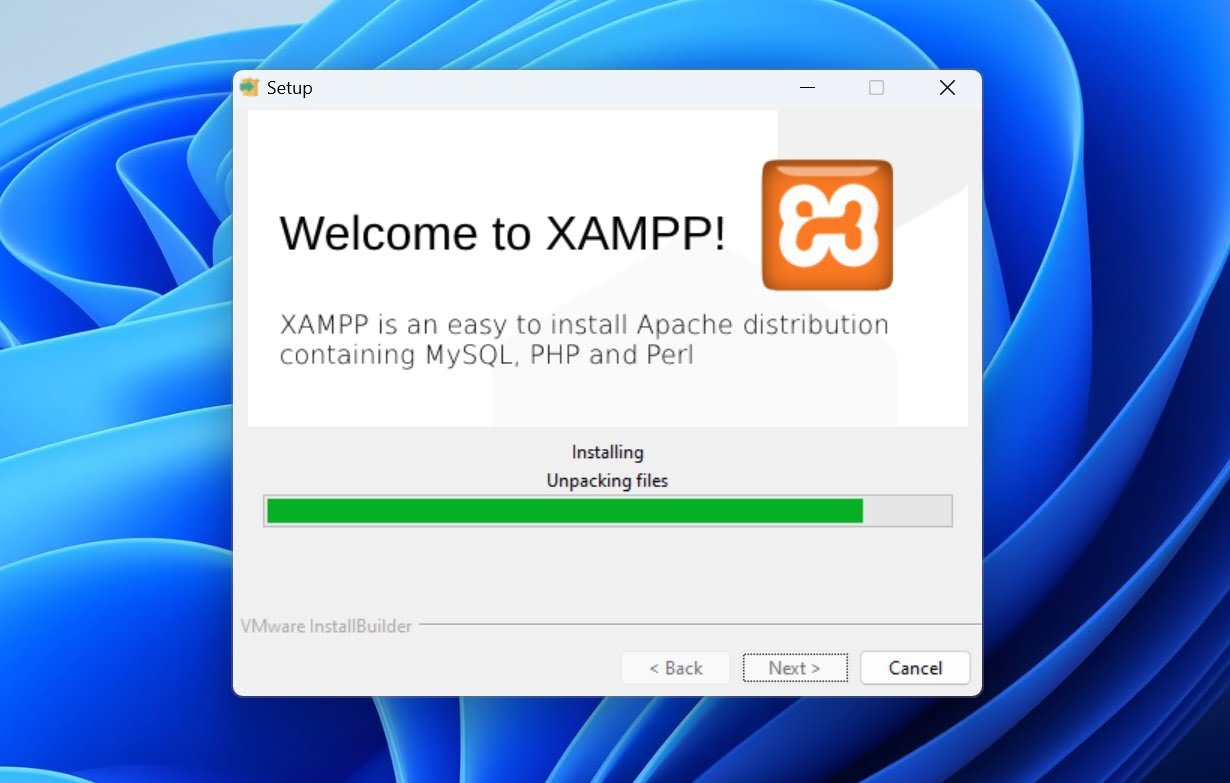
XAMPP should only take a couple of minutes to complete its installation, but it all depends on your device’s hardware.
-
Allow the Apache HTTP Server to your network
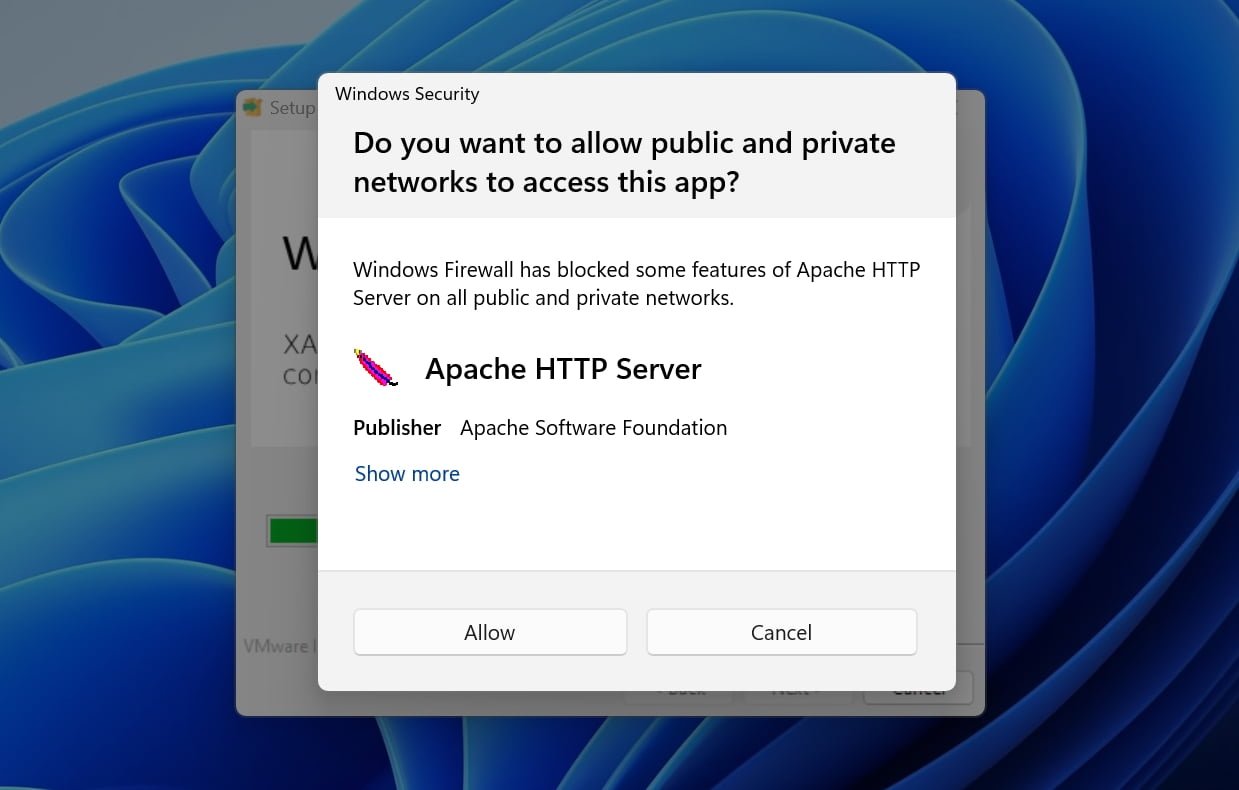
At one point just before XAMPP completes its installation process, you’ll be asked to allow public and private networks to access the Apache HTTP Server, click on “Allow” to continue.
-
Avoid opening XAMPP for now

Once XAMPP has finished its installation process, make sure the option “Do you want to start the Control Panel now?” is unchecked, and click on “Finish“. We’re doing this because XAMPP needs a few more privileges to run without any issues, and before launching the software, we will first have to make a simple adjustment.
-
Make XAMPP always run with administrator privileges
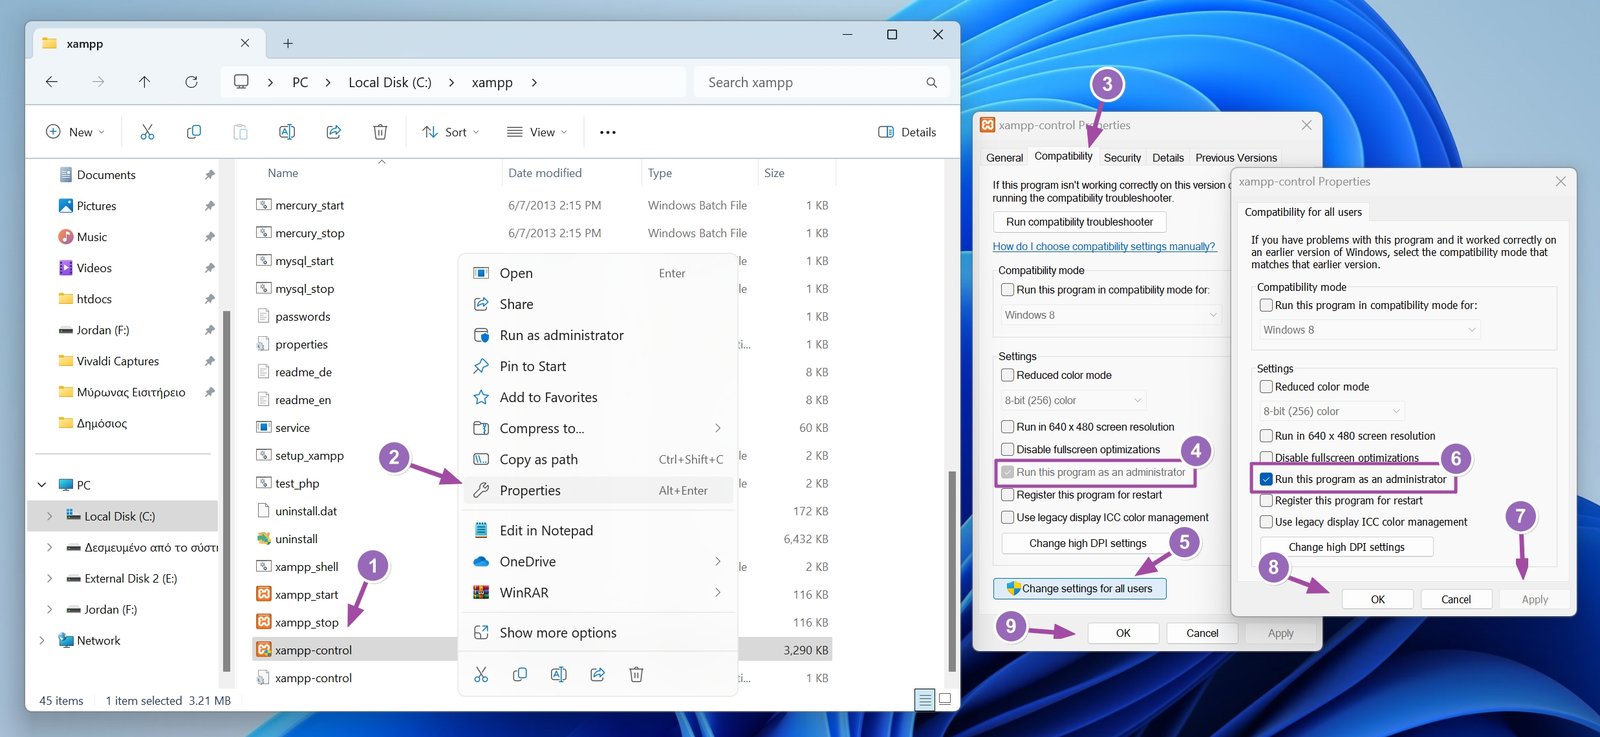
To give XAMPP admin privileges in order to run without any issues, simply head over to C:\xampp folder, right-click on the xampp-control.exe file, and select “Properties“. Go to the “Compatibility” tab and check the “Run this program as an administrator“. Then click on “Change settings for all users” and do the same. Click on “Apply” and “OK” and then “OK” again to close both windows.
-
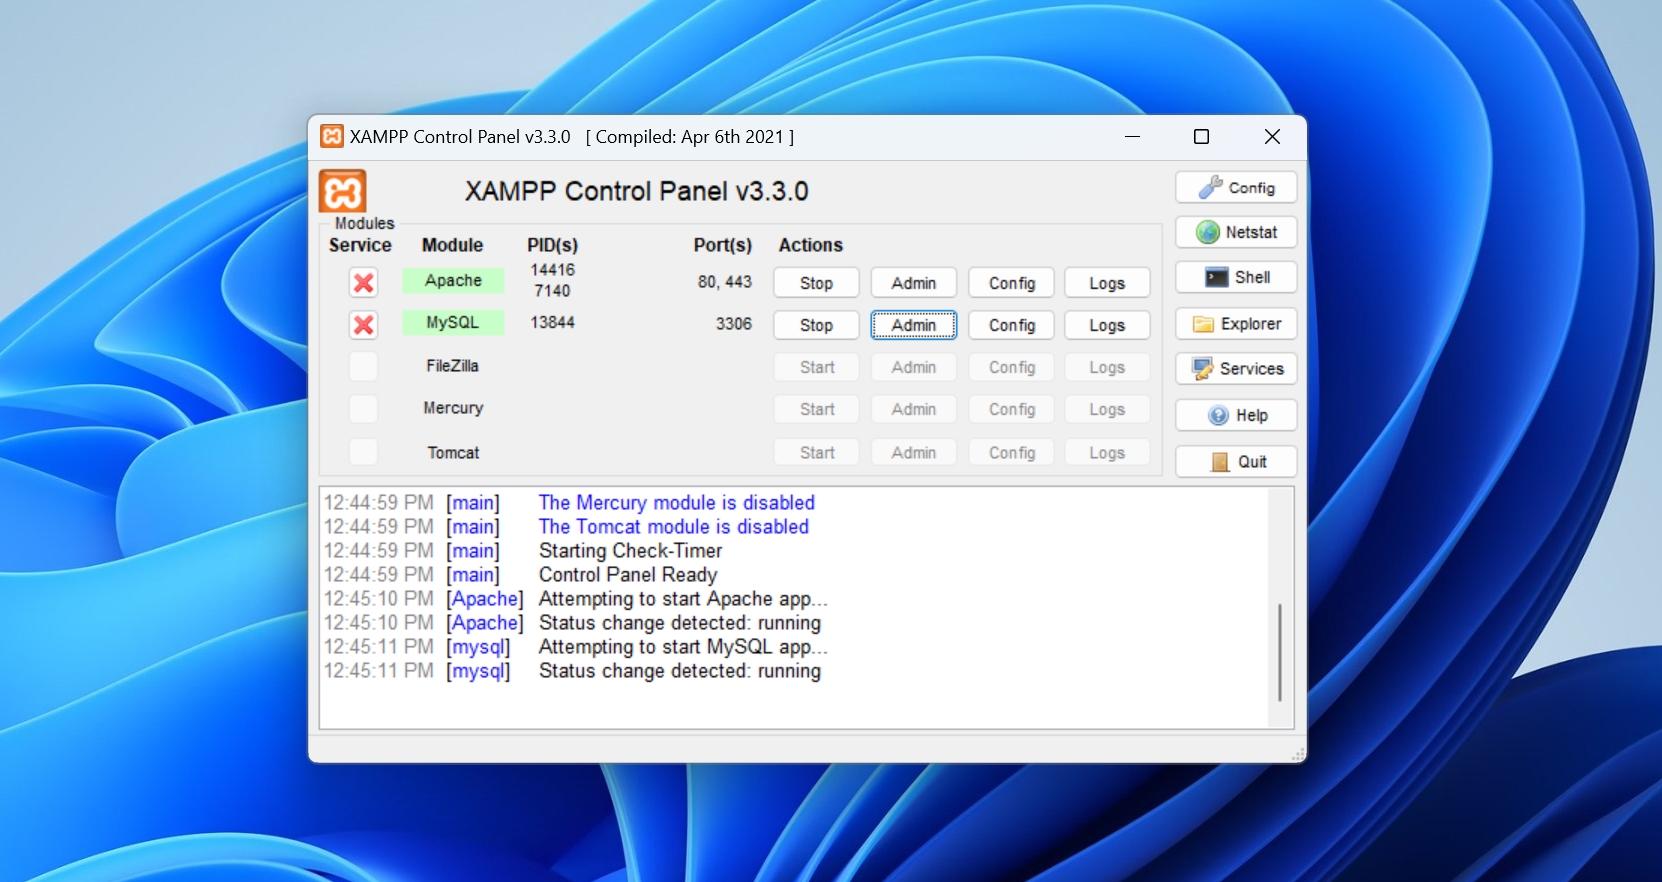
Launch XAMPP and start Apache and MySQL
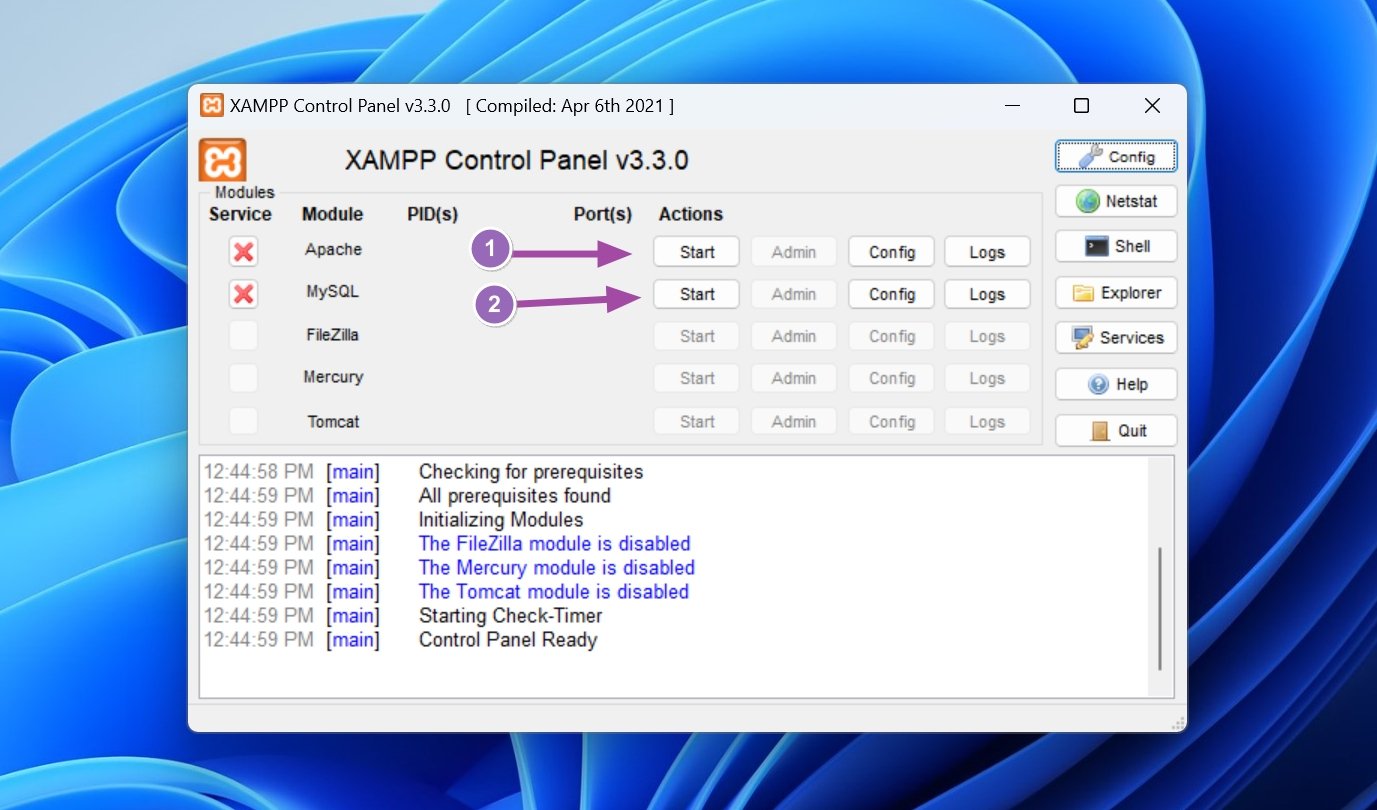
Launch XAMPP by executing the “xampp-control.exe” file (which is also available in the Windows Start menu). Once XAMPP has launched, simply click on the “Start” buttons to start both Apache and MySQL. Make sure that both services have started, and if one failed, simply click on “Start” again.
-
Extract and rename the WordPress folder
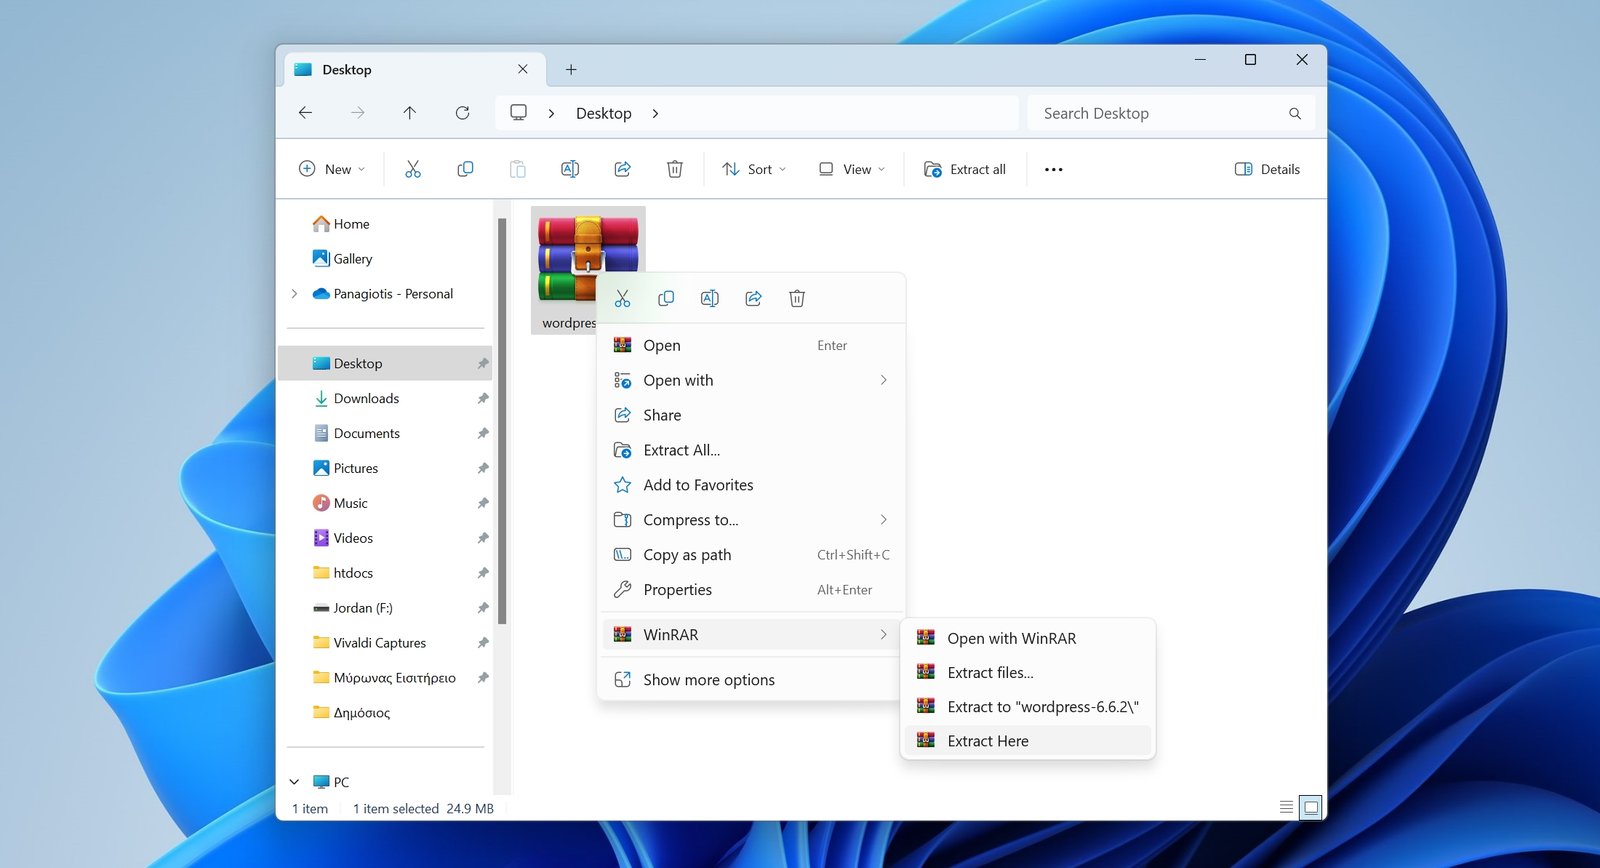
If you haven’t done that already, unzip the zip file that contains WordPress’s files, and you should end up with a folder called “WordPress”. Right-click and rename the folder. Add the name of the website you’ll be creating – without caps, spaces, etc. I’ll call it “techwiseinsider“.
-
Rename the wp-config.php file
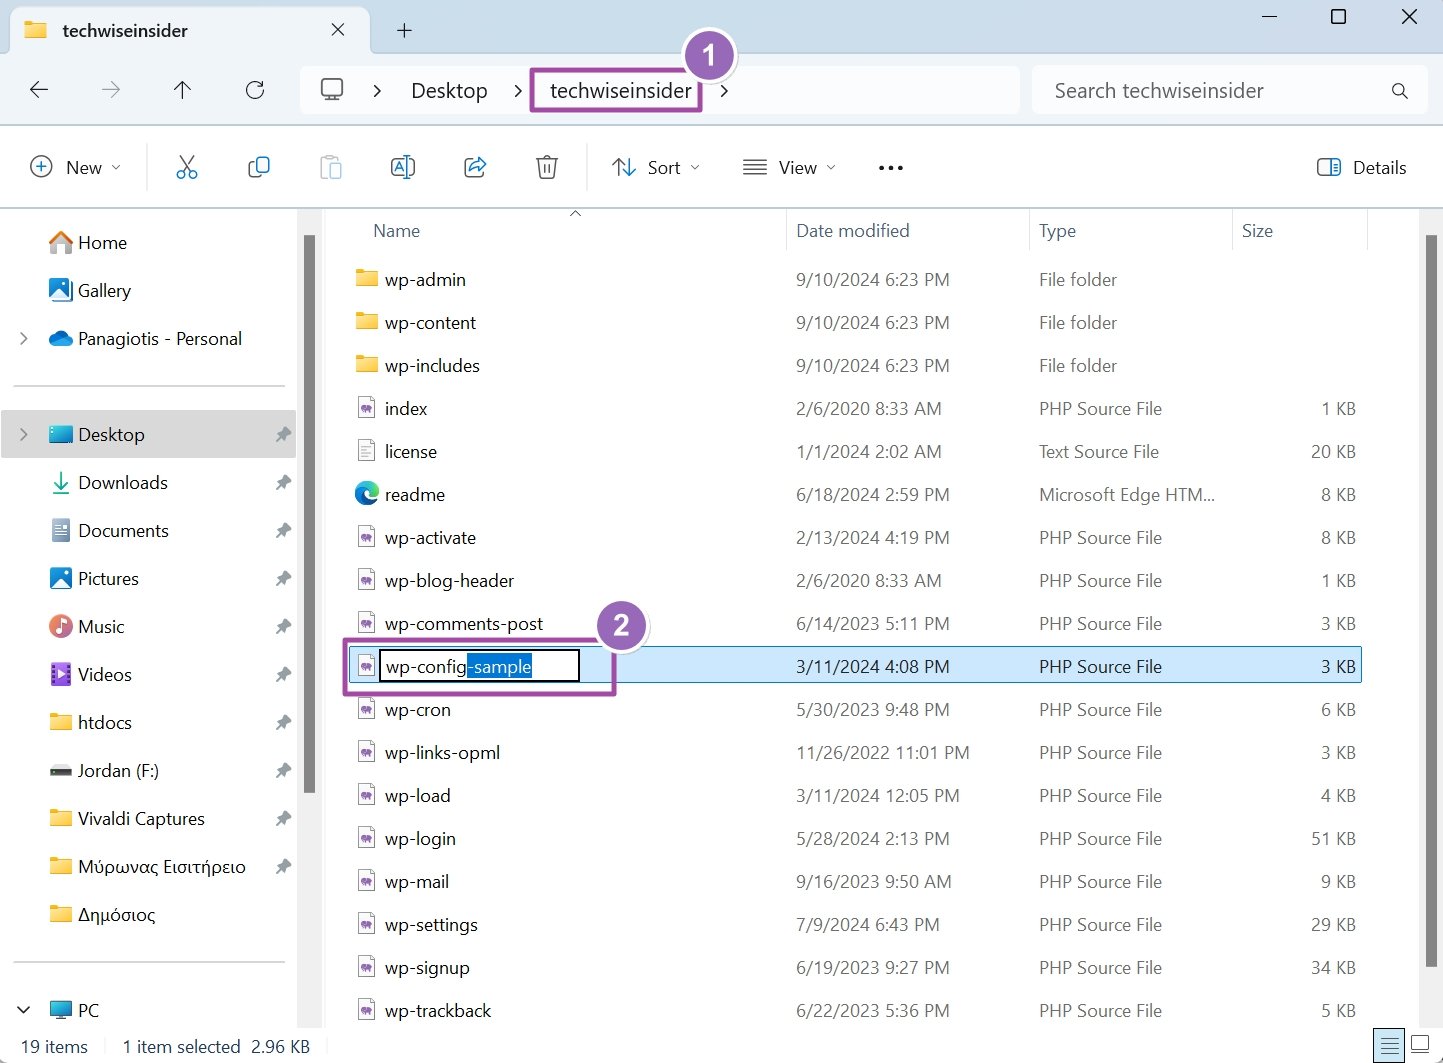
Once you’ve remained in the folder, access its files. You should find a file named “wp-config-sample.php“. Right-click and rename it to “wp-config.php“.
-
Adjust the wp-config.php file

Open the wp-config.php file with your text editor, and search for the “Database settings“, “Database username“, and “Database password“. Change the “database_name_here” with the website title that you gave to the main folder. Change the “username_here” to “root” and in the “password_here” field, simply delete the password and leave it blank and without any spaces. Save the file and close it.
-
Move the files to the htdocs folders
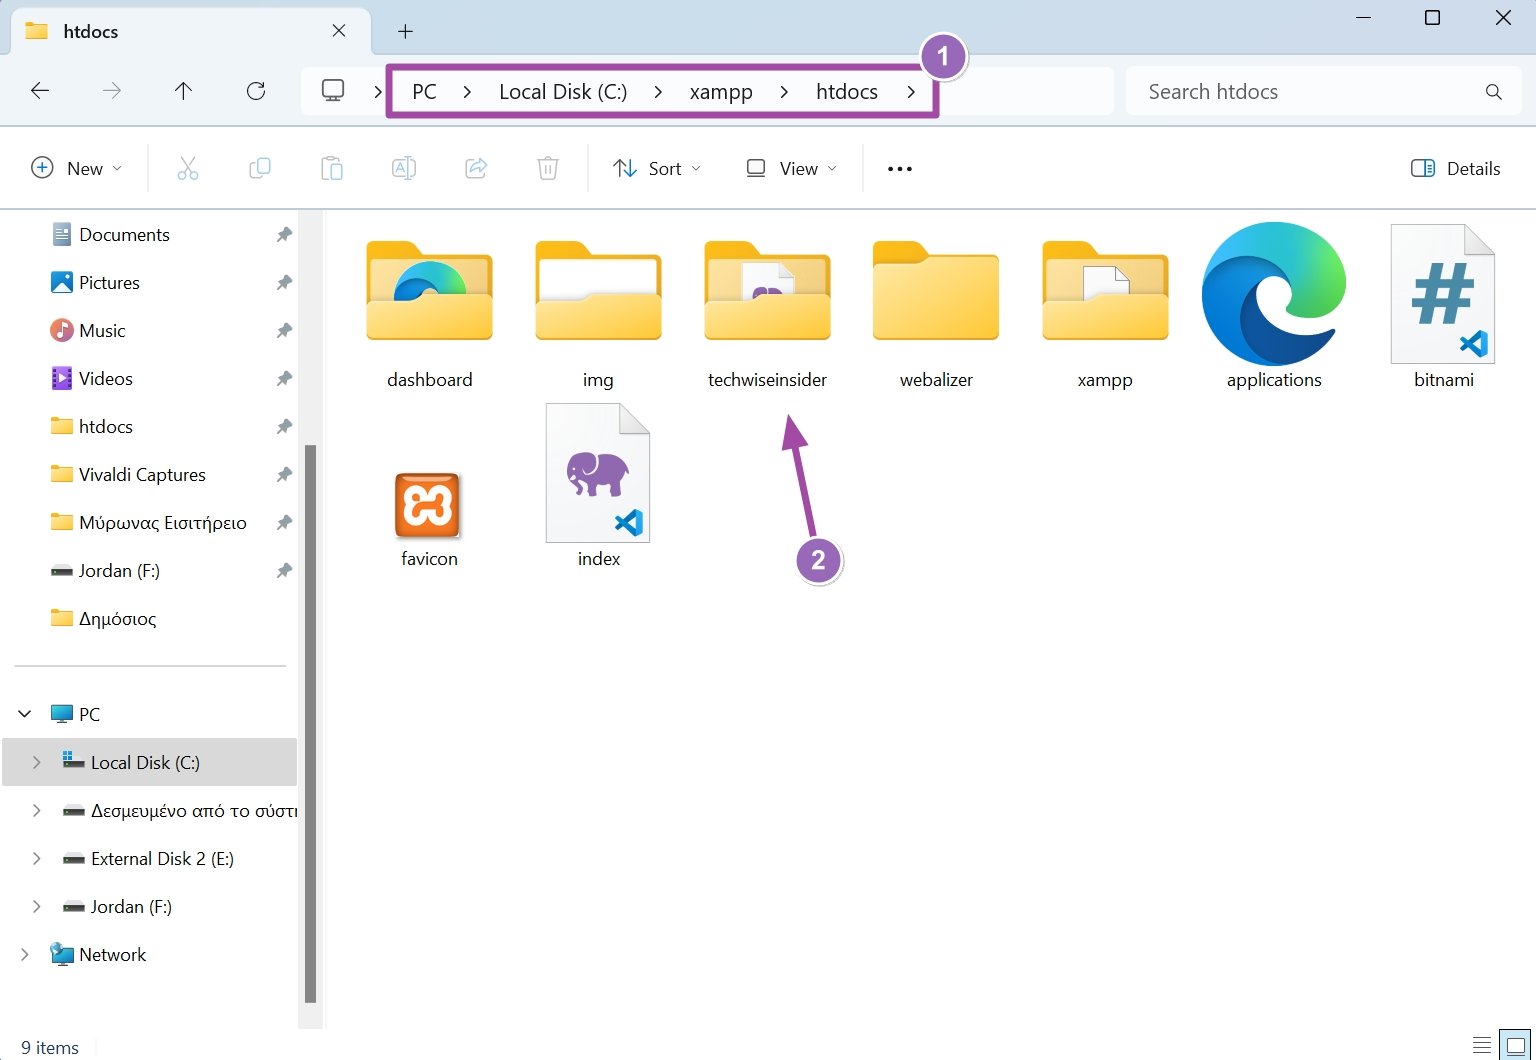
Copy the folder that contains all the WordPress files, and which you renamed previously, and paste it inside the htdocs folder located at C:\xampp\htdocs. In case you’ve changed the location during the installation of XAMPP, you will find the folder there.
-
Check if everything works
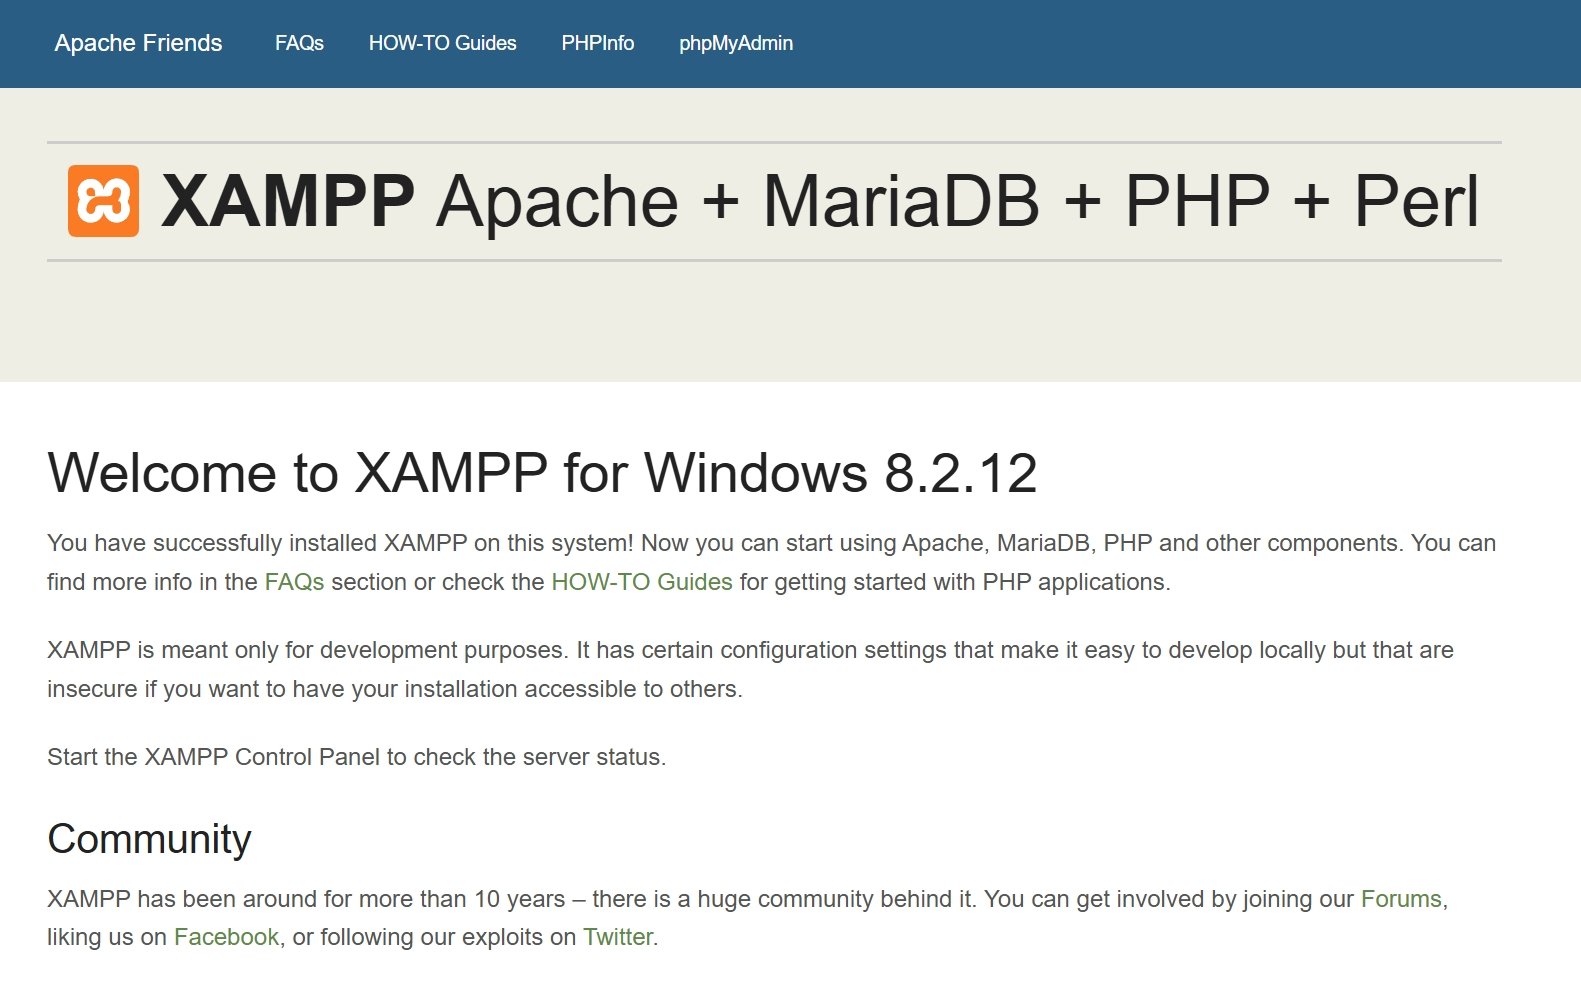
To check if everything went well, simply open your web browser and visit http://localhost/. If you see the Apache web page, that means that everything went well and you can continue with the steps provided below. If the page won’t load, make sure that both MySQL and Apache are running in XAMPP.
-
Create a MySQL Database from phpMyAdmin
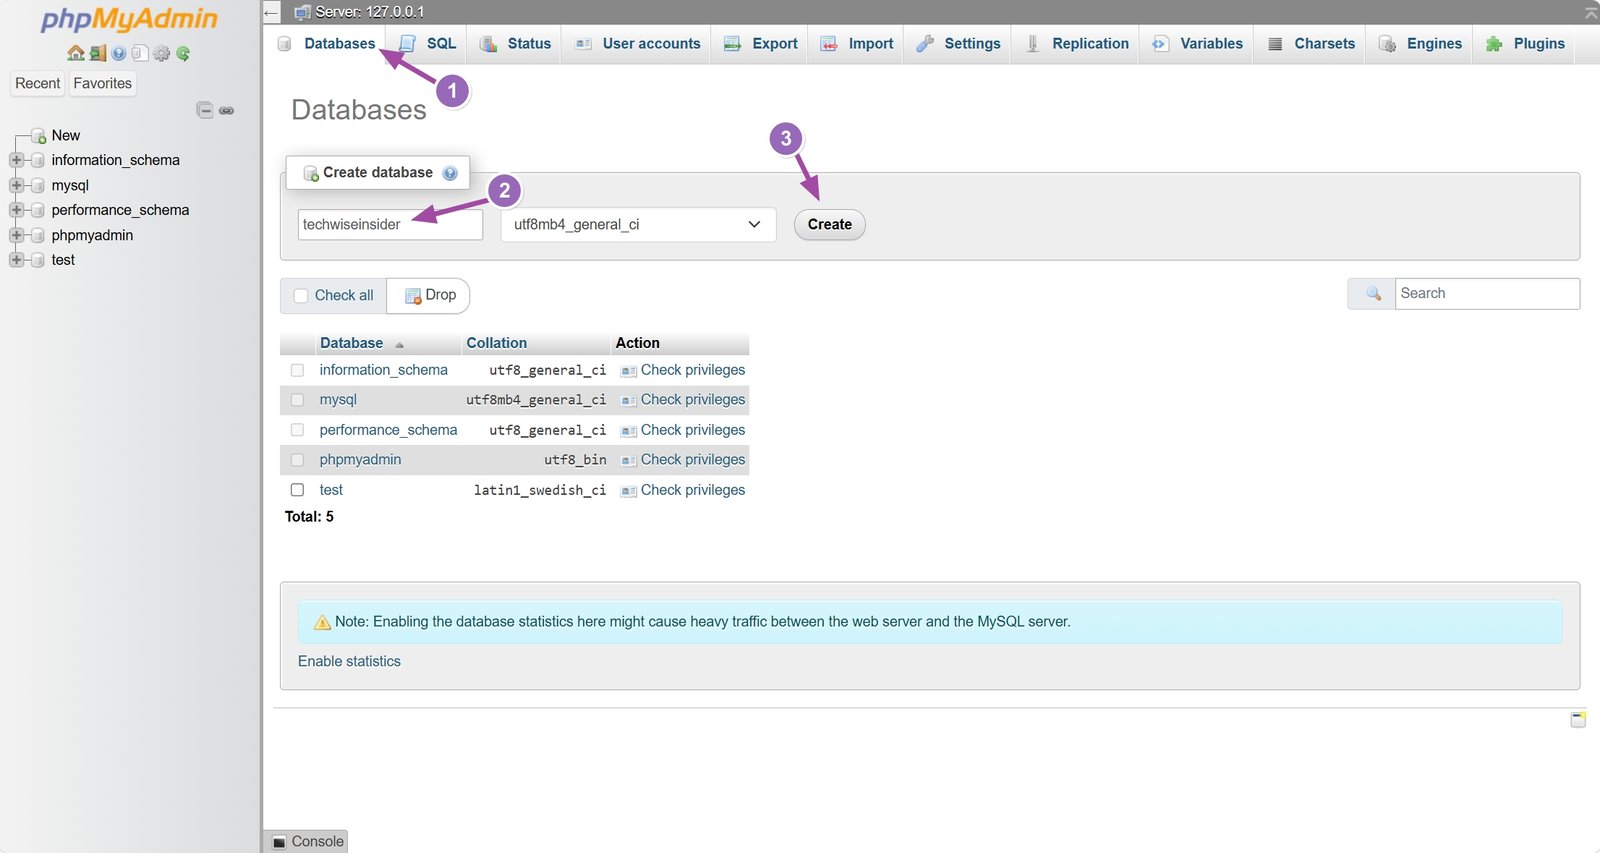
Using your web browser, visit the http://localhost/phpmyadmin page. Click on the “Databases” option, add a name (make sure it’s the same as your website’s folder), and finally click on the “Create” button.
-
Install WordPress: Select a language
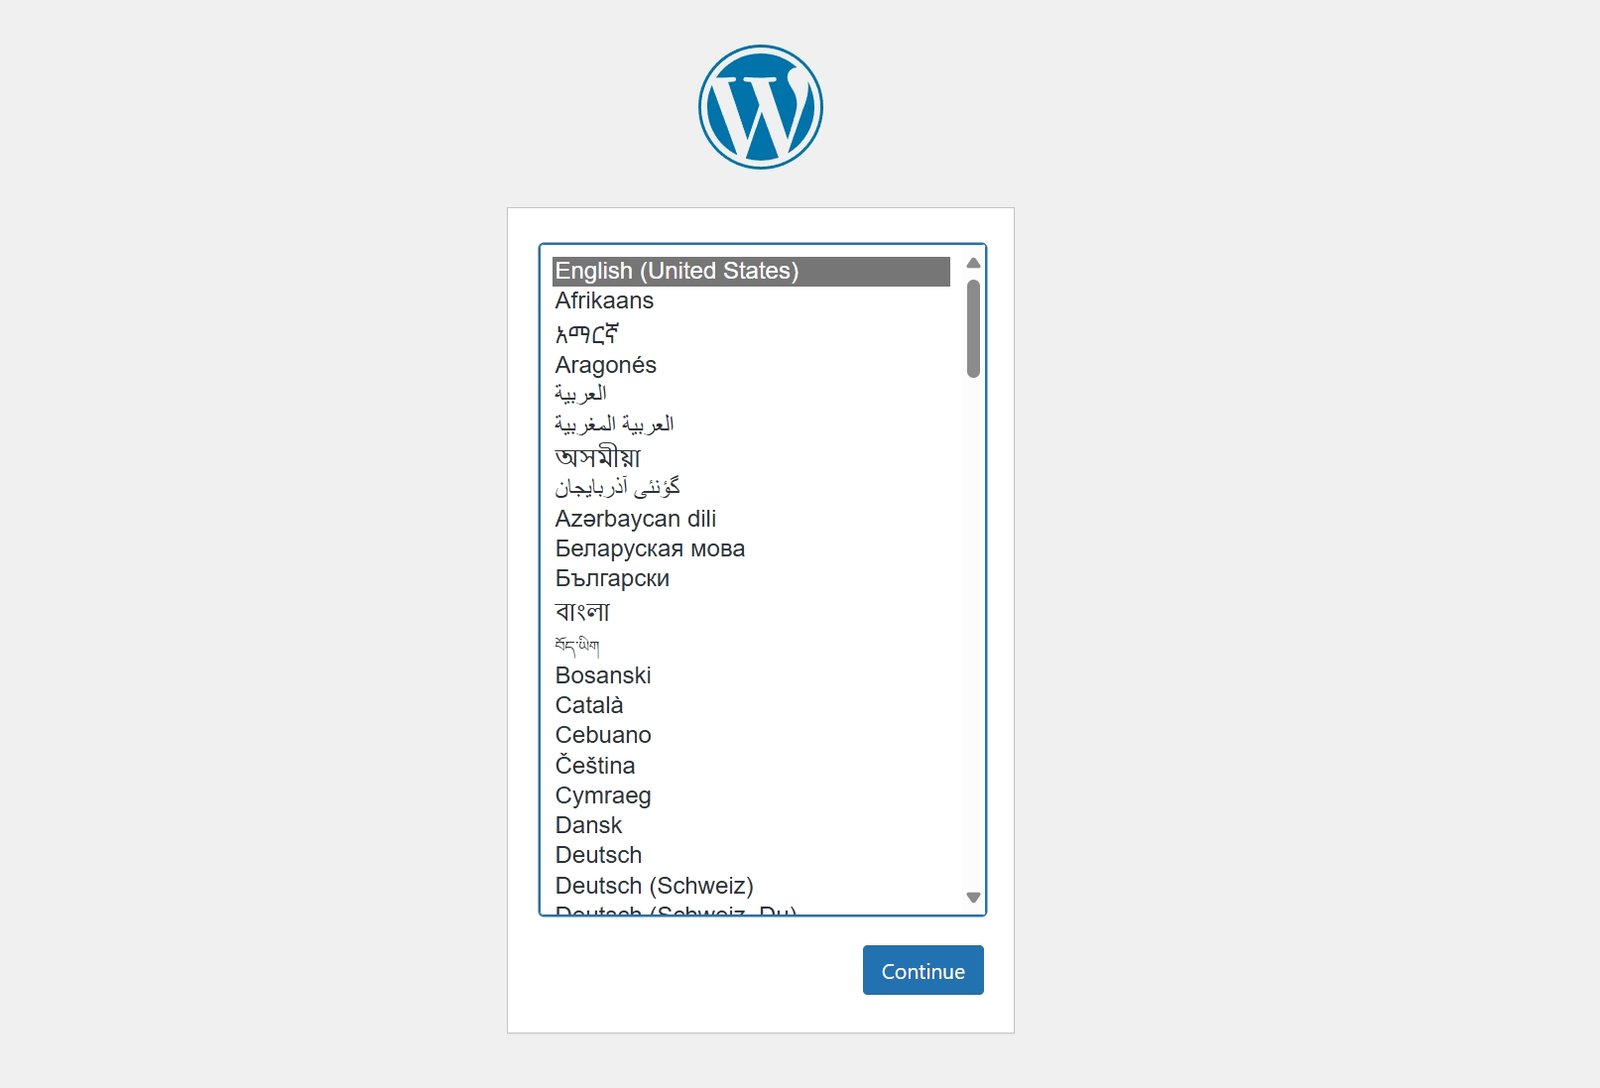
If you’re seeing the same page as the image above, that means everything’s going as expected. You can start by selecting the default WordPress language, which you can also change later. The language that you’ll select will change the whole Dashboard, dates, and options, and auto-load the same default language from every theme and plugin (if they have one).
-
Add a site title and create an account

Apart from the username, which cannot be changed once you create your account, everything else can be adjusted later. Add your site’s title, username, password, and email address which will be used for your administrator account, and click on “Install WordPress“.
-
Login to your WordPress site
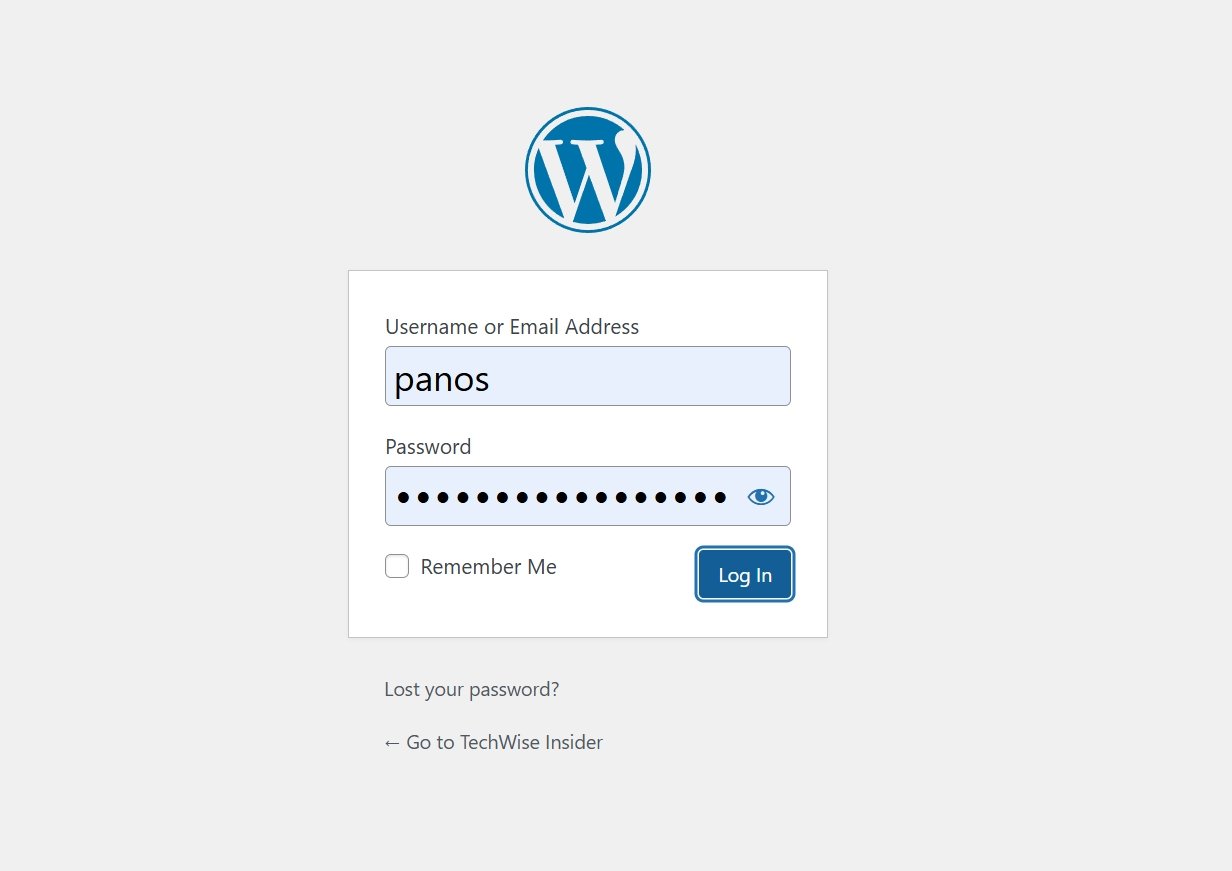
Head over to your site’s login page (for me it was http://localhost/techwiseinsider/wp-admin), add your username and password and click on “Log in“.
-
WordPress installed and ready to test
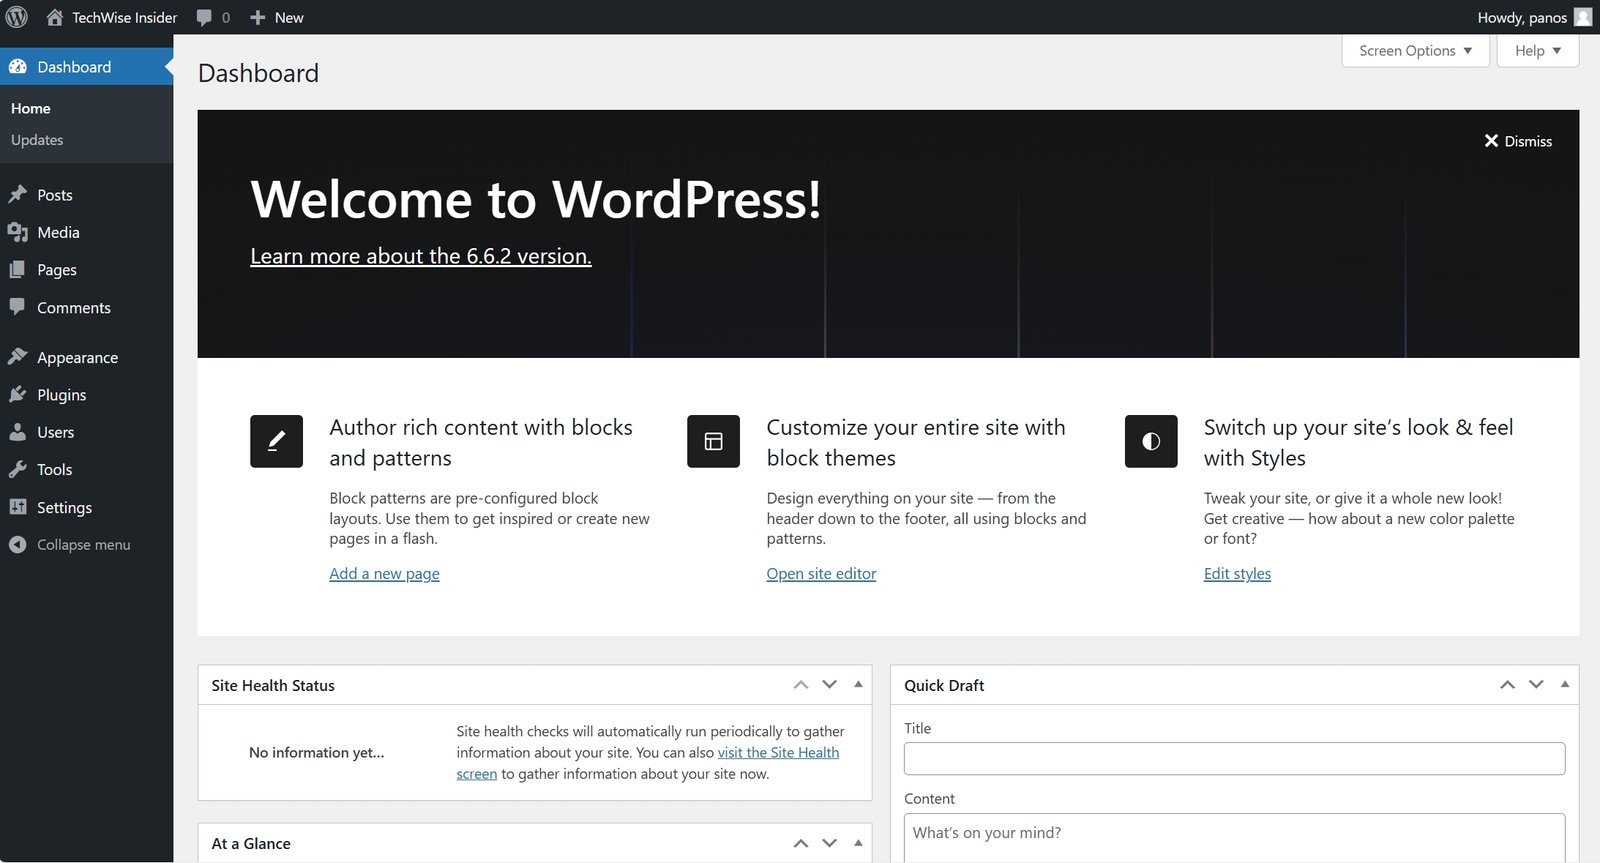
That’s it! You’ll be redirected to WordPress’s ‘Dashboard Page’, and you can start installing themes and plugins, writing articles, designing your pages, and testing the whole interface.


Every time you close XAMPP or you shut down or restart your PC, you’ll have to run the application again if you want access to your local-hosted websites. XAMPP needs to run at all times if you want your WordPress installations to work, and along with it, you should always make sure that Apache and MySQL are always running. If some of them don’t, simply click on “Start” again.
Fixing common errors with XAMPP and WordPress
XAMPP is not perfect, and despite which operating system you’re currently using, you may have to make a few changes for everything to work. You may also face errors that you’ve never seen before, but thankfully, most of them can be resolved within minutes.
Error Establishing a Database Connection
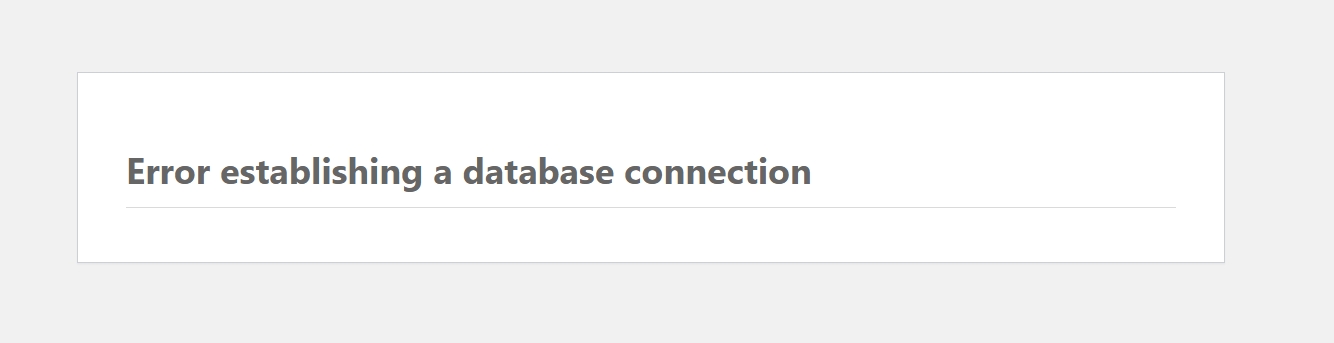
This is one of the most common errors that I’ve seen other users make. If you see one of the following images, that means that you either forgot to create a database or you made a mistake in the wp-config.php file.
The error comes in two forms:
- Error establishing a database connection.
- Cannot select database.
Both are the same errors, but they may change depending on the page you are.
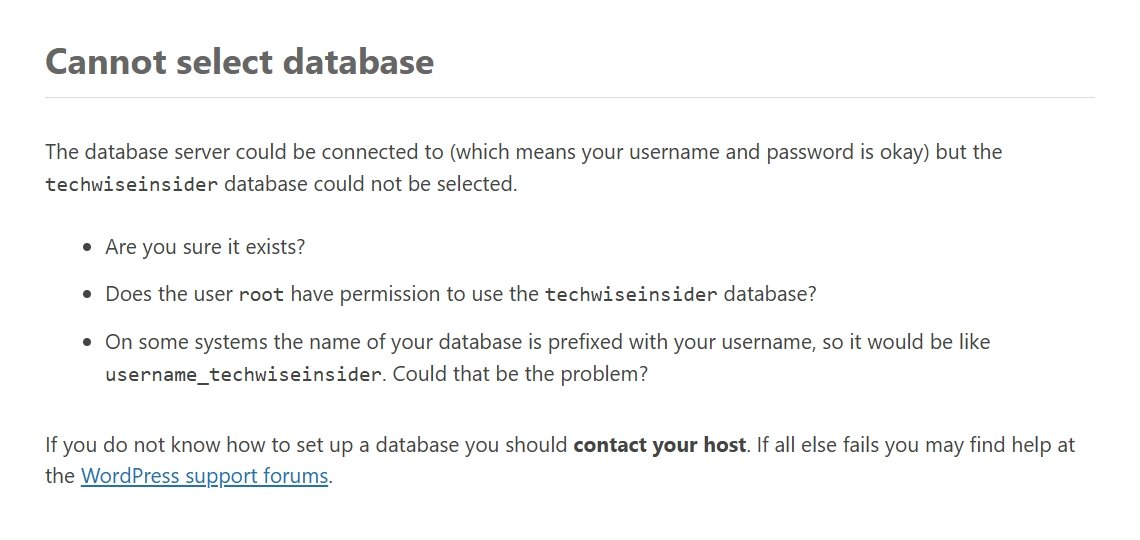
Either way, go to phpMyAdmin and make sure you have actually created a database. If it’s there, head over to your wp-config.php file and make sure the database’s name is the same as in the phpMyAdmin, the username is set to “root” and the password field is blank.
Sometimes you may have accidentally deleted a ‘ symbol. For example, in the wp-config.php file when you delete your password, make sure the ” symbols are there. Look at the picture that I have included in the steps to make sure that both files are identical, apart from the database name.
XAMPP fails to start Apache or MySQL and to close
If for any reason XAMPP is unable to start Apache or MySQL, and trying to close it simply freezes and you can’t do anything, that’s probably happening because you haven’t given the application administrator privileges. Head over to the 12. Make XAMPP always run with administrator privileges section and follow the steps provided.
To be able to completely close XAMPP’s services, click Alt + Ctrl + Delete on your keyboard, select the “Task Manager” option, and from the “Processes” tab find and close XAMPP.
If the issue persists and Apache or MySQL cannot be started, restart your PC or laptop and try again. Make sure you haven’t opened any other program before launching XAMPP and starting both Apache and MySQL. If you have programs automatically starting with Windows, simply close them and try again (some of them may be available inside the hidden icons in your taskbar – click on the arrow ⬆️ to see if you have any).
WordPress asks for FTP Credentials to install plugins and themes
There is a high chance that after setting up XAMPP and WordPress on Linux, the CMS platform will ask you to add your FTP credentials (login details) so you can start installing, updating, or deleting themes and plugins, among other things.
To resolve this issue, you’ll have to add a simple line of code in your wp-config.php:
define( 'FS_METHOD', 'direct' );
Note: Basically, the code you’ve just copied tells WordPress that your website is not hosted in an online environment, but it’s local-hosted. If you ever migrate your website from your local-enviroment to a server, make sure to remove the code from your file.
After adding the code and saving the changes, if the issue persists, go to your WordPress installation folder at “C:\xampp\htdocs\techwiseinsider“, right-click on the themes folder, and give full permissions. Repeat the same process for the plugin’s folder too.
Conclusion: A perfect way to test WordPress
XAMPP gives you the ability to easily create and manage multiple local-hosted WordPress websites, which is perfect if you want to learn about the CMS platform and all of its features before paying for a domain name and web hosting. Although the first time setting up XAMPP with WordPress may overwhelm you a bit, once you do that a few times, your hands will move on their own.
If you create a website that you like, you can easily migrate from XAMPP to any web hosting company and make it accessible to everyone with a domain name. Web Hosting companies such as Hostinger also can handle the migration, and they’ll give you an easy way to simply upload your WordPress folder with all of its files and your MySQL database (which you can extract from phpMyAdmin).
Have you been able to setup XAMPP and WordPress to work on your Windows PC? If not, what problems are you experiencing? If you got it, what are you currently working on? Let me know in the comments down below.