Setting up XAMPP and installing a bunch of WordPress websites in a local environment is crucial for my work, as I am constantly running tests, checking the latest versions, and even trying new plugins and themes that are still under development. All of that, using the Arch-based Linux distro, Manjaro.
The first time I tried to install XAMPP and set up WordPress on Manjaro Linux, it was a failure that took me more than two hours to solve. From the basic installation of XAMPP to not being able to copy and paste files inside my htdocs folder and being unable to install and uninstall plugins and themes, here’s how to install XAMPP, setup WordPress, and troubleshoot the most common issues with ease.
Setting Up XAMPP and WordPress on Manjaro Linux
For today’s tutorial, I am going to be using Manjaro Linux with KDE Plasma as my operating system, but the steps should be identical to almost any Arch-based distro out there, including EndeavourOS.
1. Download and install the Build-Essential (UCL Built)
Each time I tried to install XAMPP through the Pacman package manager, it constantly failed to complete the installation, saying that the UCL Built had failed. Trying to install the UCL Built through Pacman was my first thought, but looks like that wasn’t the actual way to solve the issue, as it also failed to install that package.
I’ve finally found a simple solution, and that’s installing the Build-Essential package. You can do that using the terminal and entering the following command:
# sudo apt-get install build-essential
After installing build-essential, UCL can be built and XAMPP can be installed from the software manager, without getting an error. But if you still get the same error, try closing and reopening Pacman or restarting your PC and checking again.
2. Install XAMPP using Pacman
Now that we have build-essential installed on our operating system, we can proceed with XAMPP’s installation. While you can head over to Apache Friend’s website to download the latest version and install it through the terminal, we’re going to get the easiest approach;
- Open the “Add/Remove Software“, which is how Pacman is called on Manjaro, and search for “XAMPP“. (Note: If you don’t see XAMPP on the list, make sure you have enabled the “AUR” support from the Pacman’s settings.)
- Proceed with XAMPP’s installation, which is pretty straightforward.
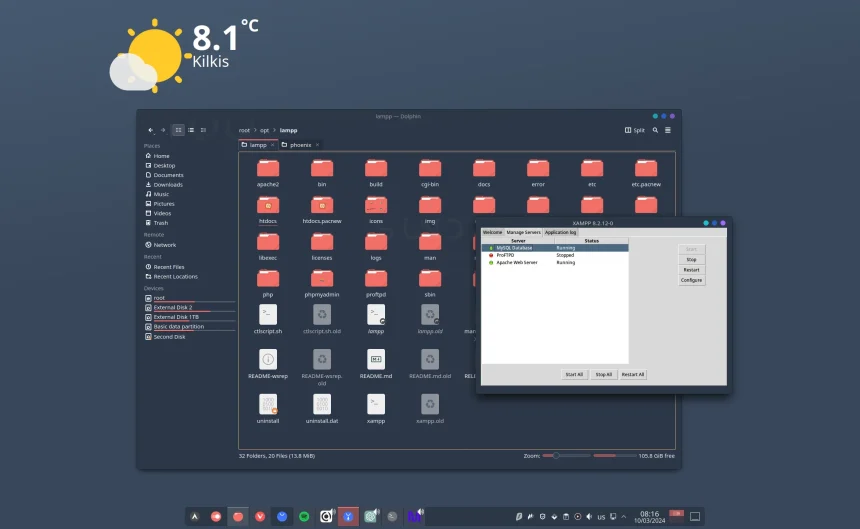
- Once the installation has been completed, XAMPP will automatically open. If not, just search for it on your app’s list. (Note: You’re going to see two XAMPP icons, one called ‘XAMPP Manager‘ and the other ‘XAMPP Control Panel‘, the first one is the one you need).
- Start Apache and MySQL, which both are needed for WordPress to run on your local environment.
Check MySQL and Apache’s status to see if they’re both running. If not, try starting them again, and if that fails too, close XAMPP and any other program that may be using the same port of your internet, and try again.
If the issue persists, move over to the troubleshooting section at the end of this guide.
3. Create a new database
Our WordPress website needs a database to handle a couple of stuff, and with XAMPP it’s pretty easy to create as many as you’d like. Remember that the name you’re going to give to any database will be used as your website’s name (for local-hosted purposes only).
- Open your browser and visit: http://localhost/phpmyadmin/
- Click on the “Databases” option on the top menu.
- Go to the “Create database” section and give it a name, such as “techwiseinsider“, and click on “Create“. (Note: If you’re going to migrate a website or a backup folder, click on your new database, click on the “Import” option, and upload your database file.)
Our MySQL database is now ready for use, and we can proceed with installing and configuring WordPress in our new local environment.
4. Download and configure WordPress
As an open-source CMS platform, anyone can download its latest version for free, and use it for both personal and commercial purposes. With all that in mind, if you were going to install the platform on a web hosting platform, you probably wouldn’t have to go to WordPress’s official website to download its files, but with XAMPP we have to do things manually.
- Head over to WordPress.org, click on the “Download” button, and download its latest version.
- Once the download has been completed, right-click on the zipped file and click “Unzip“.
- Once you see the “WordPress” folder with all of the platform’s files, just rename the folder with the same name that you gave the database that you created earlier.
- Now open the folder and find the wp-config-sample.php file and rename it to wp-config.php.
- Right-click on the wp-config.php file and edit with any text editor.
- Replace the Database Name with the same name that you gave earlier, in my example it was techwiseinsider, change Username to root, and delete the password, leaving it empty “”.
- Save the file.
And voilà, WordPress has been (almost) installed on your local environment. Head over to http://localhost/techwiseinsider/ (where ‘techwiseinsider‘ you add your website’s title), select the language, add a username and password, and lastly, an email address for the administrator’s account.
Once the installation has been completed, you’ll redirected to the WordPress Dashboard of your local-hosted website. You can start using it as you would if you had installed it in a web hosting company.
XAMPP & WordPress on Linux: Troubleshooting most common issues
I’ve faced many issues while setting up XAMPP and WordPress on Linux. Troubleshooting those issues can take lots of time, so here’s everything that I remember configuring to make XAMPP & WP work on Manjaro Linux.
Setting up file permissions
When it comes to file permissions, things can get kinda weird with XAMPP, WordPress, and Linux. To resolve the issue, we need to set all permissions to 755, and we can do that with two simple commands in the terminal:
$ sudo chmod -R 755 /opt/lampp/htdocs
Click Enter, and then:
$ sudo chown -R techwiseinsider:techwiseinsider /opt/lampp/htdocs
Note: Replace “techwiseinsider” with your PC’s name.
That change should take care of most of the file permission issues that can be seen when setting up XAMPP and WordPress on Linux distros.
Didn’t work? The easiest way to get around this problem is by going to XAMPP’s installation folder, right-clicking on the “root/opt/lamp/htdocs” folder, clicking on “Properties“, going to the “Permissions” tab, and making sure you gave full permissions for the owner, group, and others.
WordPress is asking for FTP credentials
There is a high chance that after setting up XAMPP and WordPress on Linux, the CMS platform will ask you to add your FTP credentials (login details) so you can start installing, updating, or deleting themes and plugins, among other things.
To resolve this issue, you’ll have to add a simple line of code in your wp-config.php file and check your theme’s and plugin’s folder permissions.
define( 'FS_METHOD', 'direct' );
Note: Basically, the code you’ve just copied tells WordPress that your website is not hosted in an online environment, but it’s local-hosted. If you ever migrate your website from your local-enviroment to a server, make sure to remove the code from your file.
After adding the code and saving the changes, go to your WordPress installation folder at “root/opt/lamp/htdocs/techwiseinsider/“, right-click on the themes folder, and give full permissions (775 to be exact). Repeat the same process for the plugin’s folder too.
Fix auto redirection to the main domain name after migration to a local environment
If you migrated your website so you can start testing it as it is, chances are that you’re going to get automatically predicted to the main domain name every time you try to access the localhost/yourwebsite/ local-hosted website.
To fix this issue, you’ll have to paste a simple line of code into your wp-config.php file, save the changes, do a quick update on your permalinks, and start working on it.
- Go to “root/opt/lamp/htdocs“, right-click on the wp-config.php file in your WordPress installation folder, and edit it with a text editor, exactly how you did it earlier.
- Paste the following code at the top of the file, just after the <php opening (yes, you leave a space), and replace the /techwiseinsider with your website’s name.
define( 'WP_HOME', 'http://localhost/techwiseinsider' );
define( 'WP_SITEURL', 'http://localhost/techwiseinsider' ); - Save the file and check your website (make sure to also check from a private window that has no saved cookies and history, sometimes our browser is the issue).
After that visit your local-hosted website, sign in to your dashboard, go to “Permalinks” and just update everything by clicking on the “Save settings“. You can then try and remove the code and see if it works without it, as it is a temporary solution.
Apache or MySQL won’t start on XAMPP
If Apache or MySQL (or both) won’t start, that may be from either a conflict with the port being used from another software or having set the wrong permissions. Either way, you can find out what’s the problem by checking XAMPP’s log files (/opt/lampp/logs/ by default).
Apache typically uses port 80 for HTTP and port 443 for HTTPS. MySQL uses port 3306 by default. Run the following commands to check if any processes are using these ports:
sudo netstat -tuln | grep 80
sudo netstat -tuln | grep 443
sudo netstat -tuln | grep 3306
If any processes are using these ports, you’ll need to either stop those processes or change the ports that Apache and MySQL are configured to use in their respective configuration files (httpd.conf for Apache and my.cnf for MySQL).
If the issue persists, check the folder permissions as mentioned above, or the log files to see what may be causing the problem.
If you get into any trouble, don’t hesitate to leave your comment down below with as much information as you can, and I’ll do my best to assist you!
If you’re looking at setting up XAMPP and installing WordPress in a local environment in your Arch-based Linux distribution, this beginner’s guide will help you get through all the steps faster than ever. Apart from that, we’re also going to take a quick look at some of the most common problems and how to troubleshoot them.


