Starting a new blog is now easier than ever before. Finding a good CMS platform, buying a domain name and choosing a web hosting plan should only take a few minutes of your time, and customizing the whole design is being done with easy-to-use and cheap website page builders. Here’s how to do all that step by step, and get your new blog up and running in the next few minutes.
- Start by organizing your idea
- Choosing the best blogging platform
- Starting with a cheap but reliable hosting with a free domain
- What is Hostinger?
- Popular web hosting companies to consider
- What are the WordPress Hosting plans?
- How do I choose the perfect hosting plan?
- Getting Started with WordPress
- Designing a logo and favicon, and choosing a color palette
- Choosing the perfect theme
- Create your blog’s basic pages
- Create the main Pages, Categories, and Menus
- How to create pages in WordPress
- How to create categories and sub-categories in WordPress
- How to create and manage your menus in WordPress
- Write your first posts and design your blog
- Optimize your new blog for SEO
- What are the best SEO plugins for WordPress?
- Submit the blog to the Google Search Console
- Submit the blog to the Bing Webmaster Tools
- Conclusion…
I’ve spent more than 16 years creating blogs for my clients and me. This beginner’s guide is exactly what you’ll need to start a blog with ease, without having any knowledge of coding. By the end of this guide, you’ll be able to log in, customize, and start writing and publishing articles on your new blog.
Start by organizing your idea
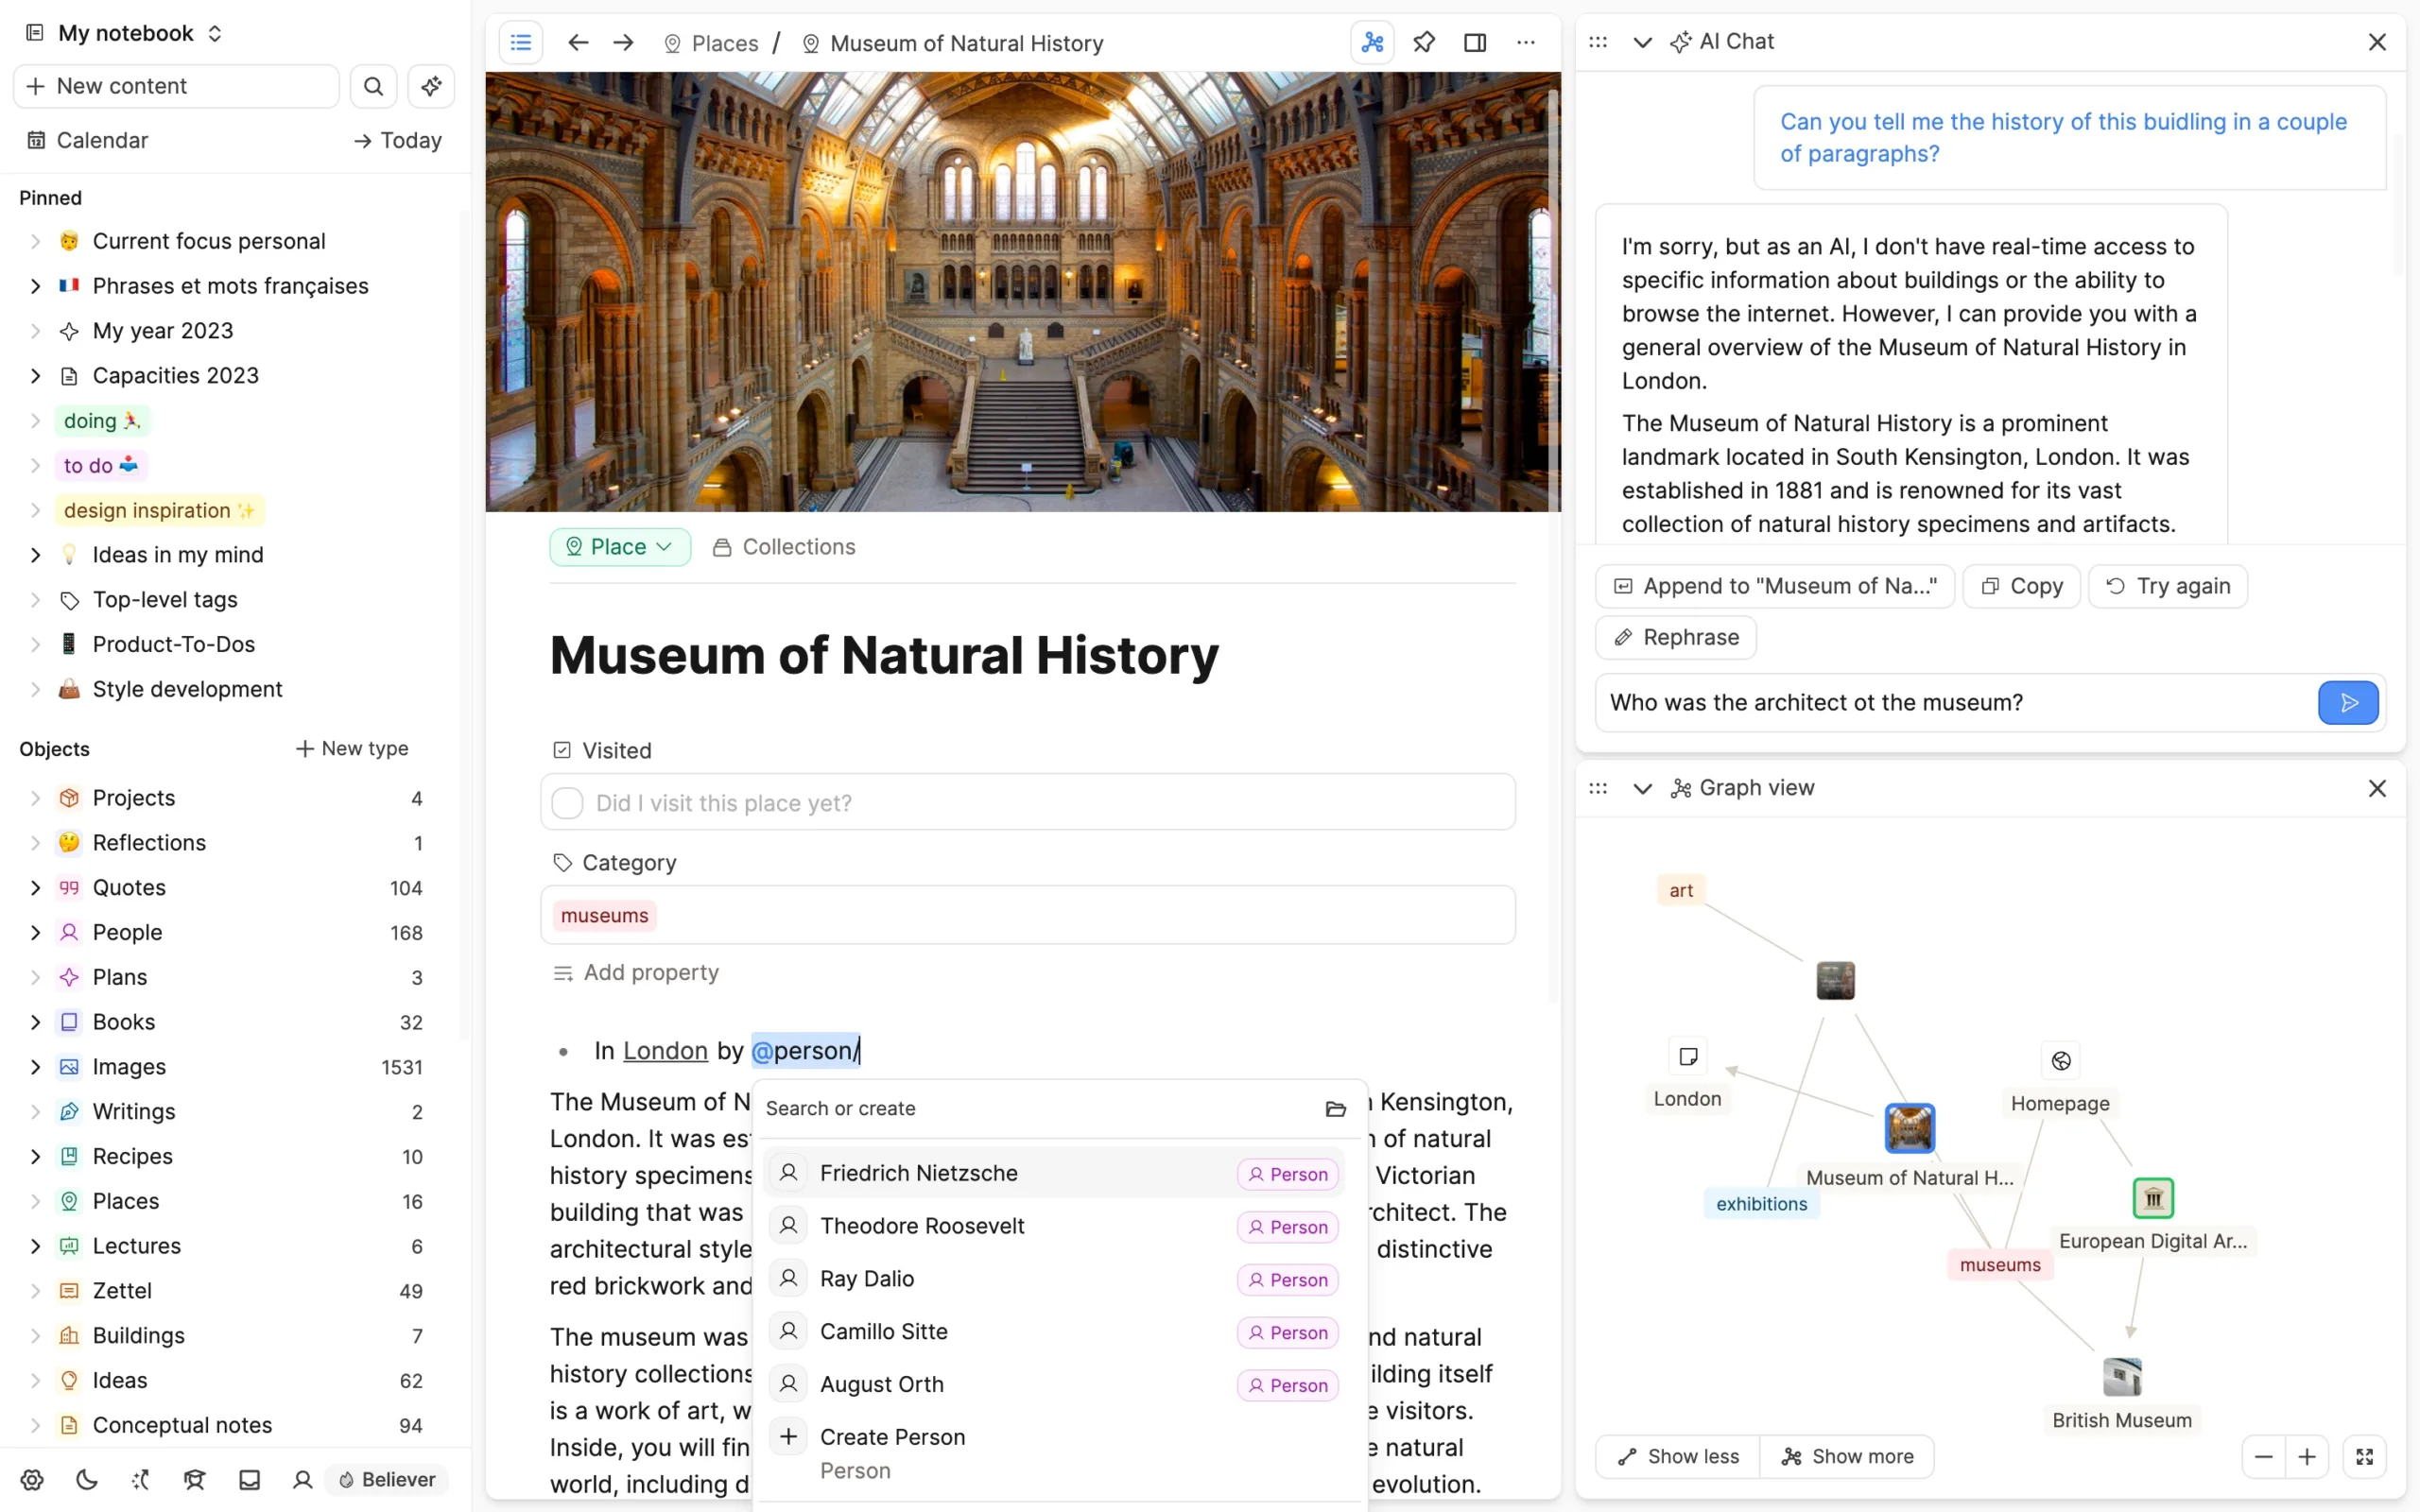
I won’t get into too much detail about this topic, but I do like to recommend a few tools and apps that helped me organize and plan my blog’s strategies. Basically, you can choose whatever works best for you, but if you don’t know any of the following, giving them a quick look won’t harm anyone.
For keeping notes, planning ahead, creating to-do lists, having a schedule and a calendar, and sometimes even writing my articles, there’s nothing that can easily beat Capacities. Unfortunately, its mobile app is not accessible by free users, but you can always visit it from its web-based version when you’re on the go. Another similar app is Notion, which is robust, filled with features, and has tons of options for anything that you may need.
If you’re looking for more advanced software, try Obsidian. It has tons of free extensions that you can install for more options and features, and local backups, and it’s basically used for various needs. If you’re looking for something simpler and faster, I’ll suggest Trello.
There are many different ways that you can organize and plan your new blog, including defining your blog’s purpose and goals, identifying your target audience, choosing a niche, planning your content strategy, finding the essential tools that you’ll be using, developing a solid marketing plan, monetizing your content, and more. You can also develop a marketing strategy once you find the perfect niche, and then it’s all about monitoring, adjusting, and staying consistent and patient.
For example, when I started TechWise Insider, the blog that you read right now, I specifically remember writing that one of my goals was to hit 100 visitors per day in the first six months, which is a good number for a new domain name without many published articles. Thankfully, it went to 150-170 per day, and sometimes even 200 daily visitors in the first six months.
Choosing the best blogging platform

There are many content management platforms (also known as ‘CMS’ or just ‘blogging platforms’) that you can choose from, starting with WordPress, the most popular and powerful of all. WordPress is the king of CMS platforms, and it lets anyone create professional websites without coding or previous experience in building websites.
While there are differences between WordPress.com and WordPress.org, in this guide, we will focus on self-hosted blogs, which use the WordPress version found in WordPress.org. We aren’t going to be talking about anything WordPress.com-related.
Other blogging platforms include Ghost, Drupal, Joomla, Squarespace, Wix, Medium, and even Tumblr for some (check here for the best WordPress alternatives). There are many others, such as the free Blogger.com platform from Google, which has stayed outdated. Medium is good, minimal, and has a huge community of readers, and many writers have made an income from the platform simply by publishing content.
What is WordPress?
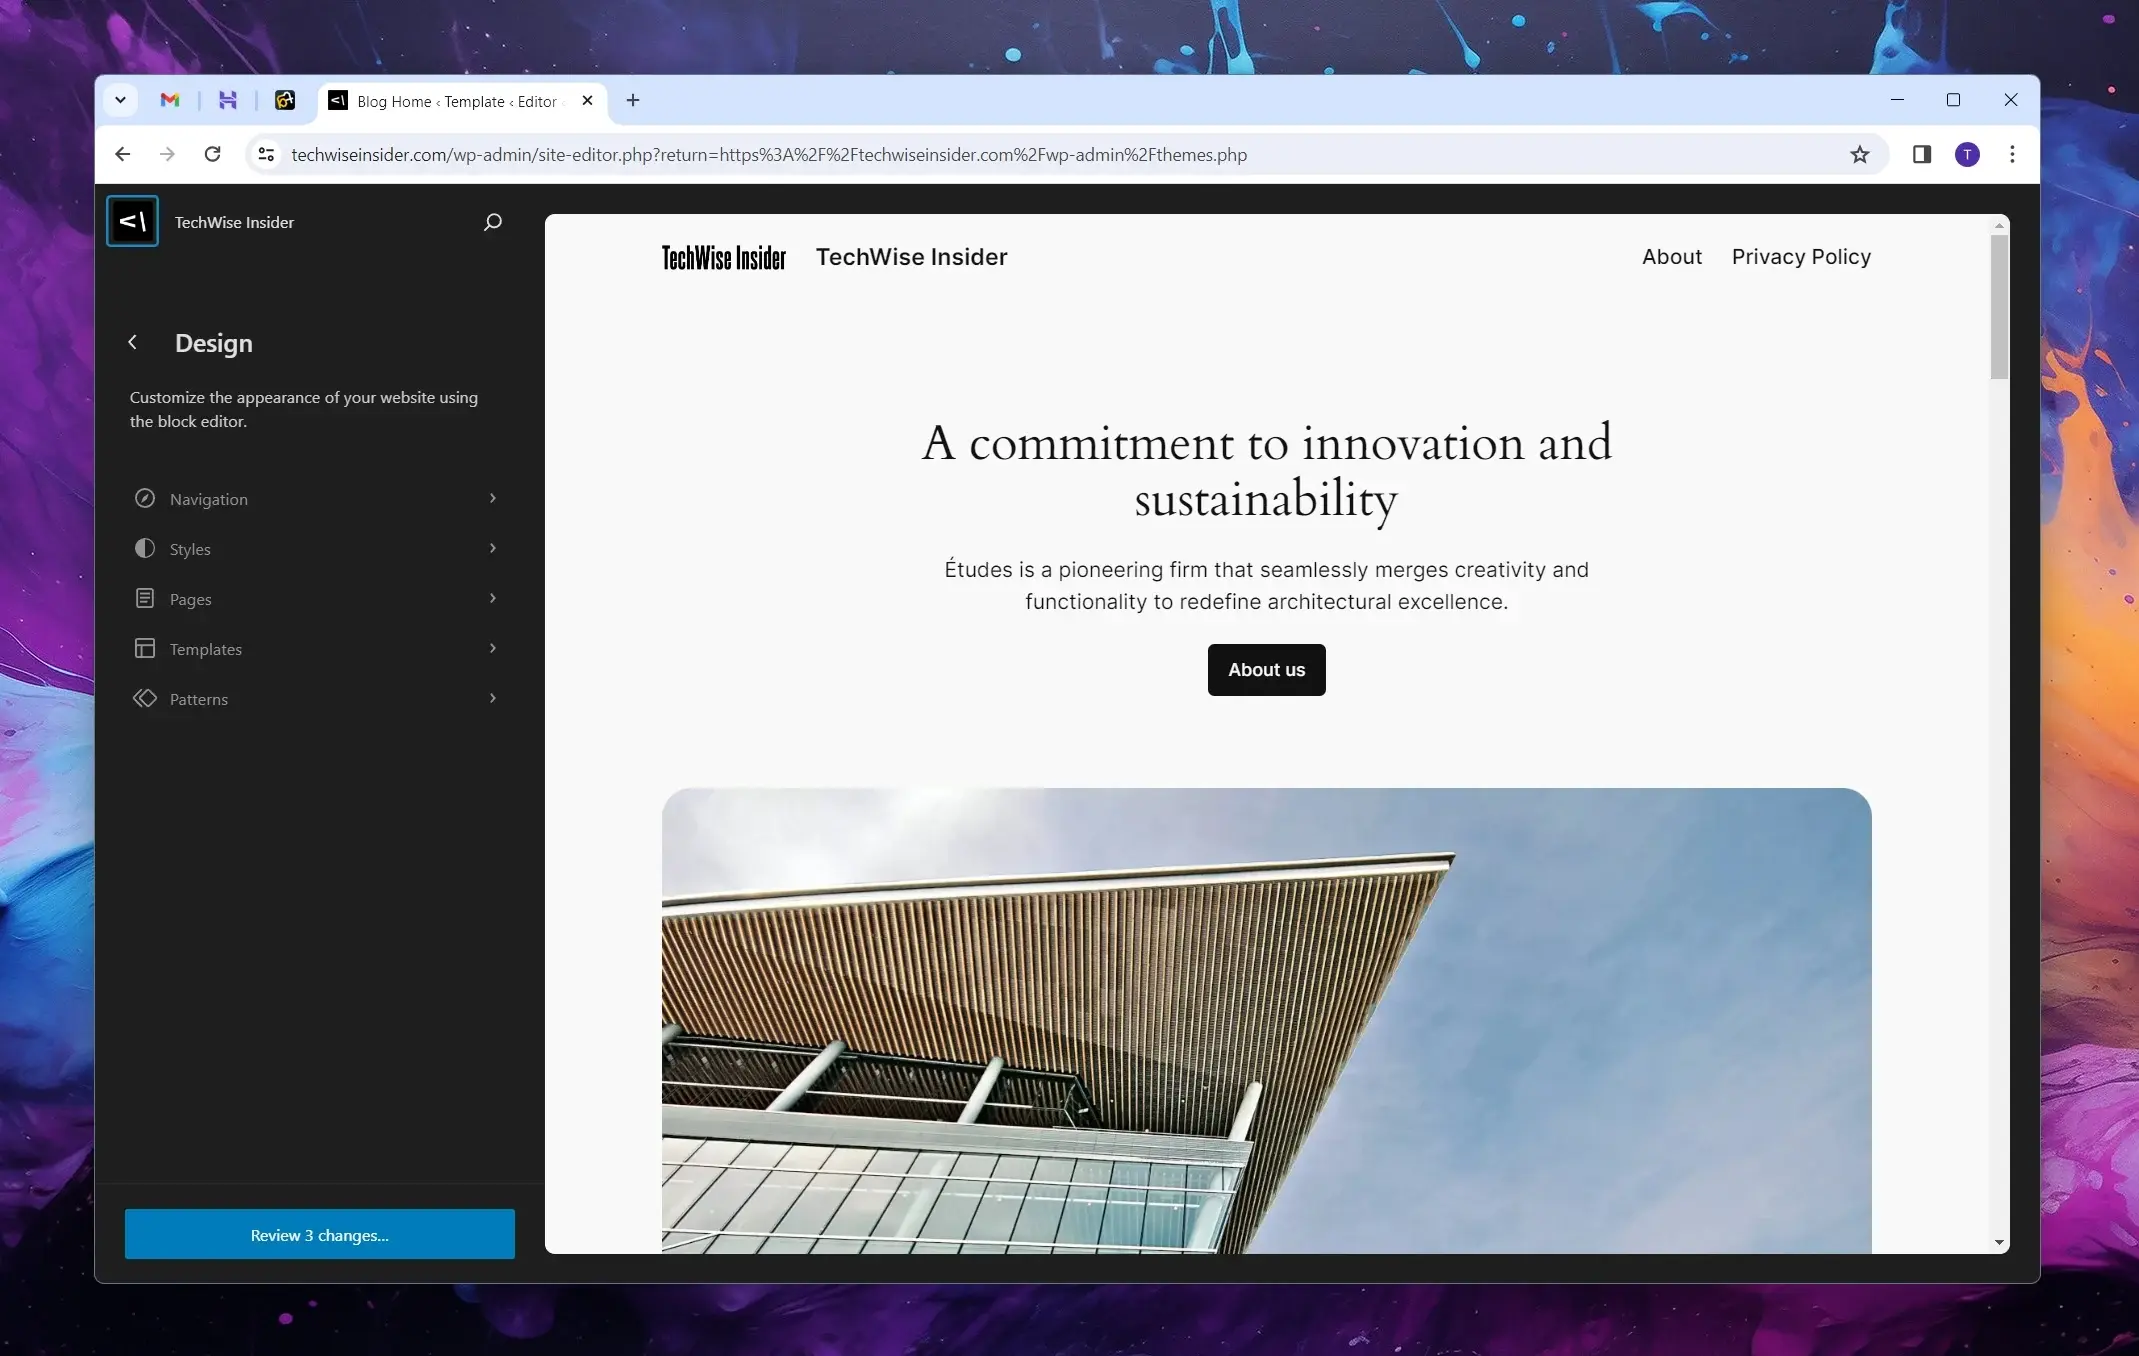
Simply put, WordPress is a content management platform that lets anyone create simple or professional websites without coding or having any programming skills. It’s an open-source platform, which means that people can see, edit, and use the platform’s code freely.
Anyone can download WordPress from WordPress.org and install it either locally on their computers for testing or on a server with a domain, two crucial parts of every website that wants to be accessible from anywhere.
In the past, installing and configuring WordPress meant that you had to learn some skills, such as manually creating a database, modifying the files you’ve downloaded, and adjusting them depending on your server. Nowadays, it is as easy as clicking a few buttons and getting it over with in just a few minutes (if not seconds, which is actually how long it takes for the installation to finish).
WordPress provides an easy-to-use interface from which you can create and design new blog posts, pages, categories, tags, and install themes (pre-made designs that you can use and customize as you see fit). You can also find and install hundreds of thousands of plugins for different purposes, such as creating contact forms, inserting social media share buttons, increasing your blog’s speed, adding recipes, and so much more.
What can I do with WordPress?
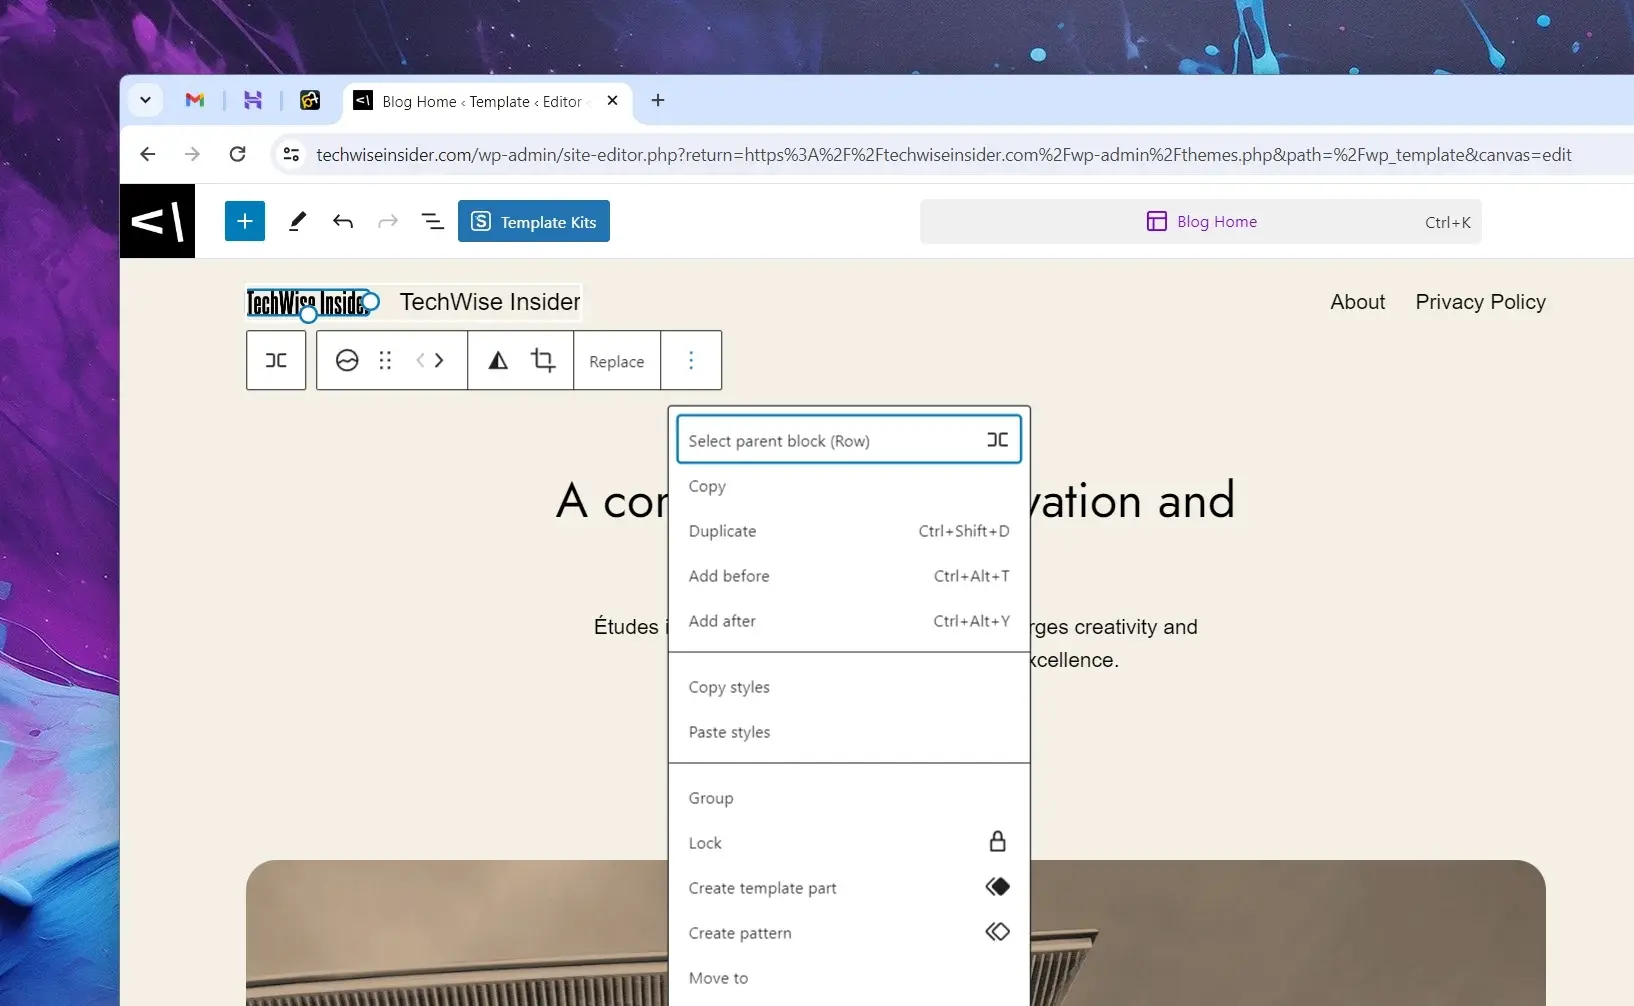
It doesn’t really matter what type of website you want to create; WordPress is probably the go-to tool to do that. Based on W3Tech’s usage statistics, WordPress is used by 43.1% of all websites, which is a content management system market share of 62.9%. But numbers shouldn’t matter for everyone, and you may find other blogging platforms, such as Ghost, simpler and better for your needs. So make sure you’ve done your research.
With WordPress, you can create a blog, and then later add a store, you can sell your courses, and maybe implement a forum to drive discussions and build a community. You can have a food blog, fashion blog, tech blog, or create a portfolio to showcase your skills and work. Want even more? You can combine all of them together.
And while WordPress provides Gutenberg, its own page builder for creating and designing pages for writing blog posts, there are many other page builders that you can use to design your website or blog. For example, some of the most popular page builders for WordPress at this moment are Elementor Builder, GeneratePress, WP Bakery, Beaver Builder, Divi Builder, and many more.
Some of them are premium plugins, but they are often included for free in many premium themes. While you won’t be getting any new updates automatically for those premium page builders, your theme’s developers should include their latest versions every time they update the theme.
Why I’ve chosen WordPress as a CMS
I’ve used almost any CMS or blogging platform there is out there, from the most popular to the least known. As a web developer, I know WordPress is the only platform where you can actually build anything you may want, even if you have no clue about how to code. Yes, it’s that good!
But if you’re looking at something simpler, easier, and without the need to purchase a web hosting plan and a domain name, Ghost is probably the best alternative for bloggers. It helps you focus on writing and creating high-quality content rather than trying to customize everything, finding where all the options are, and keeping up with all the security and speed issues.
The other big advantage that you get with WordPress is the community. WordPress has its own forum from which you can find answers to common issues and ask your questions. If you like, you can also take part in improving the platform by becoming a translator, pattern author, or anything that’s needed.
Here’s my profile on WordPress, where you can get an idea of how members are in WP.
Starting with a cheap but reliable hosting with a free domain
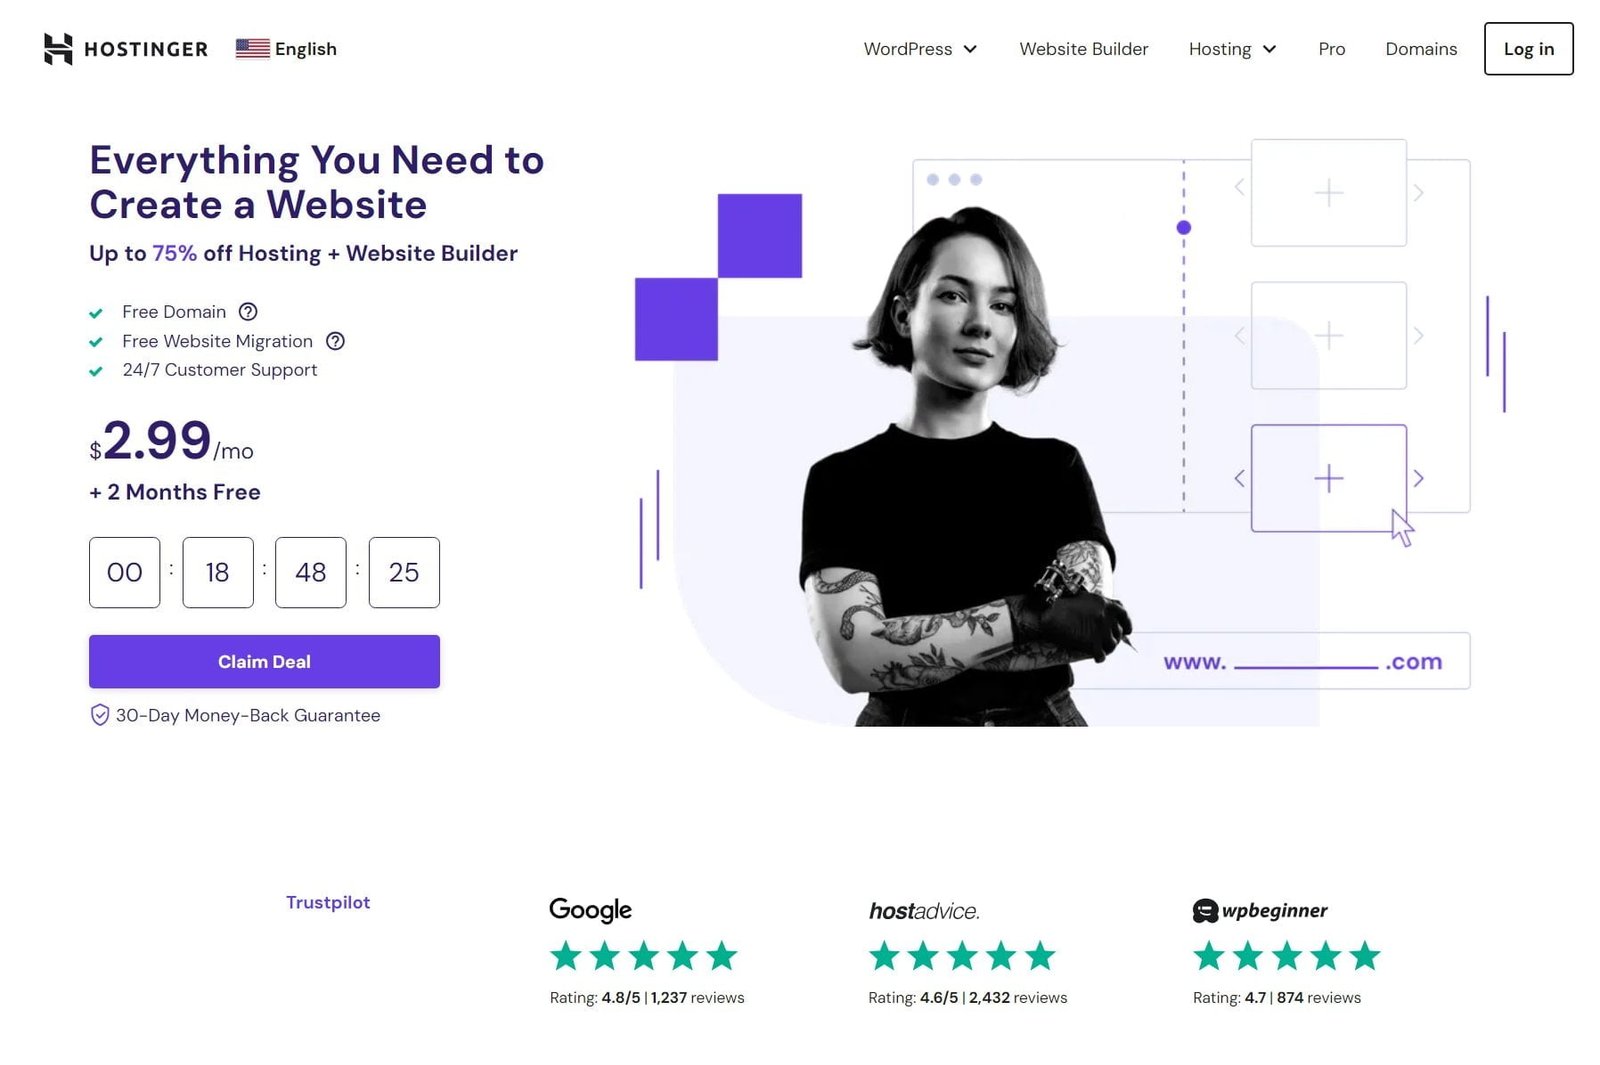
If you’re anything like me, then spending more money than you have to on an unreliable service isn’t an option. Unfortunately, when it comes to web hosting, and most importantly, WordPress Hosting, there are thousands of options, making it a bit confusing.
Now, like I’ve said before, if you’re using WordPress.com, Ghost, or any other blogging platform that doesn’t require web hosting, you won’t have to spend time searching for the right hosting company. But if you’re going with self-hosted WordPress, as most people do for apparent reasons, choosing the right hosting company is crucial when you’re a beginner.
What is Hostinger?
Hostinger is one of the world’s most popular web hosting companies – and for all the good reasons. For starters, it provides the fastest web hosting plans available, all of which run under LiteSpeed, a technology for which you can learn more here. They also have one of the most modern and robust environments for managing multiple websites, and their WordPress plans are optimized for ultimate speed.
While there are many great and very popular web hosting companies, Hostinger provides a 1-click installation for WordPress, fast and reliable servers, cheap plans that don’t cost a fortune, fast and friendly support, and it only takes a few minutes to get started. With all that in mind, I have many websites from clients running at this moment on Hostinger’s servers, and none of them have had any issues during all those years.
Popular web hosting companies to consider
There are many great options when it comes to WordPress hosting, and when it comes to stability, safety, and performance, there are a few companies that handle everything with ease. Here are some of the most popular and trusted web hosting companies in the world:

1. Hostinger (best overall)
Get 12 months for $41.88 (regular price $146.28), which includes 20GB of storage space, 2 mailboxes, and 3 WordPress installations.
2. NameCheap (fast and flexible)
Get ultra-fast and isolated in their own containers, servers that are affordable and stable.
3. BlueHost (popular and affordable)
One of the most popular choices for new bloggers and people who want to start cheaply and expand.
Although you can’t go wrong with any of them, looking at what each company provides and at what price range is crucial when choosing a web hosting plan.
For example, Hostinger focuses on providing cheap plans with high performance, and they get to do that by using the latest technology available, known as Lightspeed. It also provides lots of storage space and will automatically install the LiteSpeed plugin for you.
What are the WordPress Hosting plans?
There are many different web hosting plans that you can choose from. WordPress Hosting plans are servers that have been optimized for this specific CMS platform, with all the optimal settings for maximum speed and stability.
Hostinger is just one of the hundreds of web hosting companies providing their own servers specifically optimized for WordPress; many others do the same.
Now, don’t make the same mistake as many people do: A WordPress Hosting plan is not necessarily different from a classic Web Hosting plan. Both will give you the same options, but the biggest difference is that one has already been optimized for WordPress, while the other has to be optimized manually. For that, some web hosting companies may price their WordPress-optimized plans a bit more, while others don’t (Hostinger being one of them).
How do I choose the perfect hosting plan?
Choosing the right hosting for your needs can be pretty complex when you’re a beginner, but I’ll try to do my best to help you choose the best for your new blog.
But first, it’s important to note here that a server is more or like a desktop PC, laptop, or even a smartphone; The more you have, the better and faster it’s going to run, and the more people will handle (let’s say that people are apps that we install). A more advanced smartphone can run multiple apps at the same time without lagging, and a server can do the same with our users.
Thankfully, you have the same tech specs when it comes to servers, as you’ll need a good CPU (the more cores the better), RAM (the more the better), disk space for your files (depending on what website you’ll be creating), and bandwidth, which tells you how many visits your server can basically have every month (although bandwidth itself can’t really tell much).
So, how do you choose the right server for your needs? Well, here are the most important aspects that you’ll have to take a good look at before choosing a web hosting plan:
- Cores (CPU): The more cores your server has, the more people it will be able to handle and the faster it will run. A new blog should be fine with just 1 Core, while anything above will upgrade its speed and overall performance. 1.5 CPU is also presented in many web hosting companies for new blogs.
- RAM: The same goes for RAM, the more you have, the smoother your server will run, and more services can run at the same time without slowing it down. 1GB of RAM is enough for a new blog, and anything above this number will only make things better.
- Disk Space: The thing with storage when it comes to servers is simply that everything is being compressed, so you won’t have to worry a lot about it. Now a smartphone with 15GB of storage space won’t last you long, but a server can handle thousands of images with that space. Thankfully, web hosting companies like Hostinger (I’ll talk about it more as we proceed) will give you up to 100GB of storage space, which is more than enough even for professional photographers looking to upload high-quality images. Most companies will provide between 10GB to 20GB of storage space in their cheapest plans.
- Bandwidth: Nowadays, most web hosting companies provide unlimited bandwidth for their clients, and it’s basically how many people can visit your website per month. But even if you get unlimited bandwidth, that doesn’t mean that your server can handle an unlimited number of visits, as the CPU and RAM play a more crucial role here. You shouldn’t worry about bandwidth, except if it’s limited to less than 100GB per month, in which case you may experience problems after getting a few thousand visitors per month.
- Traffic Limitation: Many web hosting companies nowadays give you a hint on how many monthly visitors each plan can handle. While that specific number is not always correct, give or take 10 thousand visitors difference, it will help you better understand if it’s for you or not.
There are also different web hosting plans, some optimized to run specific CMS platforms such as WordPress or Ghost. Hostinger, for example, provides three WordPress Hosting plans that give you the ability to easily install and configure the CMS platform with a few clicks. They also automatically install the LiteSpeed Cache plugin, which is important as it increases our scores in Google PageSpeed Insights and overall site speed.
If you’re looking to create a WordPress website, choosing a managed and optimized server is important, as it will run faster and smoothly, and ultimately, an optimized server can handle more visitors without exhausting its resources. To increase the overall speed even more, decrease the amount of bandwidth, and avoid high server usage, I recommend going with a hosting plan that includes a CDN service. If it’s not, you can use CloudFlare as it’s free – but don’t expect your website to be flying like a rocket.
Last but not least, some web hosting companies have limitations when it comes to Inodes. Now, the thing about Inodes is that they’re crucial when it comes to web hosting, as they determine the number of files and directories we can store in our hosting account. Even if you have unlimited storage space and bandwidth, Inodes will play a more crucial role, as they can limit the number of files and directories that you can store.
Think about it this way: Each file you store on your server, whether that’s a file, image, video, folder, or email, is represented by an inode, so you can do your math. In other words, if you hit the limitation of your inodes, that means that you’ll be unable to upload any new files, and some of your blog’s services may not run properly.
Getting Started with WordPress
You can buy your first WordPress Hosting plan and domain name in the next few minutes, and it’s so easy and user-friendly that even kids can do it nowadays. It’s mostly choosing a plan, registering for an account, completing the order, buying a domain name, installing WordPress, and logging into your new blog.
In this guide, we will be using Hostinger, a very popular and well-trusted web hosting company that provides cheap, reliable, and fast WordPress Hosting plans. The company is also known for its fast servers, as it has optimized them all with the LiteSpeed technology, which will benefit your blog’s overall speed – and ultimately, will boost your rankings in Google and Bing. Apart from that, it gives us free SSL certificates and a domain name, has its own CDN, and has an automatic installer for WordPress.
Total Time: 5 minutes
-
Visit Hostinger’s WordPress Hosting plans

First, visit Hostinger and from the top main menu, go to WordPress -> Managed WordPress. At the top of the page, Hostinger usually promotes its new offers, so make sure you’ve checked that too. Scroll down until you see their available plans.
-
Choose a WordPress Hosting plan

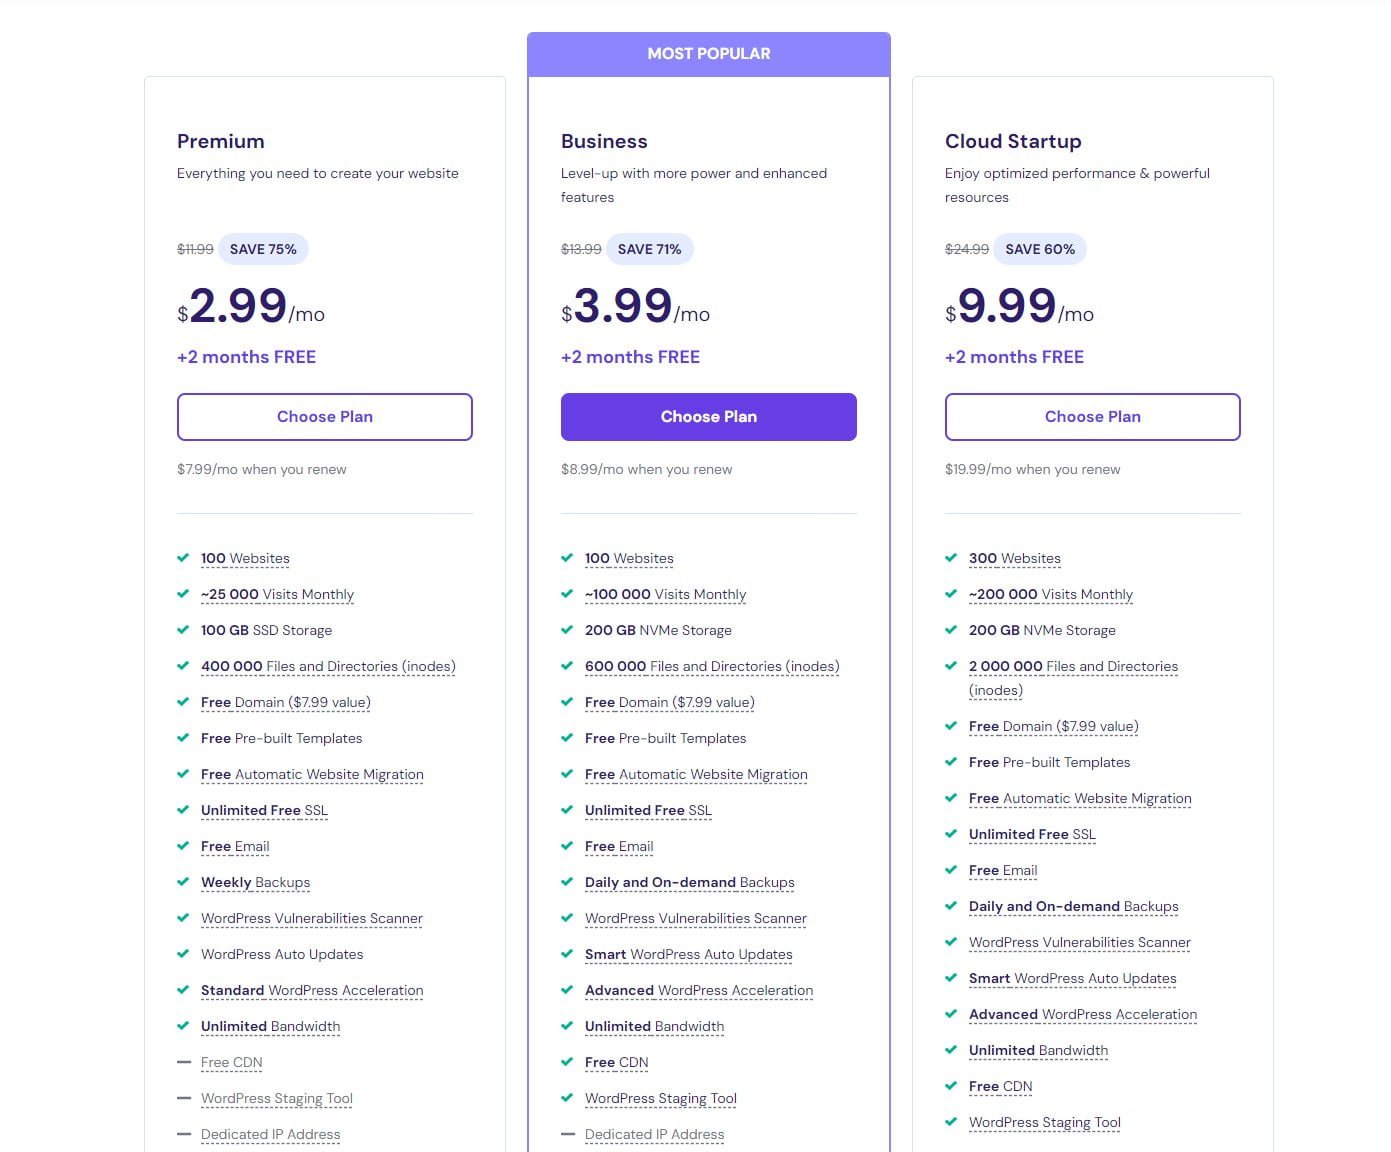
As of this moment, Hostinger has three different Managed WordPress Hosting plans: The Premium, Business, and Cloud Startup. To help new clients, they also give you a hint of the monthly visits that your hosting plan can basically handle every month. For this guide, I’ll choose the “Business” plan, as I want access to their CDN service. Click on the “Choose Plan” to proceed.
-
Select the pricing
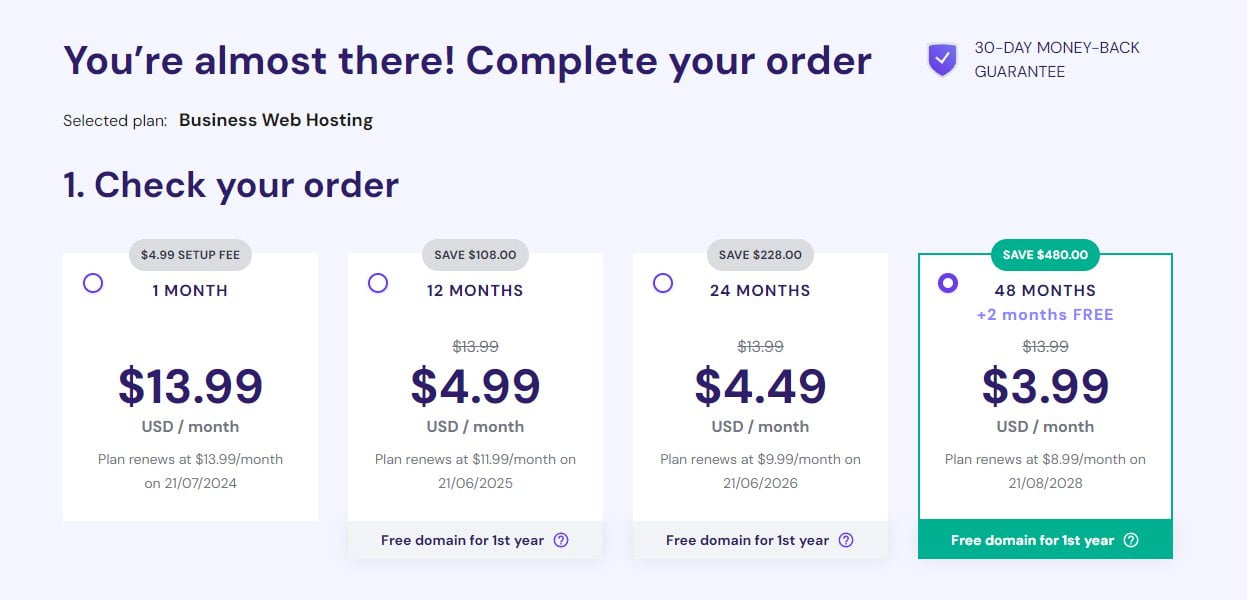
Hostinger gives an extremely good offer for new clients, which basically works this way: The more months you pay, the cheaper you’ll get your hosting plan. Now, you can pay for 48 months to get it as cheaply as possible, but if your plan is to pass the monthly visits limitation over this period of time, I’ll suggest either going with a bigger plan or choosing fewer months.
-
Create an account

Before proceeding to the payment, you’ll have to create a new account in Hostinger. To do so, you can either choose to register with your email account and provide a strong password or use Google or Facebook.
-
Select the payment method and complete the order
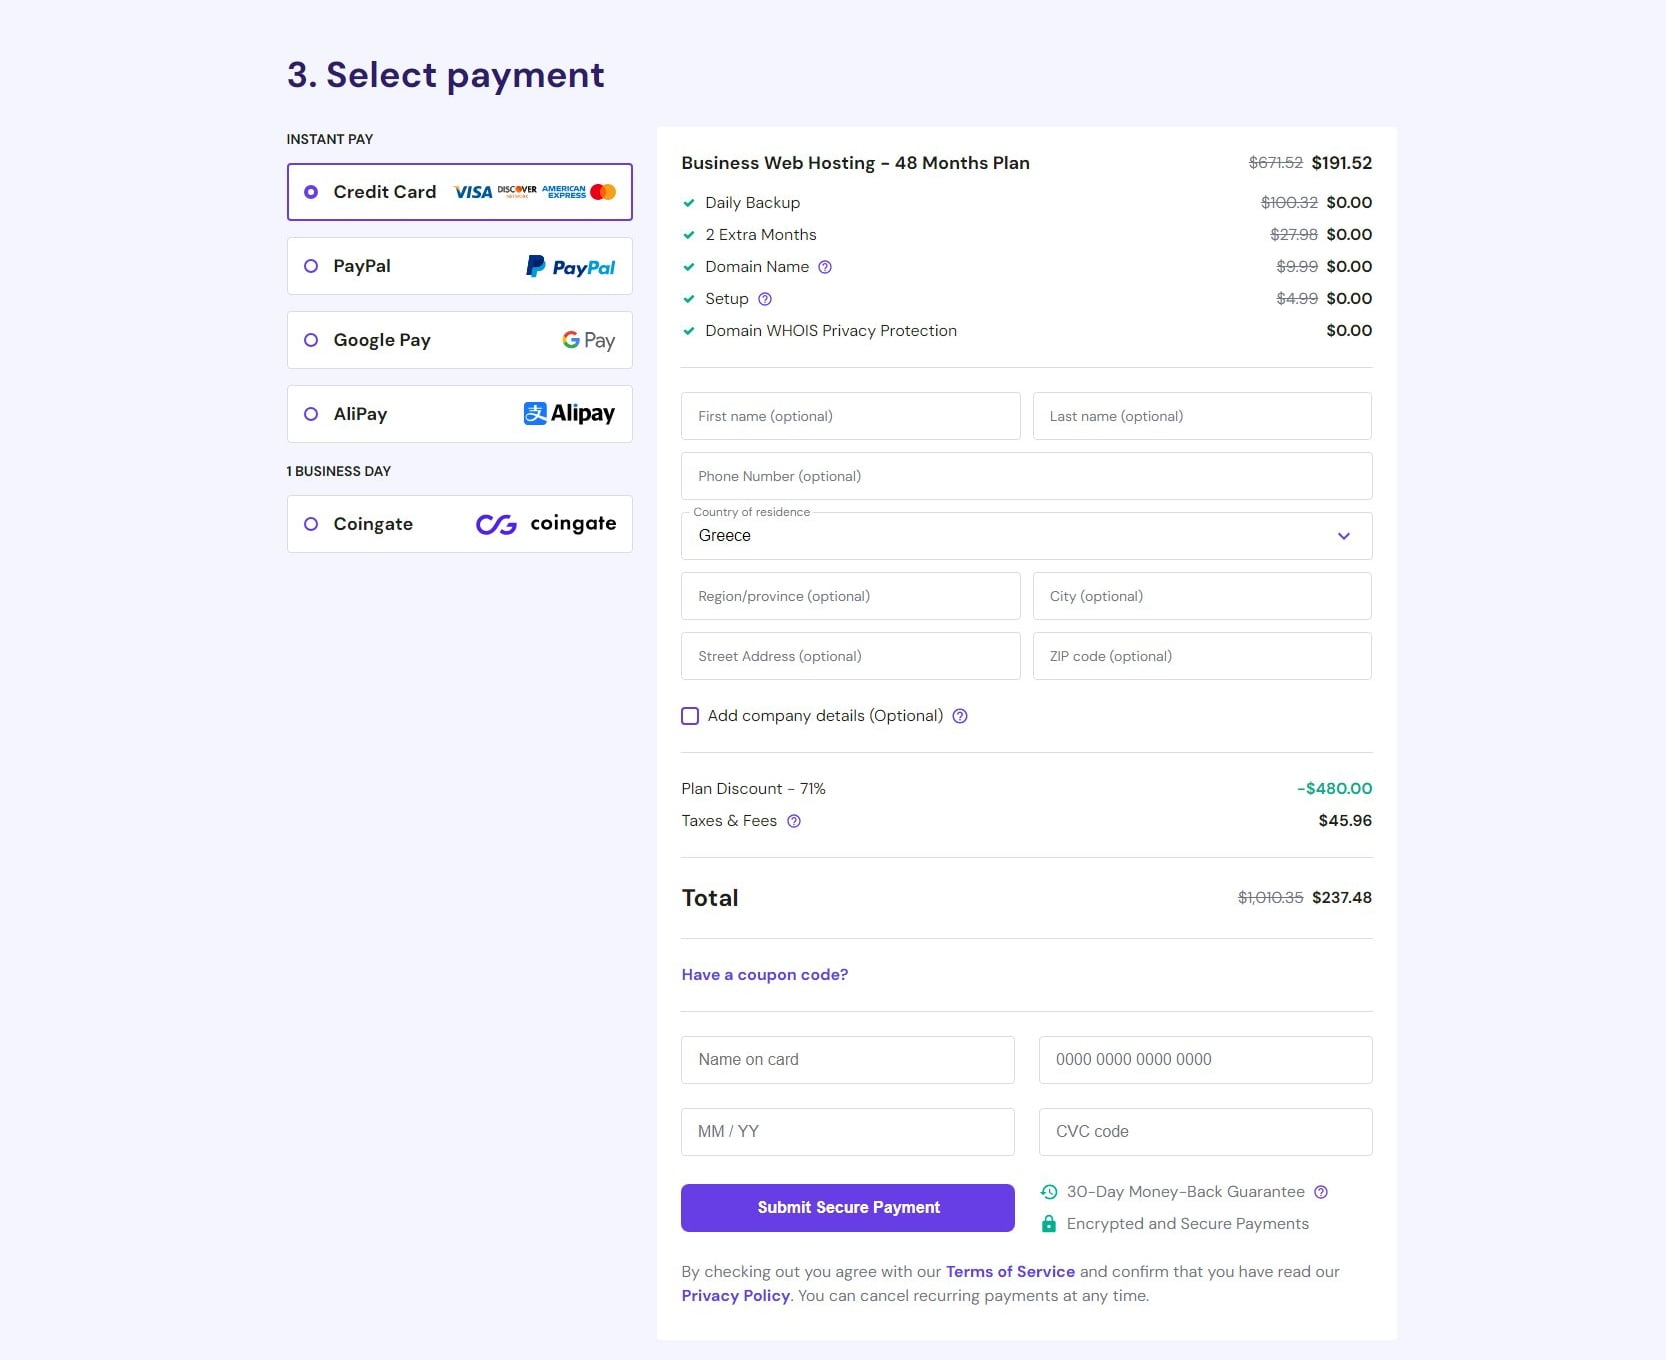
Choose a payment method, including using your Credit Card, PayPal, Google Pay, AliPay, or Coingate. Fill out all the fields with your information, add the coupon code INKSTORY to get a small discount, and complete the order.
-
Login and start the WordPress Installation
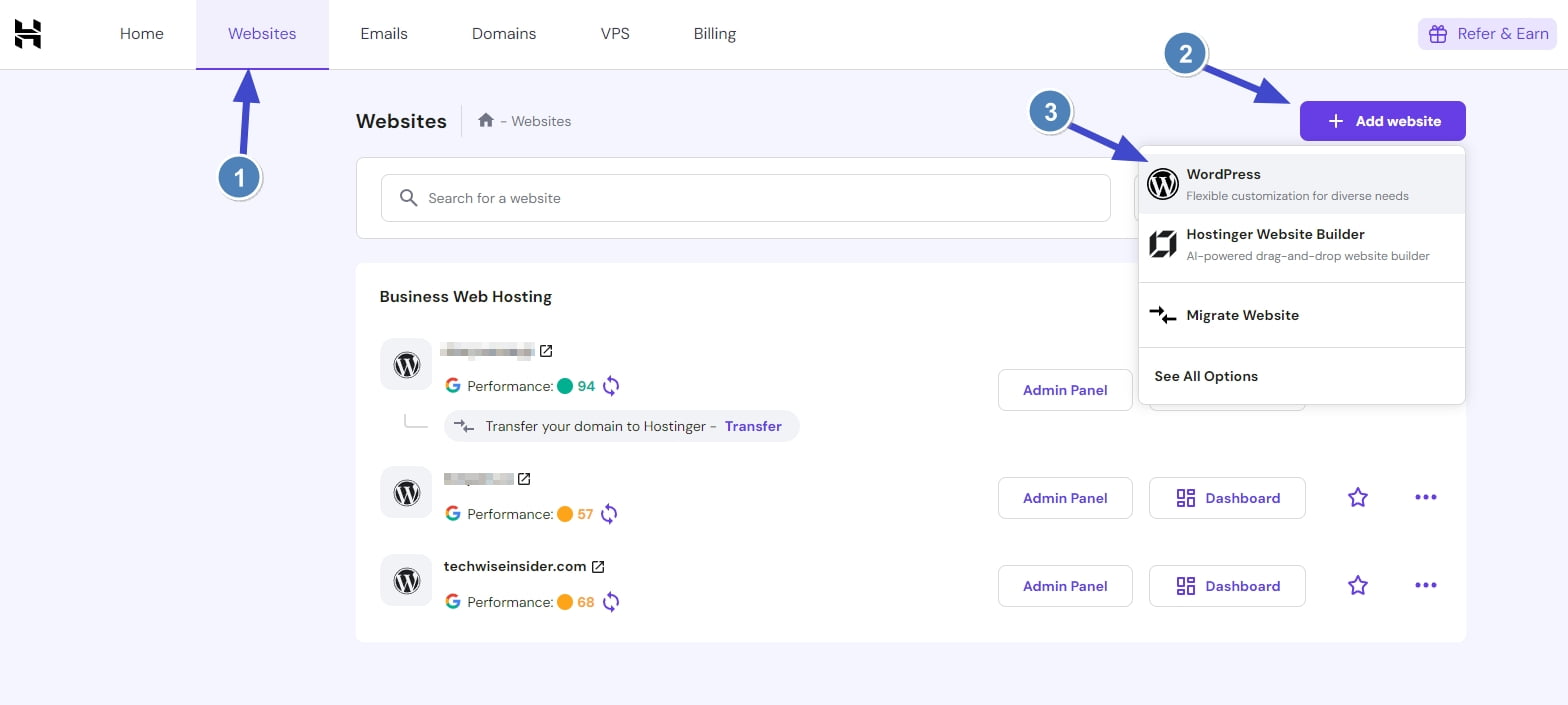
Go back to Hostinger and log in to your account (if you’re not already logged in). The platform will automatically redirect you to the WordPress installation, but if it doesn’t, simply head over to Websites and click on the “+ Add Website” button at the top right corner.
-
Create your WordPress blog login details
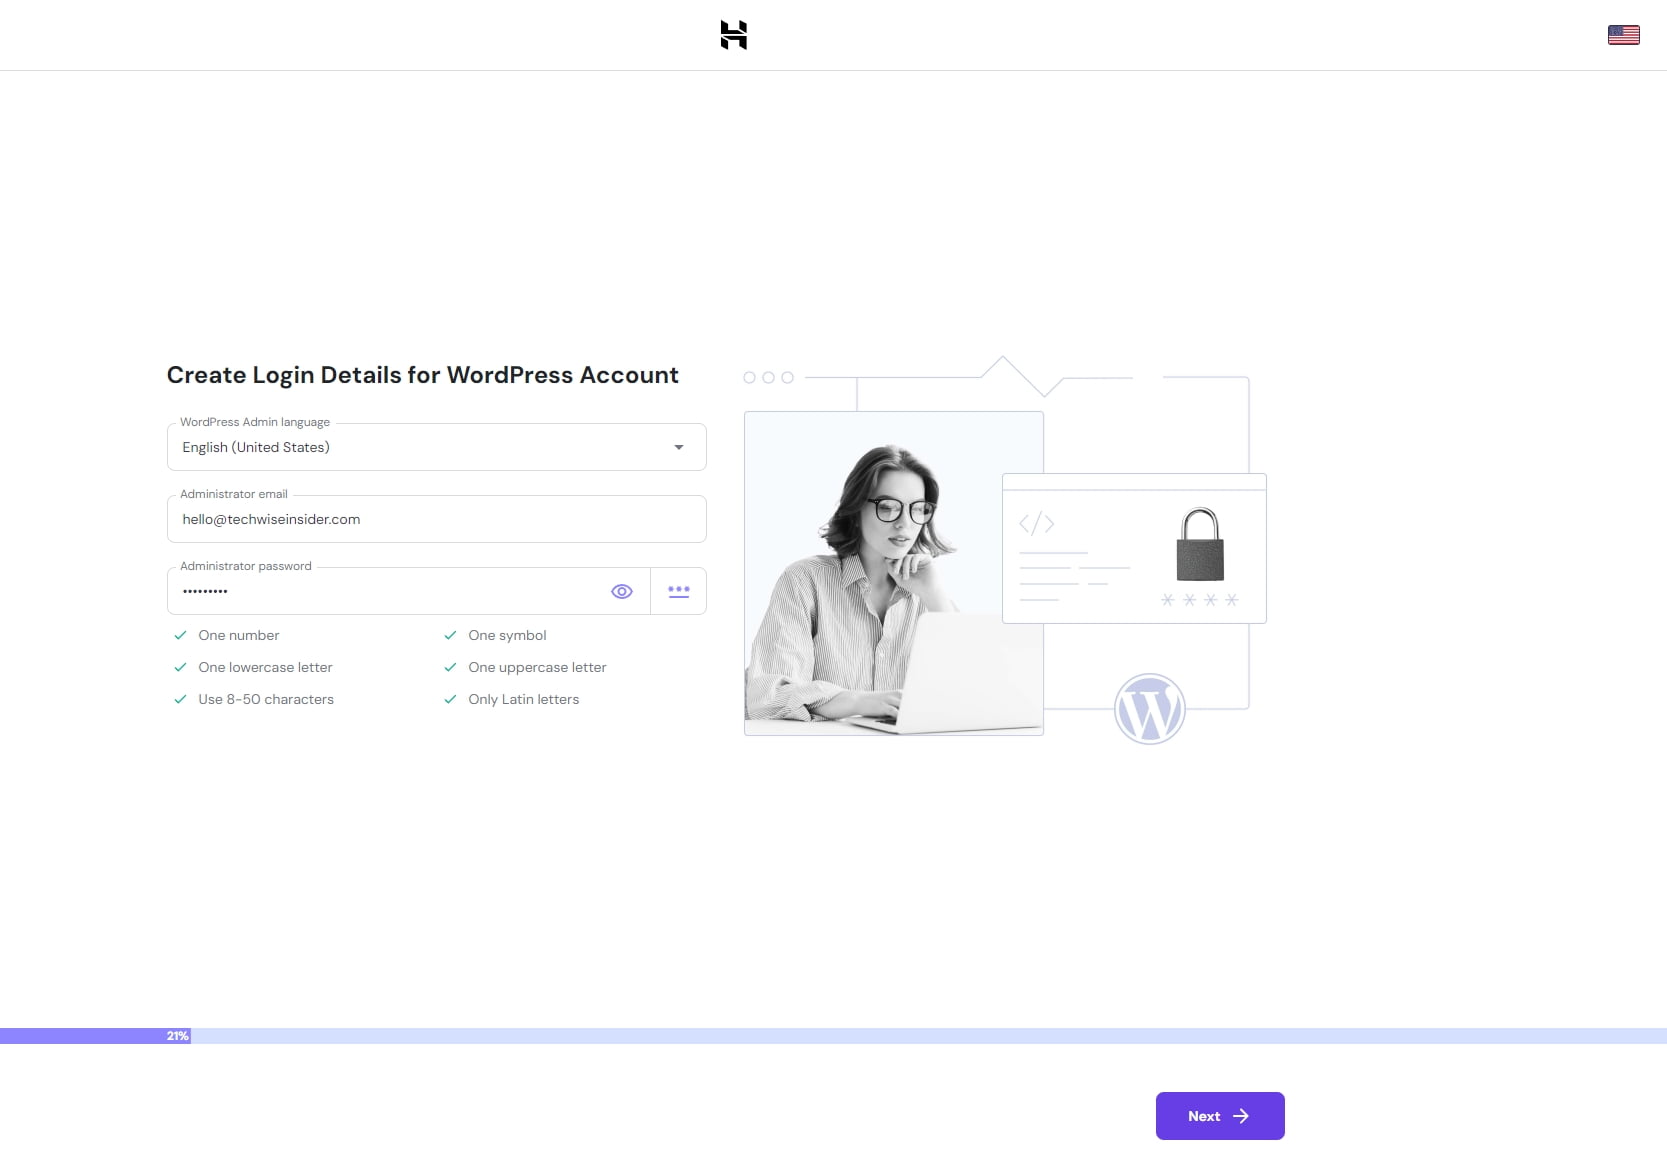
Select the preferred language you want WordPress to be installed with (you can change that at any moment), and add an administrator email and password, which you’ll be using every time you want to log in to your blog. Once you are done, click on the “Next” button to continue.
-
Choose the type of your WordPress website
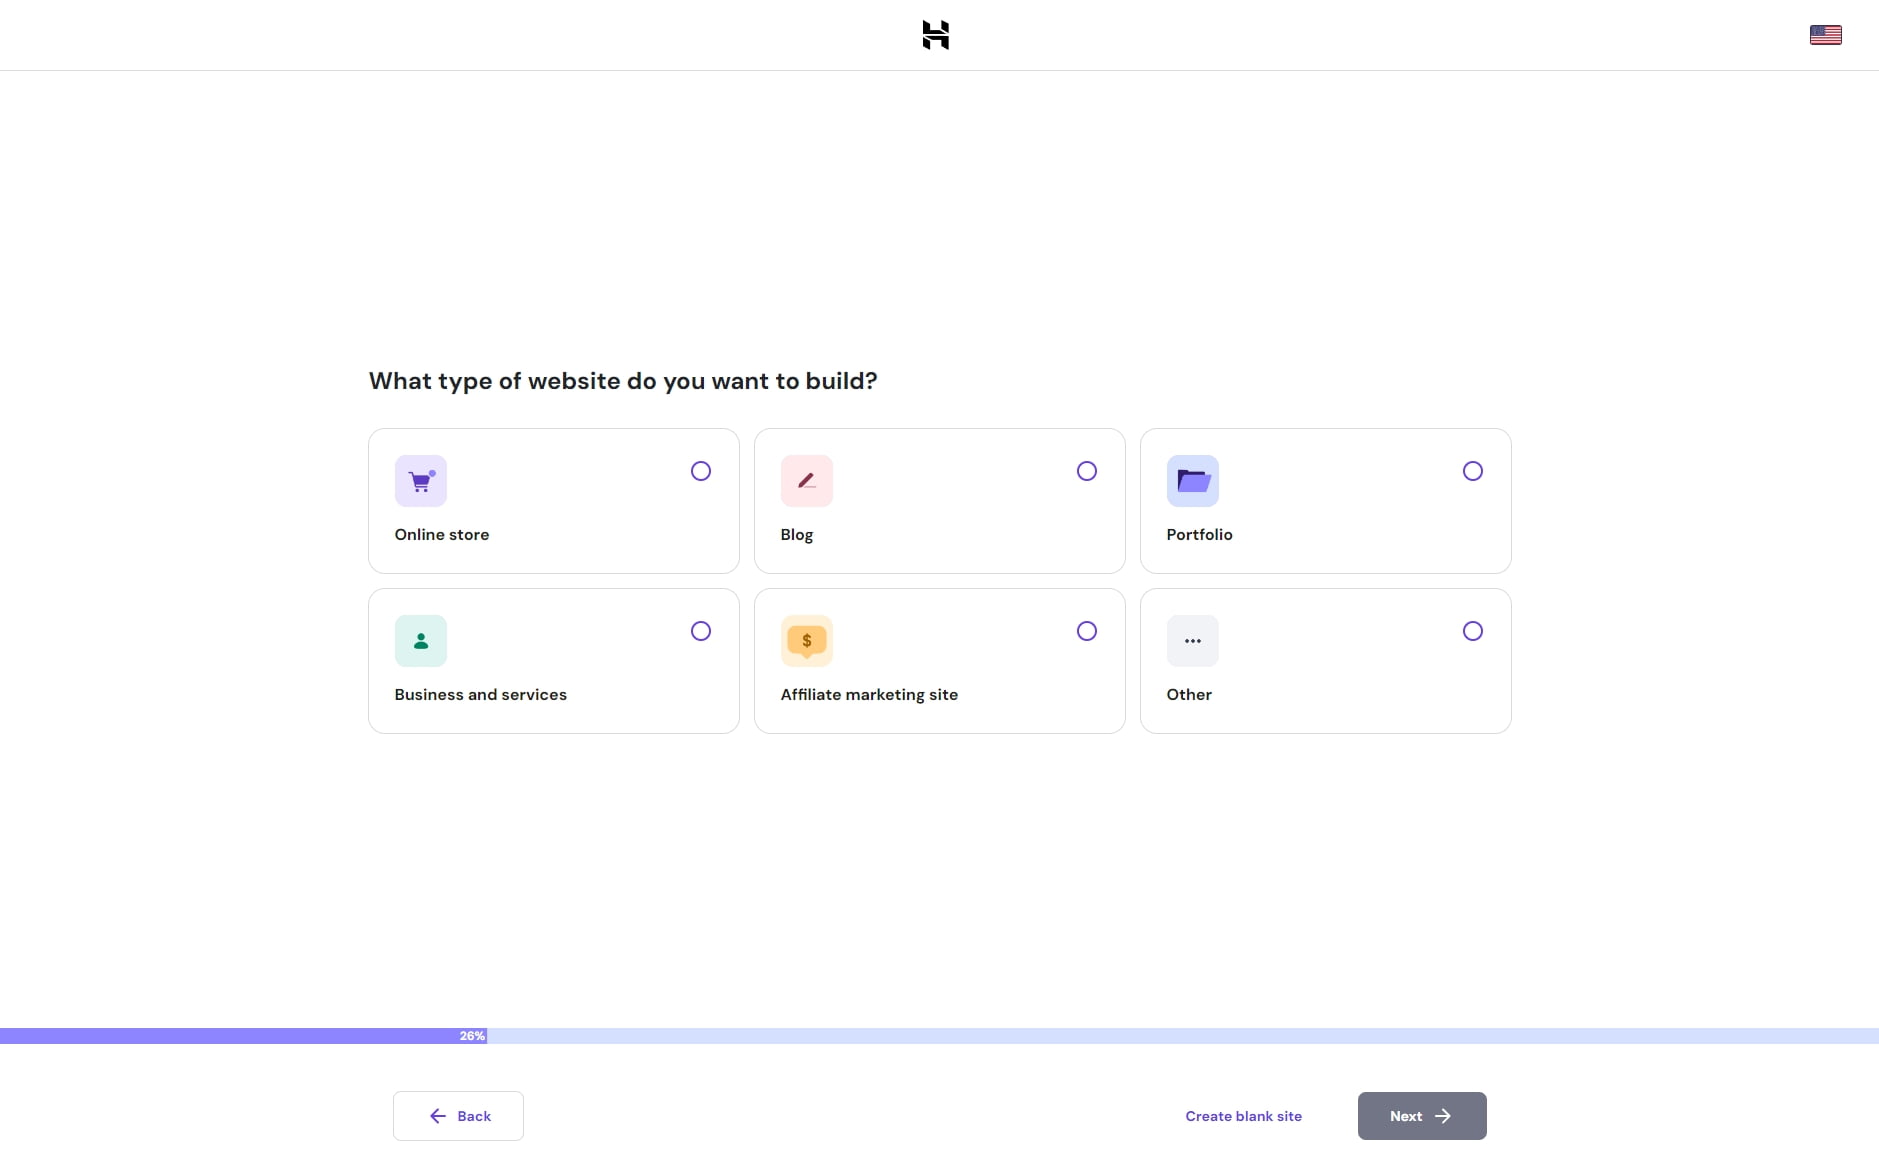
Hostinger can optimize your WordPress website for specific uses, such as selling online, publishing a blog, creating a portfolio, etc. We’ll skip that and click on the “Create Blank Website” option.
-
Buy or connect a domain name
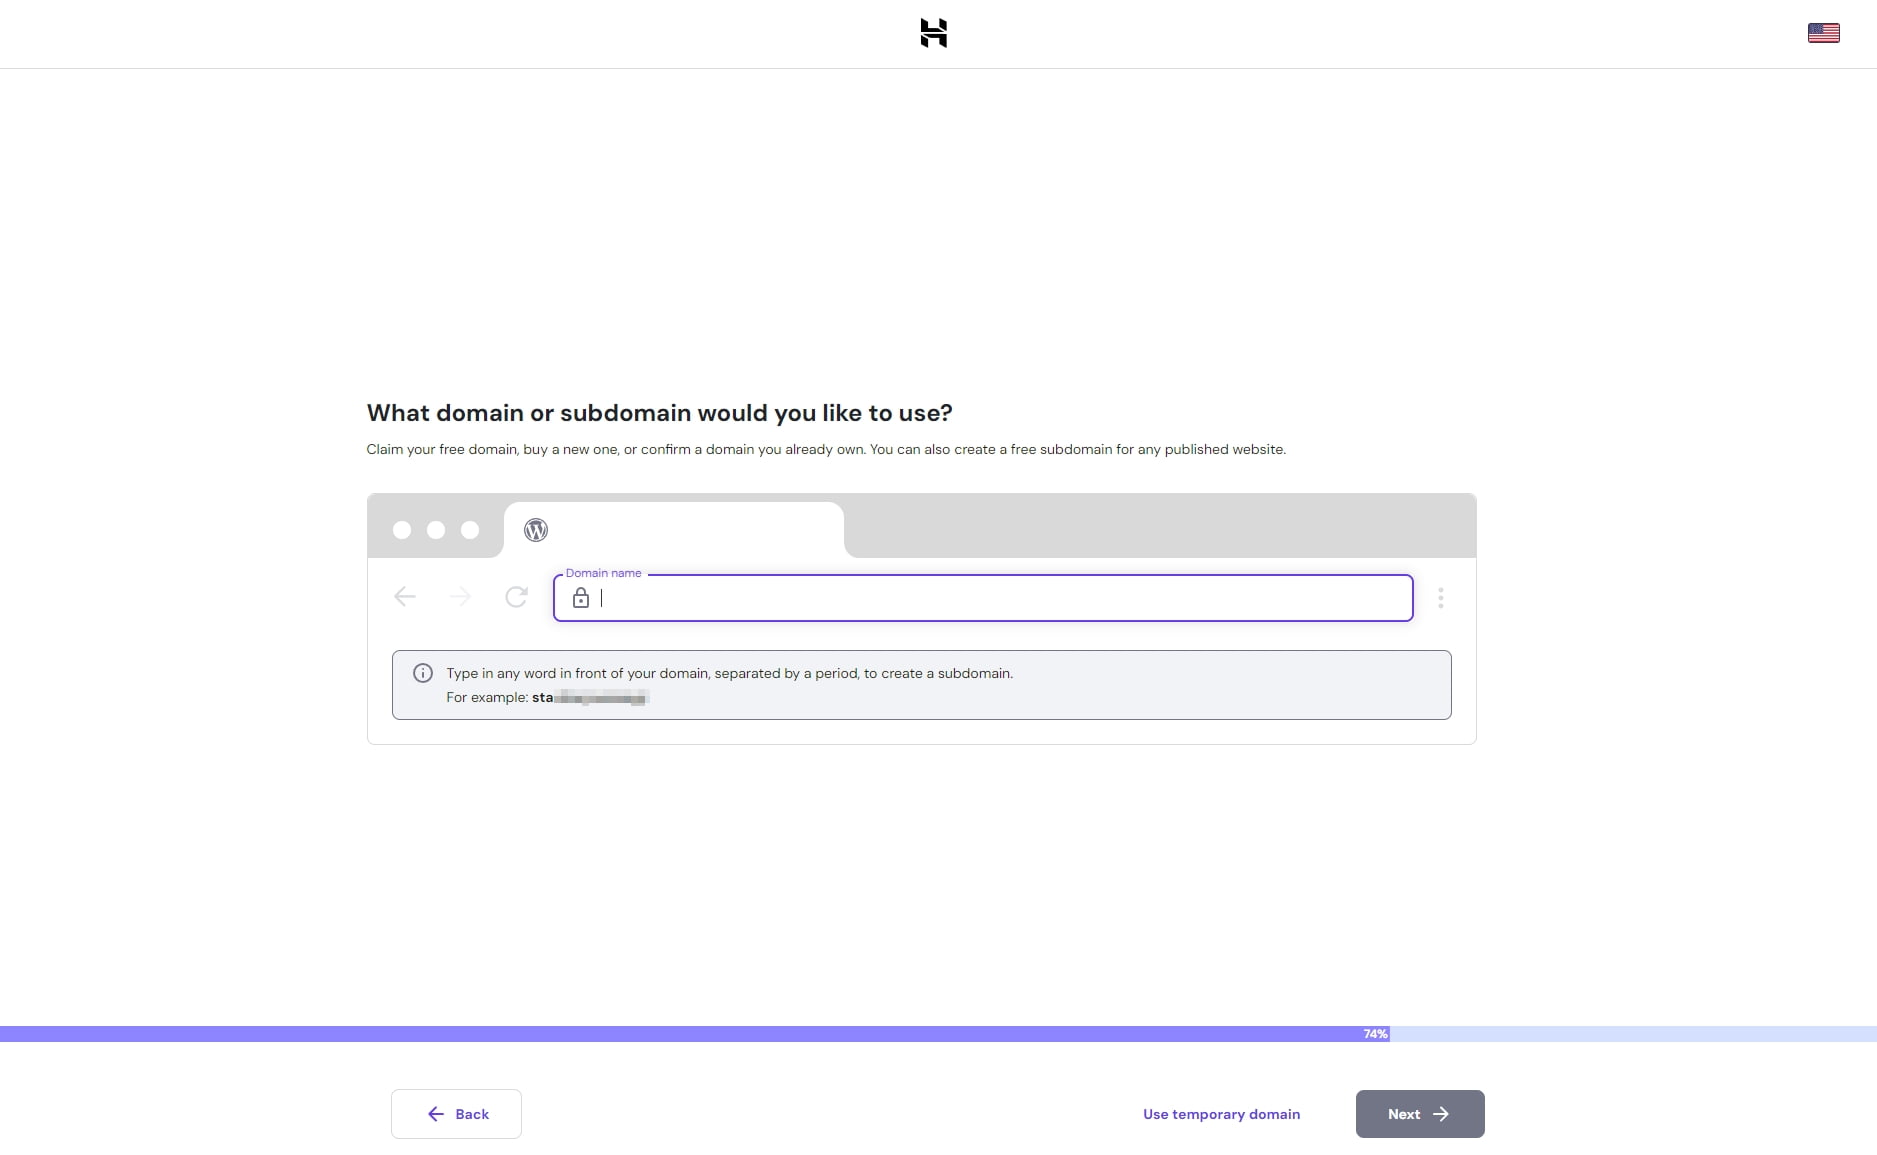
Hostinger will show you a field from which you can search for available domain names that you want to buy, or even choose the one that you’ve already bought from another company and connect it afterwards by adding the nameservers. Simply search for a name, and if it’s available, select it and click on “Next” to continue.
-
Wait until the WordPress installation is finished
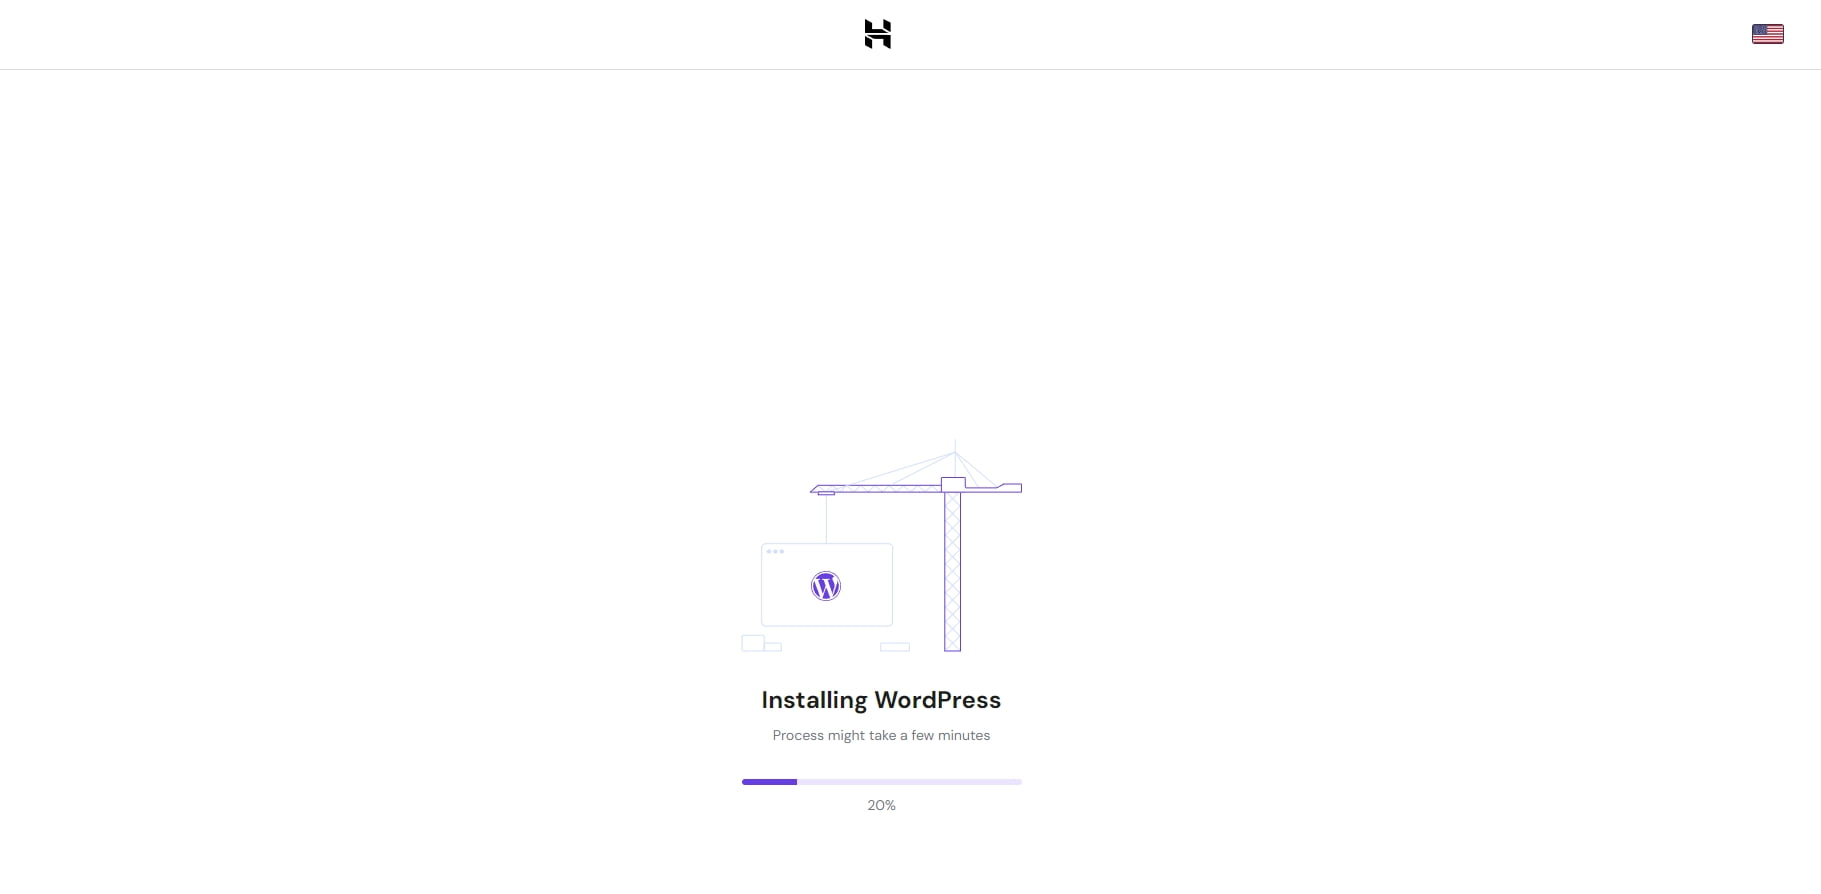
Hostinger will start automatically installing WordPress on your hosting account, and it should only take a minute or two. If you just got a new domain name, it may take a few minutes until you’re able to see and log in to your blog, so be patient.
-
Log in to your new WordPress blog
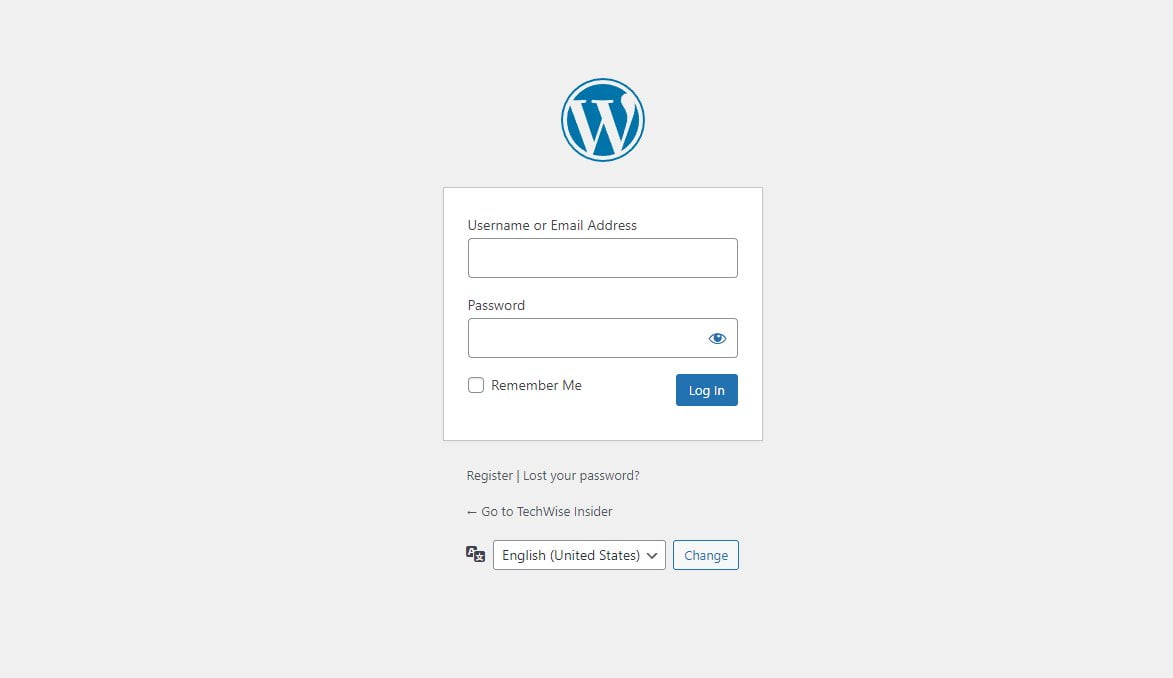
Once the installation has been completed, you’ll be able to log in to your new WordPress blog. To do that, simply add your domain name in the browser’s address bar and at the end add /wp-admin or /wp-login.php (it’s the same).
If for example, you bought the “example.com” domain name, simply visit “example.com/wp-admin“.
Note: If you just bought a new domain name and you’re unable to access your new WordPress blog, it may be due to the domain name. New domain names will take a few minutes to get working properly, and Hostinger is giving you a domain name “status” in your account that you can check to see when it’s ready for use.
Designing a logo and favicon, and choosing a color palette

Before launching our new blog, it’s important to first create a few things, including a logo which we will be using both on our blog and social media pages, a social media cover, and a favicon that will be displayed in our address bar whenever someone visits our website.
Now, you can pay a professional to design your new logo and favicon, but nowadays, with the right tools, you can create it by yourself. Although you won’t be able to create the same complex designs a professional would have using software such as Adobe Illustrator or Photoshop, you can get a great and high-quality result from other tools, too.
For your logo, favicon, social media cover, and anything else, I would totally recommend going with Canva, as it’s easy to use, you won’t have to get the premium subscription if you’re happy with the free one, and it has tons of pre-made templates to get ideas or start with a base.
I would also totally recommend checking the Color Hunt website to find the perfect colour palette. There’s a huge list of available colour palettes that you can choose from and get inspired for the colours of your logos, covers, and even your blog’s theme. What I like to do is try different colour palettes or combine them in order to find the perfect combination of colours for my blog.
The size of your logo will depend on your new blog’s design, while the favicon is usually 512x512px. If your theme supports dark mode, you should create two versions of it, one for darker backgrounds and one for light backgrounds.
Choosing the perfect theme
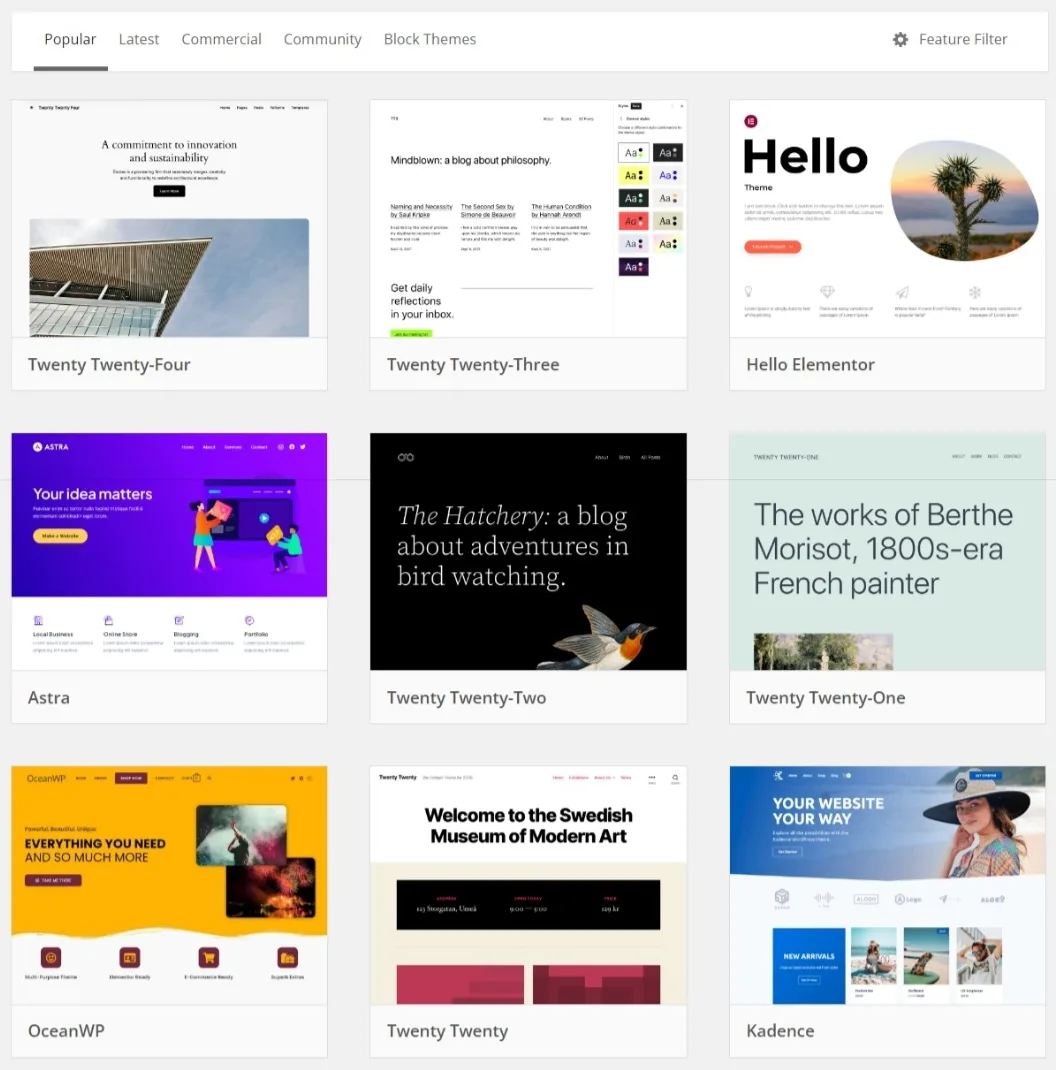
Themes (or templates) are basically pre-designed websites that you can install on your WordPress blog, customize them by changing every little detail, and use them with ease. Every theme has its pros and cons, with free themes being basic while premium themes usually come with tons of options and features, and some are fully SEO-optimized.
There are multipurpose themes and niche themes, with the first being those who are looking at creating different types of websites or have a plethora of customization options, while with the second option, we get themes that have been designed for specific purposes, such as for food blogs, tech blogs, fashion blogs, etc.
Niche themes are better when you have a specific niche, and they are usually faster because they only include specific options and features, while Multipurpose or Magazine & Blog themes are heavier but more customizable and flexible.
Most themes also use some kind of website builder to provide all those options and make the customization easier than ever before. The most popular website page builders for WordPress as of this moment are Elementor Builder, Gutenberg (the default builder by WordPress), GeneratePress, WP Bakery, Beaver, and more. Most of them are pretty easy to use and every theme gives you an import method to quickly get started with everything set up and ready.
Free and Premium WordPress Themes
If you’re looking for free themes, you’ll find a huge list in the official WordPress Theme directory. You can access the same page and install any theme with 1-click by logging in to your blog and going to Plugins -> Add New Plugin.
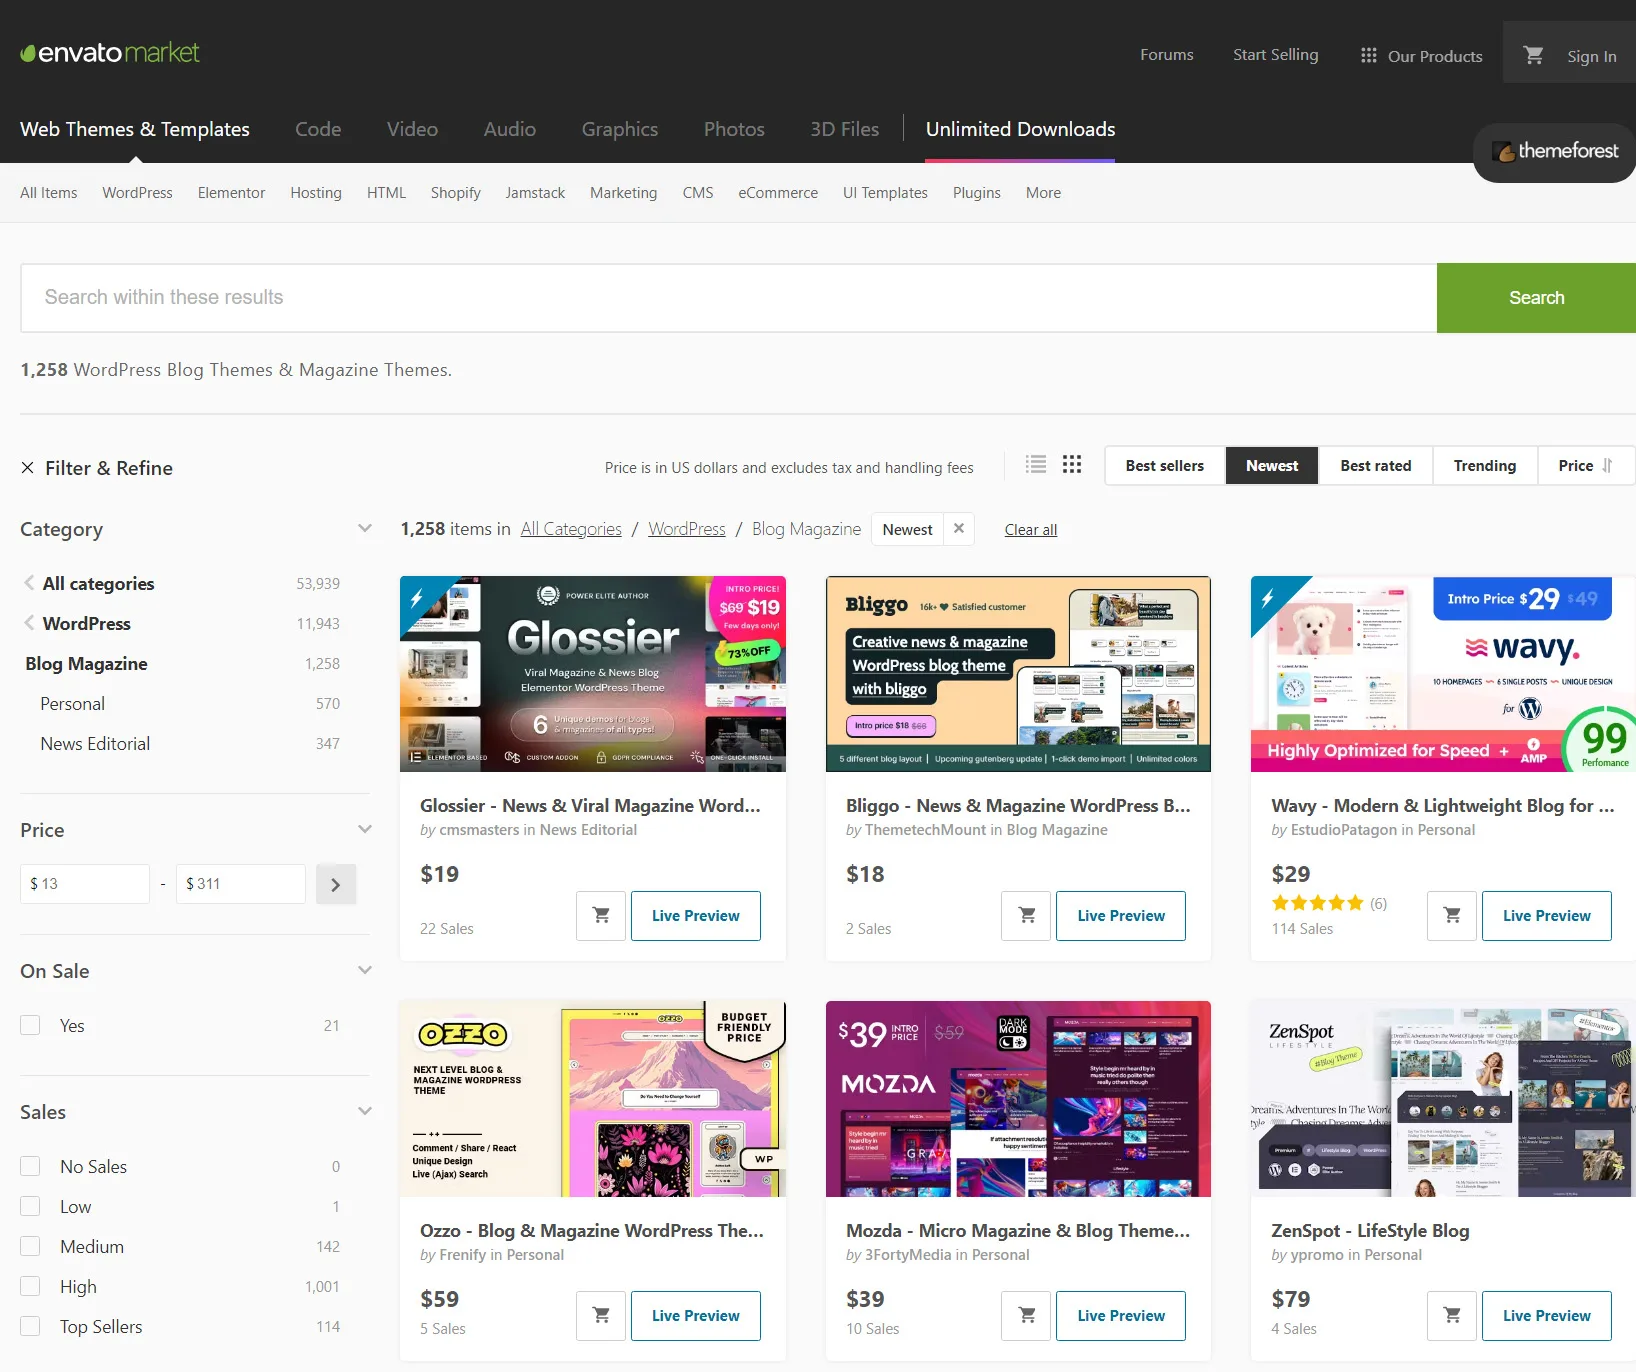
Envato’s ThemeForest is one of the most popular marketplaces for buying themes for different platforms, including WordPress, so make sure you take a good look there too. If you want something unique, you can always use Gutenberg to build your pages, and there are tons of tutorials that will help you get started.
There are many other marketplaces to buy premium WordPress themes, including Creative Market, TemplateMonster, Elegant Themes, and StudioPress, just to name a few.
WordPress theme customization tutorials
Jamie Marsland has a YouTube Channel from which he shows how anyone can easily build any kind of website by replicating popular websites using the Gutenberg editor, and the guy is simply wonderful. His videos are so good and pleasant to watch that even I, a developer with over 15 years of experience, love and find them very inspiring.
There’s also The Admin Bar (check the YouTube Channel), which is perfect for anyone looking to create unique and professional websites using GeneratePress, a great and easy-to-use website builder, which I’m also using. Kyle Van Deusen is such an inspiration and such a kind guy who knows exactly how to explain every little detail that you’ll need to take your designs to the next level. He also has a big community on Facebook, which you can use to ask questions and take part in the discussions.
Create your blog’s basic pages
Every blog has its own important pages which are used to help its visitors find more information, contact, navigate the content, or even download any files. There are also welcoming pages with the most important links, pages for terms and conditions, and your privacy policy, and sometimes landing pages with call-to-actions to gain more subscribers.
Here are a few pages that every blog should have:
- Contact Page: This can be a very basic page that only includes your email, or you can even add a contact form with your own options and fields.
- About Page: This is where you write about your blog, the topics you’ll be covering, what this is all about, and maybe a few words about yourself. It’s probably the most difficult page of them all, but it needs to be done right.
- Privacy Policy Page and Terms & Conditions: To make your life a whole lot easier, you can use a Privacy Policy Generator; there are plenty of free ones out there.
- Press & Media Page: If anyone has written or mentioned you in their content, you can add that to this page, and also provide a ‘Press Kit’ with your logos, covers, and anything that may help the press learn about you.
- Welcome Page: A “Welcome Page” usually contains a short description with your logo and buttons with links to all of your important pages. It can also display your latest posts and comments.
- Landing Pages: Depending on your niche or the topics that you’re going to be covering, you may want to create various landing pages for different purposes. For example, can you create a landing page for your newsletter, one with affiliate products or services, and even promote your own work? You should then link to those pages as often as you can.
Some may have even more pages, including a Comments Policy page, a Portfolio showcasing their work, a Shop page with affiliate recommendations, services that they may provide, and much more. You can create as many pages as you want, as long as they have a purpose and they’re on point.
Create the main Pages, Categories, and Menus
Every blog should have its own menu that its visitors can use to navigate through the content with ease. The menu should include your main categories and tags, important landing pages, and pages such as the Contact, About, Privacy Policy, etc.
How to create pages in WordPress
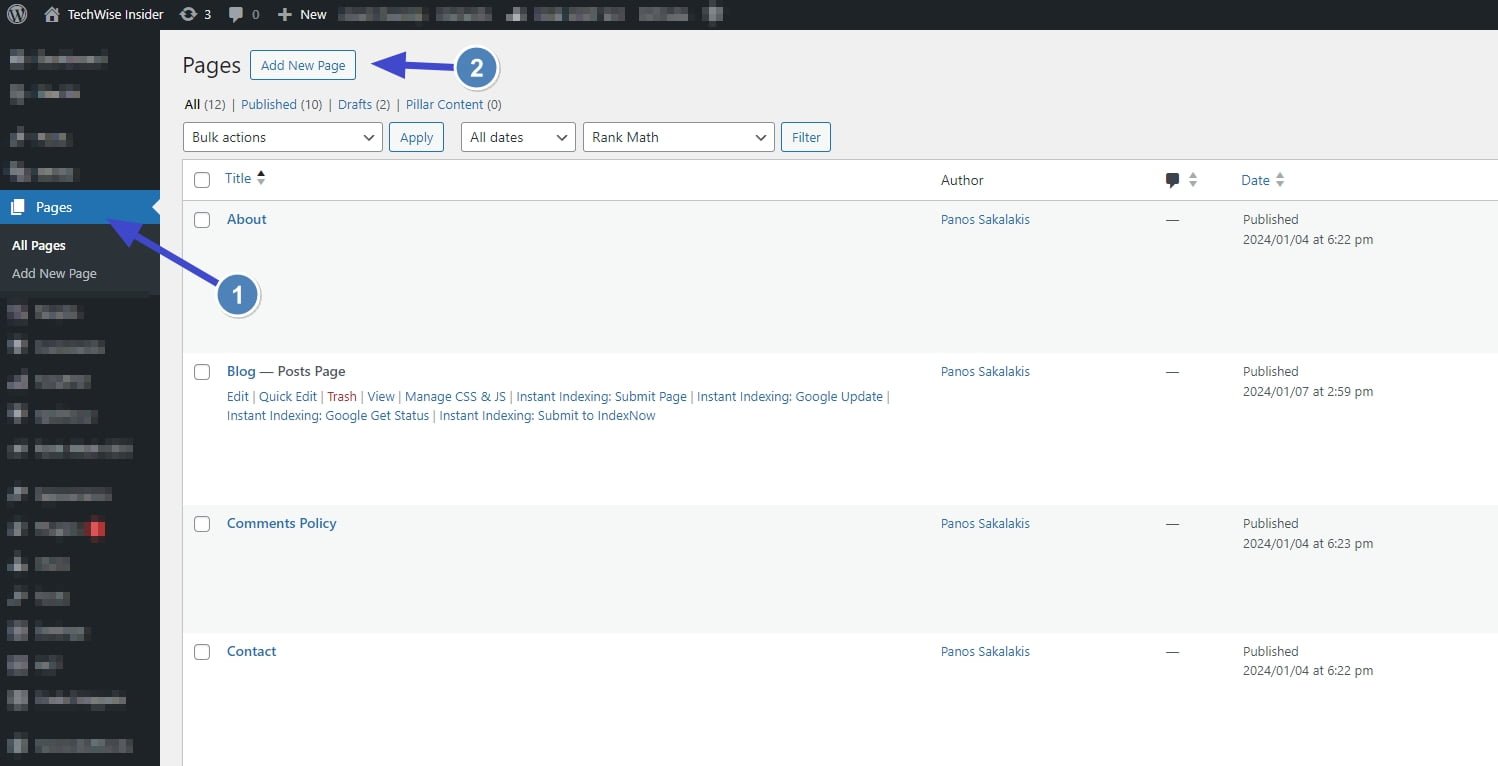
With WordPress, creating your pages is easy and straightforward. From the Admin dashboard, simply head over to Pages and click “Add New Page“.
You’ll be prompted into the Gutenberg editor. Add a title to your page, and just below, you can add any blocks that you want to customize your page, including paragraphs, images, videos, quotes, podcasts, headings, columns, lists, and so much more. The whole editor is based on blocks, so adding them, replacing them, and moving them around it’s all part of the “game”.
Tip: To add a new block, simply move your cursor in the Gutenberg editor, and you should see the “+” icon. Click on the icon and select the block you want to insert. You can also click on the “+” icon in the top left corner of the editor.
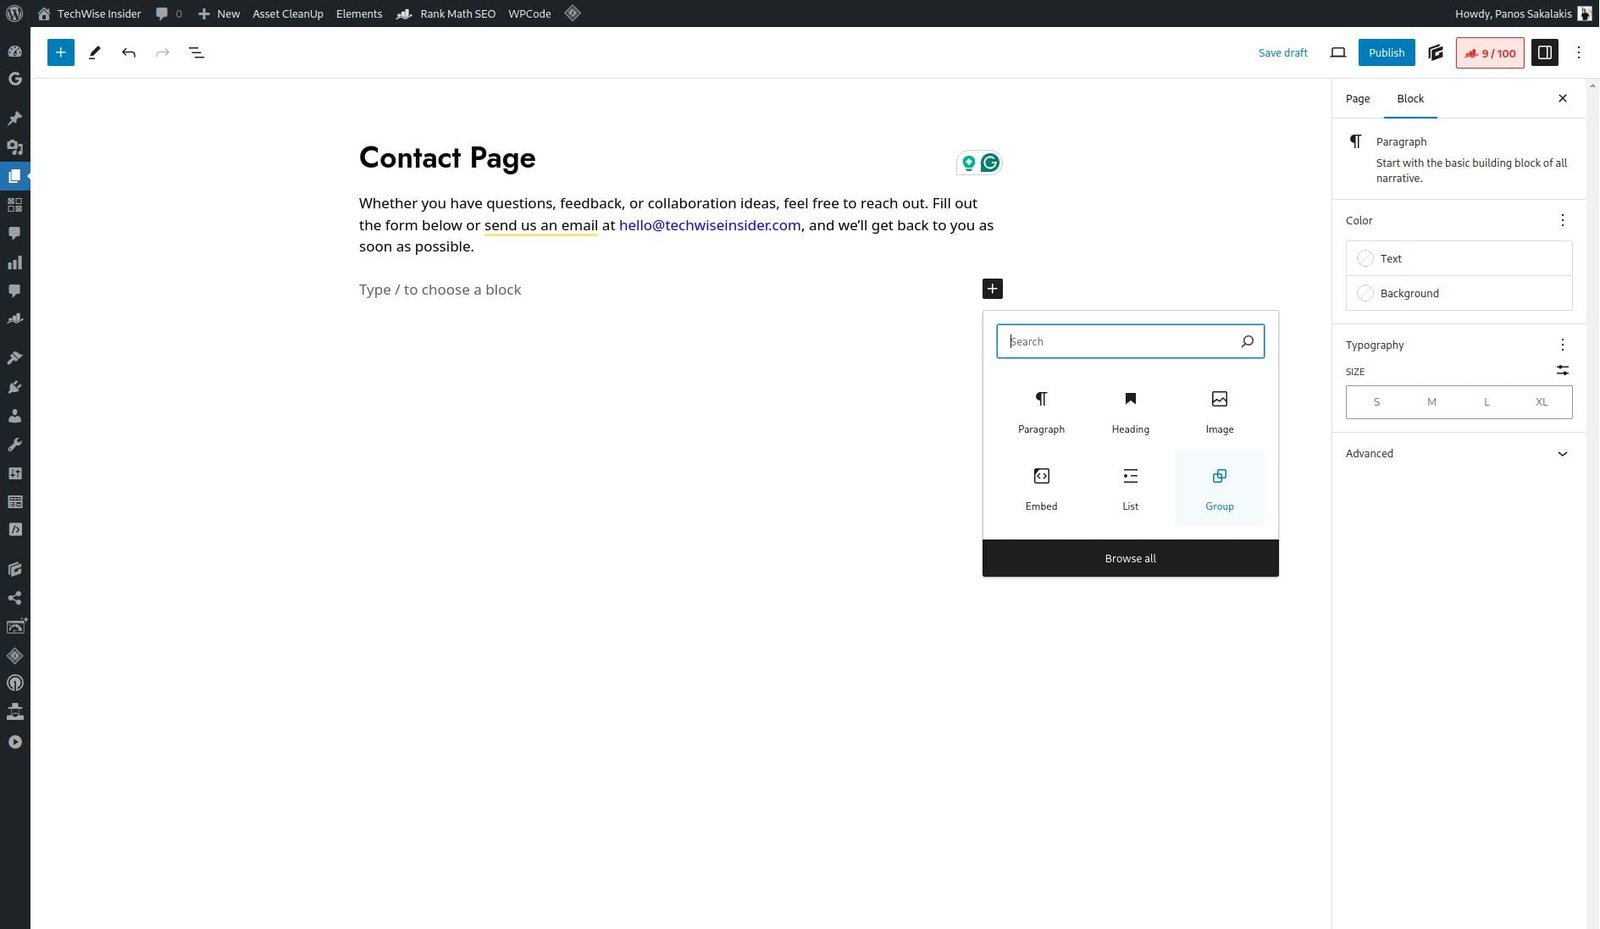
Once you’re done with your first page, simply click on the “Save Changes” button at the top right corner of the Gutenberg editor to save your page as a draft, or “Publish” to publish it. If you publish a page, then any change you make will have the “Update” option instead of “Publish”, as it is already published.
You can also just add a title for now and skip adding content; you can always do it later, and after you have everything customized when it comes to design. But make at least a page that has content, including paragraphs, headings, and images, so you can use it as an example when you’re customizing your theme.
How to create categories and sub-categories in WordPress
To create new categories and sub-categories for your WordPress blog, go to Posts -> Categories from the left menu in your admin dashboard.
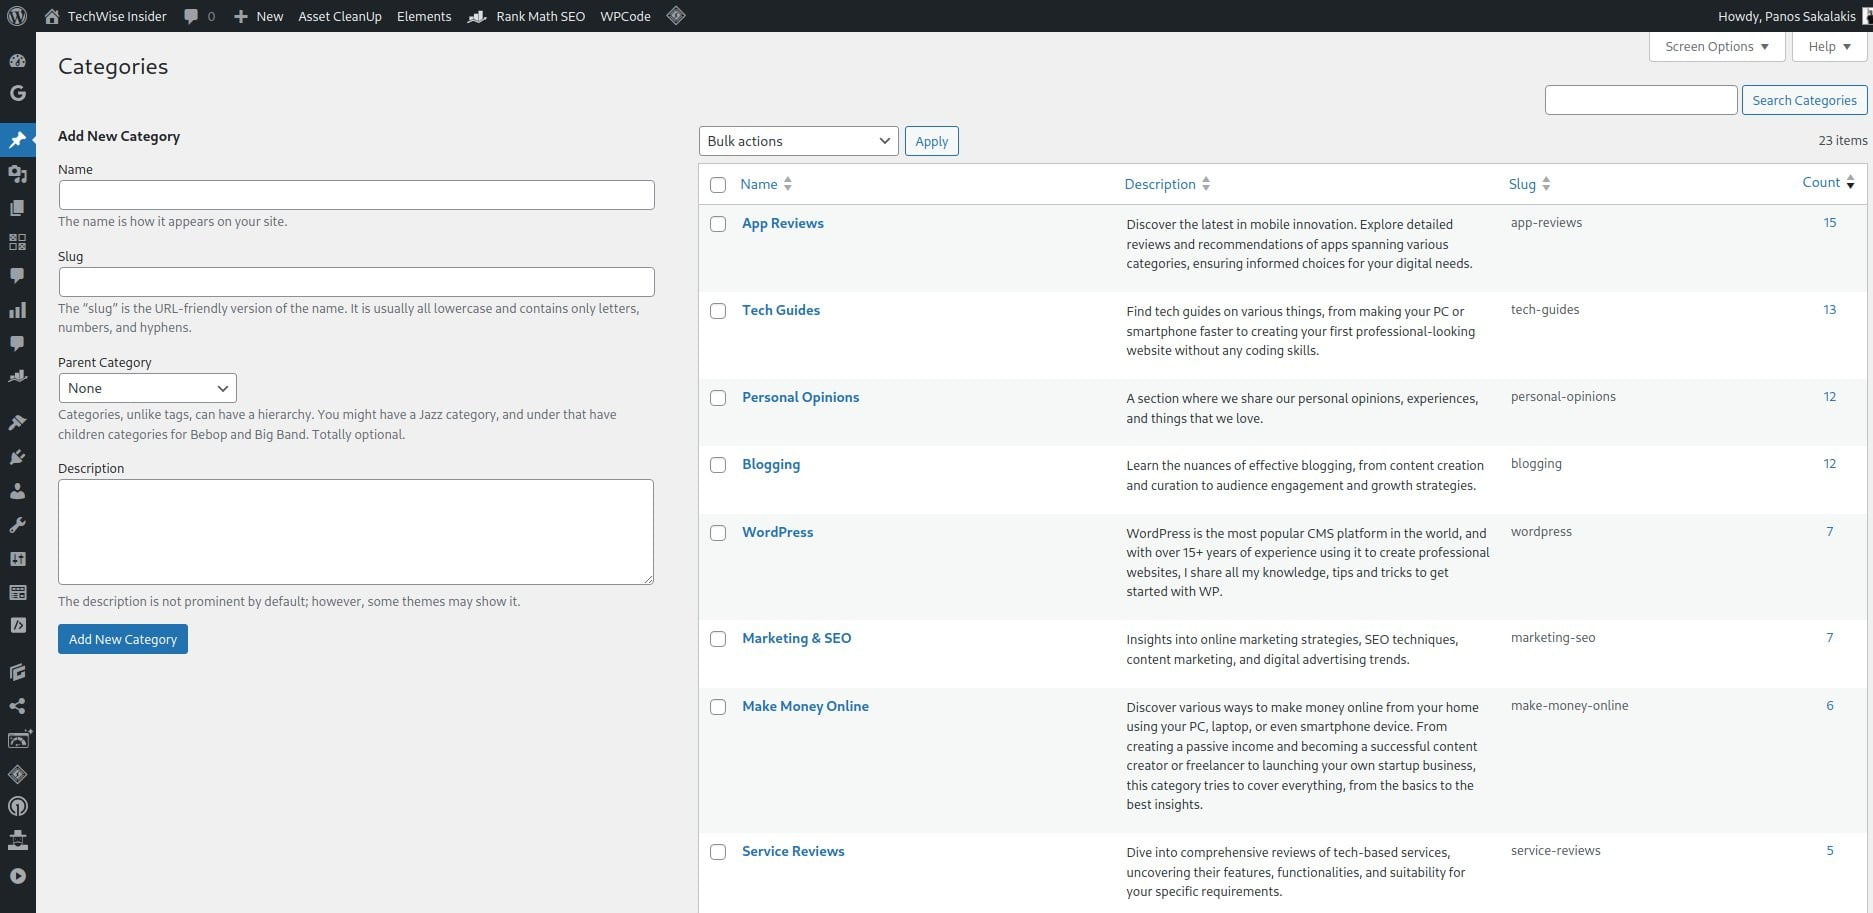
This is where all of your categories live, and this is the fastest way to manage them all from one page. In the left section, you get to fill in the name and URL of the category (if you leave the URL field blank, it will automatically add it afterwards), add a short description, and publish it.
There are no limitations on the number of categories that a blog can have, but the more you have, the harder it gets to fill all of those categories with content. Based on the topics that you’ll be covering, you may want to better organize your categories by adding sub-categories. An example will be a category named “Games” with sub-categories that include “Game Reviews”, “Latest AAA Titles”, “MMORPG Games”, “Racing Games”, etc.
Another (full) example is also this:
- Home (Page)
- Meals (Main Category or Landing Page)
- Breakfast
- Brunch
- Snacks
- Healthy
- Appetizers
- Salads
- Desserts
- Ingredients (Main Category or Landing Page)
- Eggs
- Chicken
- Beef
- Pork
- Pasta
- Seafood
- Fruits
- Vegetables
- Vegan
- Cuisines (Main Category or Landing Page)
- Greek
- Indian
- Chinese
- Mexican
- Bulgarian
- Hungarian
- Italian
- Information (Not Clickable)
- Contact Us
- About Us
- Join our Newsletter
- Press & Media
- Privacy Policy
- Terms & Conditions
- Comments Policy
The actual structure when it comes to pages is similar, but it may differ based on your blog’s niche. You can also add more categories or sub-categories later in the future, and customize your menu accordingly, so don’t worry if you want to start with fewer categories for now.
How to create and manage your menus in WordPress
From the admin menu on the left side of your WordPress Dashboard, head over to Appearance -> Menus. If you don’t have a menu, you’ll have to add a name (each menu has a name) and click on the “Add New” button.
On the left side of the page, you can select your categories, pages, tags, and other attributes and add them to the menu on the right side. You can also click and move them into any position.
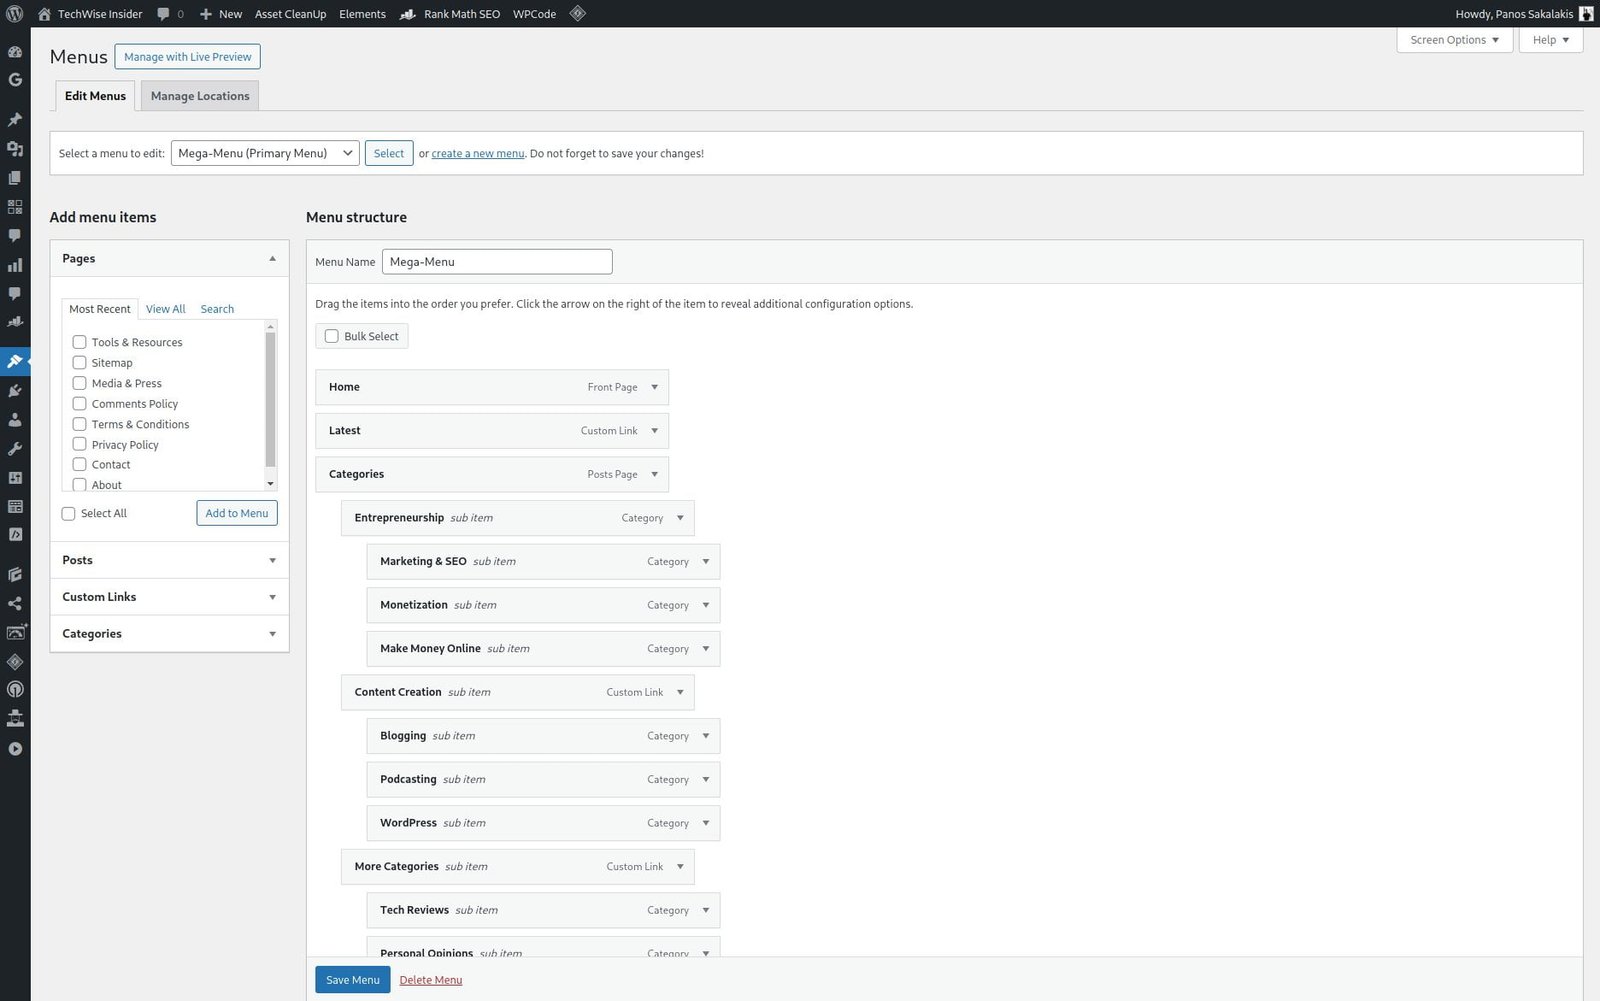
Make sure you’ve saved your changes after you’re done. At the bottom of any of your menu’s pages, there are a few options when it comes to automatically inserting the menu in some places of our theme. For example, you may see the option to set it as “Primary Navigation“, which means that it should appear in your main menu. If not, check on your theme’s settings for any menu options.
Note: There are many premium themes that give you the ability to have a different main menu for desktop and tablet users and another one for mobile visitors. In that case, you can simply switch over the menus and make adjustments, or keep one primary menu for every device.
Save the settings and head over to your blog to see if the menu has appeared.
You may also want to create multiple menus for different parts of your website, including your footer, as it supports the use of blocks, and you can use the “Navigation” block to insert the menu.
Write your first posts and design your blog
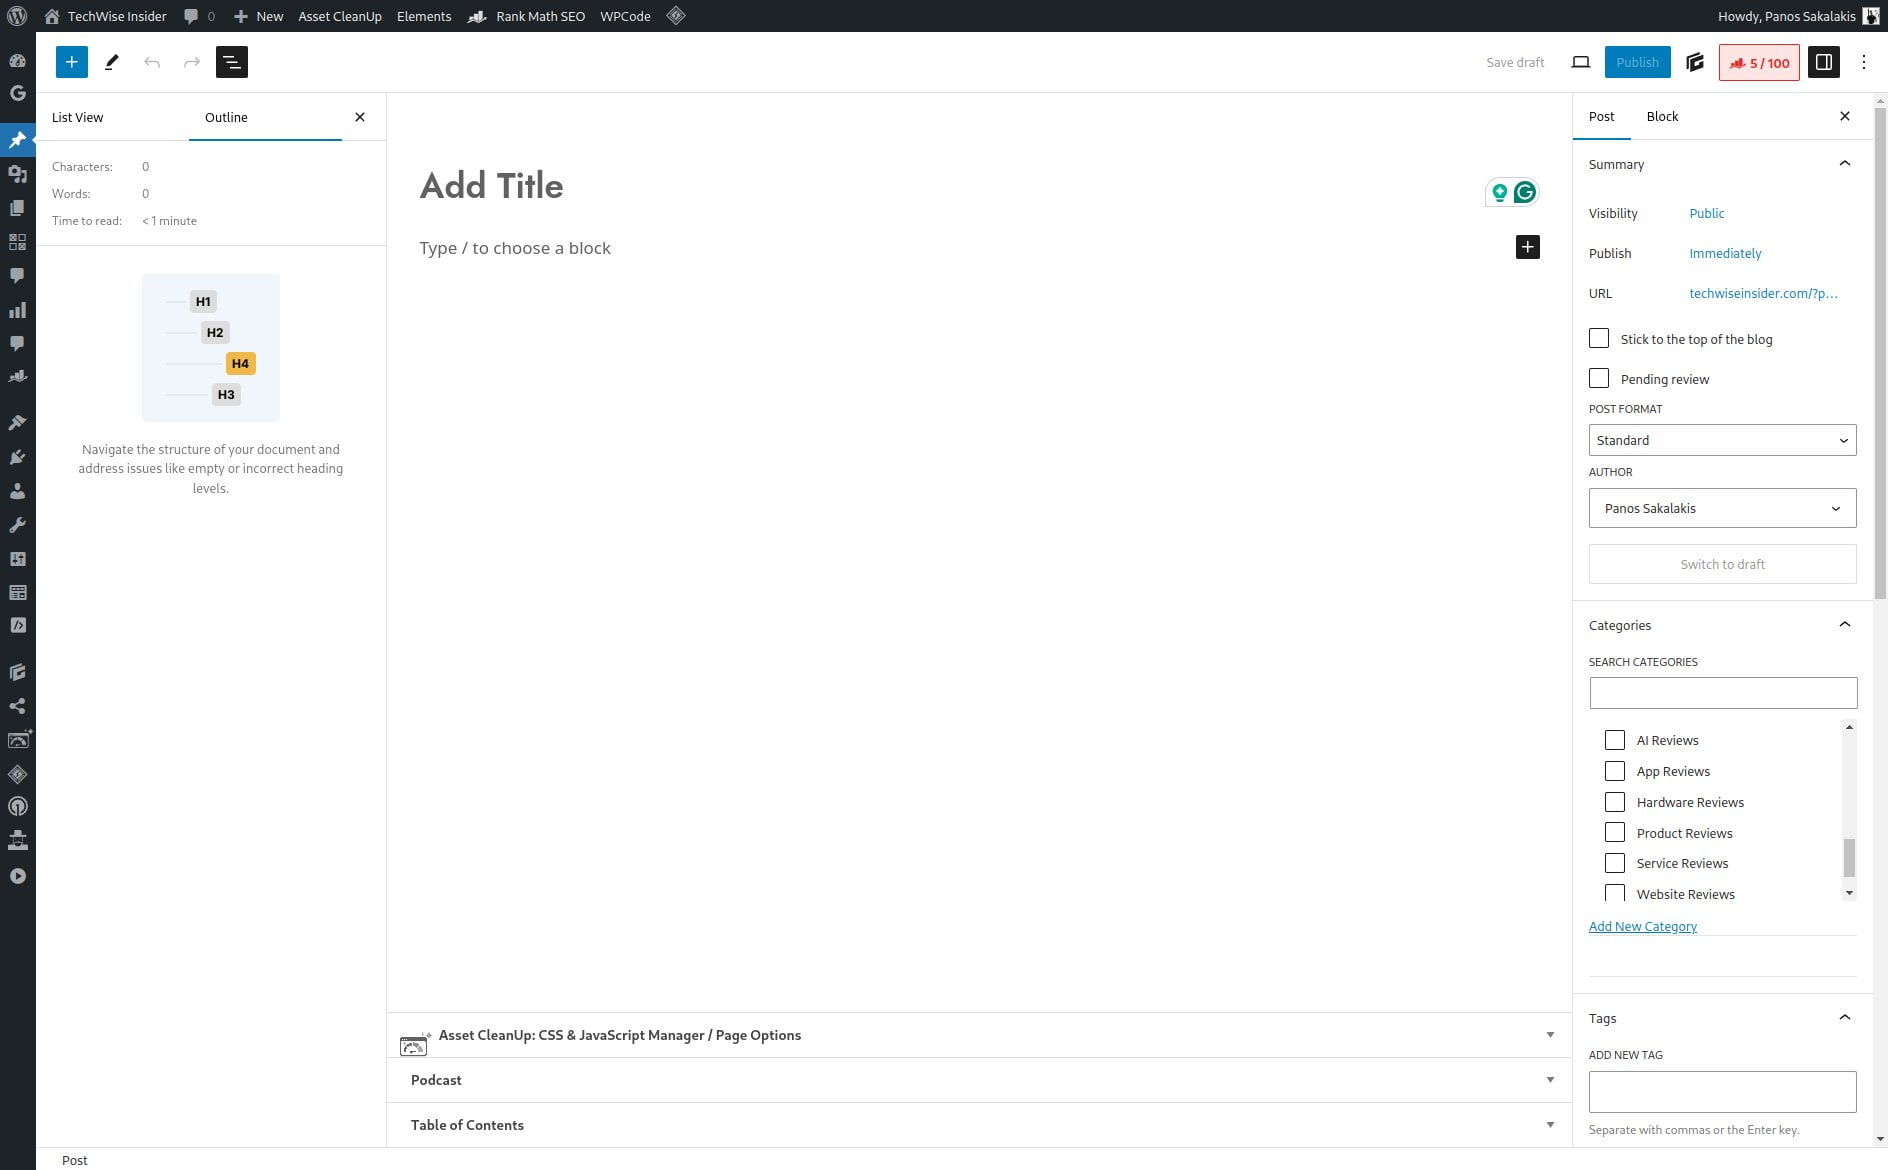
Your new blog now has all the important pages, all the categories you’ll need, and a main menu for easy navigation through the blog’s content. Premium WordPress themes usually come with an import system that lets you import pages, articles, categories, tags, and much more to easily customize your design.
Free themes, on the other hand, don’t have the same option, so you’ll have to either temporarily copy examples of articles you find online or write your own posts.
I’d never found the demo content very useful, because my articles are very different from what is presented in those articles, and having my own helps me better understand what works and what doesn’t when designing my blogs.
Write your first blog posts (at least 30)
There isn’t a “perfect number” when it comes to published articles. A new blog can start with only 1 blog post published, while others may prefer writing more content before launching their new sites. I like focusing on 30, as I find that both search engines and other third-party services will accept it faster.
Take Google AdSense for example, which many bloggers use to display ads and make money. Before accepting your new blog, they’ll first take a look at your content, and most of my clients got accepted after they had at least 30 articles published in their blogs. Anything lower than that will only slow you down, as you’ll have to wait a couple of days for their team to check your blog again.
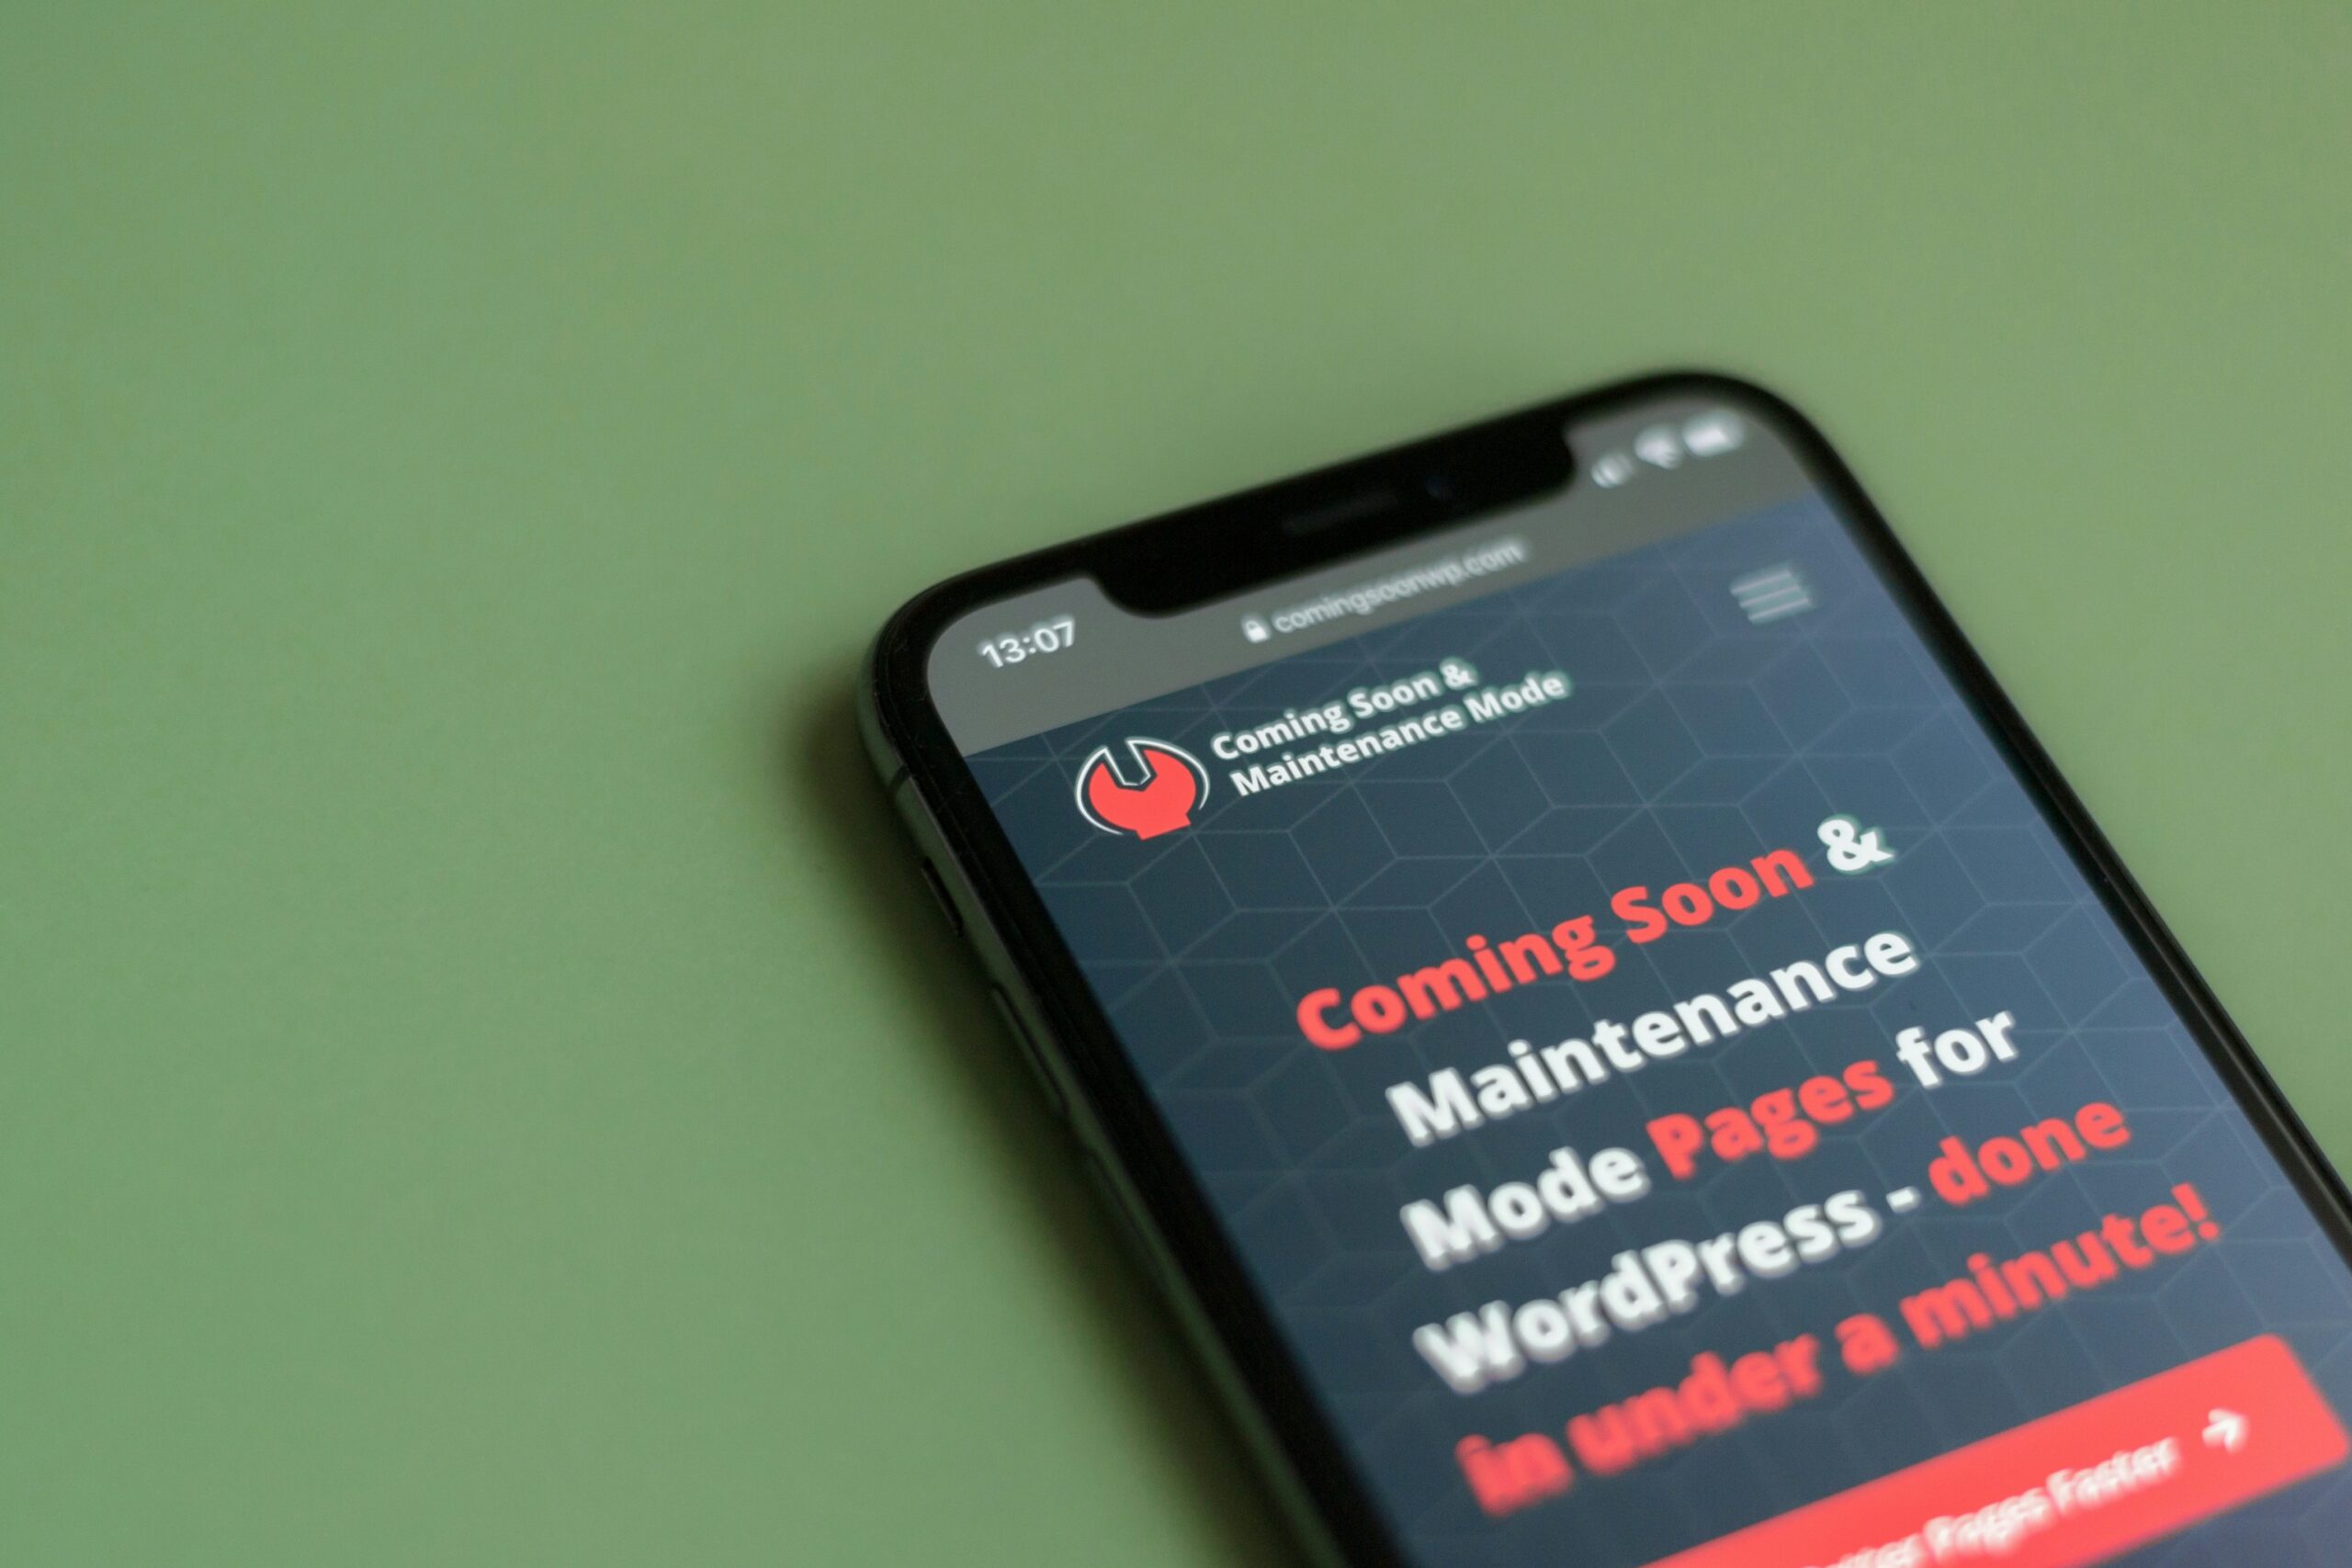
You can start with just one article, or you can have your blog in an under-construction mode. You can use free WordPress plugins such as Under Construction or Minimal Coming Soon, both of which are easily customizable and let you display a title and a message, add your social media follow icons, or even a subscription form for your newsletter.
Only admins will have access to the backend and the website’s content, while visitors will be presented with the ‘Coming Soon’ page. Most of these plugins will also give you the choice to block Google’s bots from indexing your content until it’s out of construction mode, but you can leave that off without worrying.
Start customizing your theme
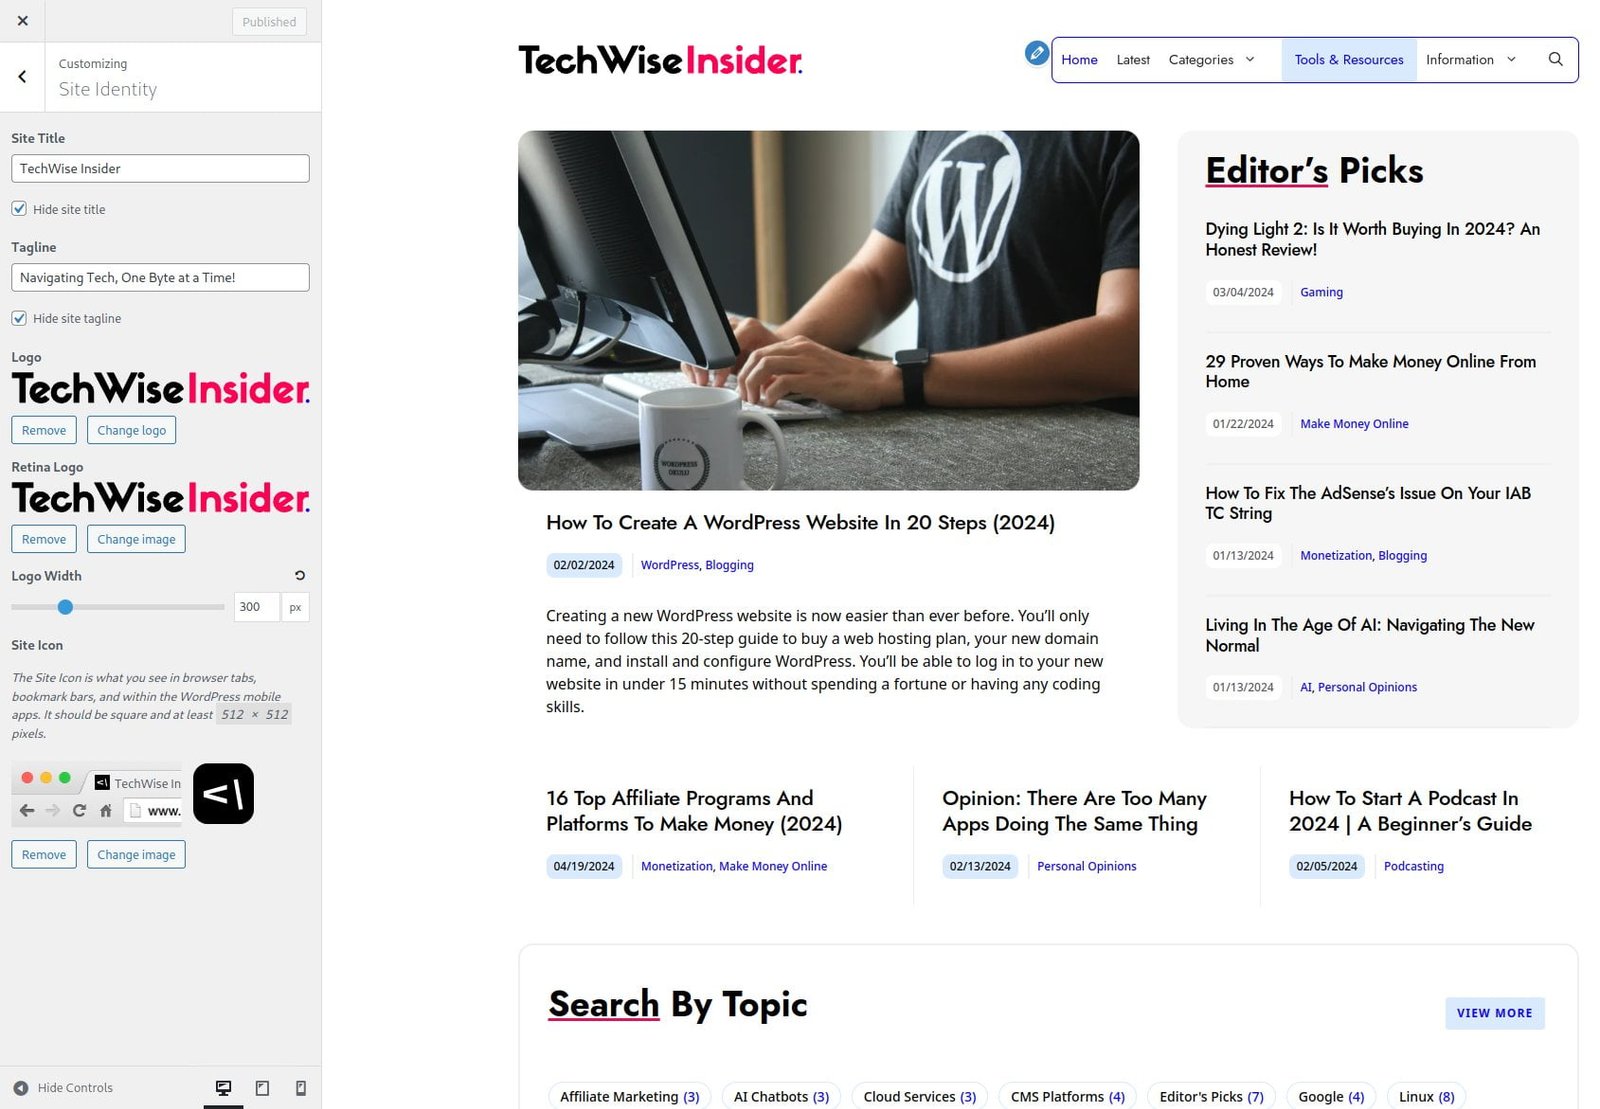
One of the most complex things about WordPress is the tons of options you get when it comes to customization. Web developers and designers also get to choose how they’ll create their themes, meaning that they can choose to build them upon a specific page builder plugin, WordPress’s Gutenberg editor, or even design their own systems.
When it comes to most free themes that you’ll get from WordPress’s theme directory, they’ll use the classic Customizer tool found in WordPress for easy customization, while some may offer their own page builders, including popular themes such as GeneratePress and Avada. But when it comes to premium themes, you’ll always have to check in the theme’s description which page builder it uses.
Gutenberg is the future, while Elementor Page Builder is by far one of the best out there. GeneratePress is blazing fast, highly customizable, and flexible, and there are many other page builders out there that you can use to design your website, but only if they’re compatible with your theme. It’s also important to mention here that the more options and features a page builder offers, the heavier it usually is, and speed is a ranking factor nowadays.
Apart from the page builder, which you’ll use to customize your pages, elements, and sometimes even the mega menus, a theme can also provide its own page of custom settings that you can quickly change. For example, most premium themes have a “Settings” page from which you can make adjustments to your blog’s header, body, footer, fonts, and many other parts of its design.
If a theme won’t give you access to any “Settings” page, head over to Appearance and Customizer, as many may also use WordPress’s default customization tool.
Optimize your new blog for SEO
Having a blog with a few articles published and a well-looking theme isn’t enough to get enough organic traffic. While search engines can easily detect any type of content nowadays, you can still help them better understand your blog and its structure. Thus, both Google and Bing provide their own tools to help bloggers and website owners submit their websites and quickly get indexed.
There are also many other third-party tools that you can use to further optimize your content and improve your SEO strategy, but most of them come with a price and their free versions are pretty limited.
What are the best SEO plugins for WordPress?
There are many popular SEO plugins for WordPress, and most of them come with their own free versions. The best free (and Pro) SEO plugin is Rank Math SEO, and it has tons of options and features that similar plugins are still missing. It’s also easy to use, can automatically migrate all your work from other SEO plugins, and it won’t break your budget.
There’s also Yoast SEO, All In One SEO, and SEOPress, which are among the most popular choices when it comes to WordPress blogs. Every plugin comes with its pros and cons, but considering their features, stability, options, customizability, and so on, Rank Math SEO is – for me at least – the most robust choice.
Submit the blog to the Google Search Console
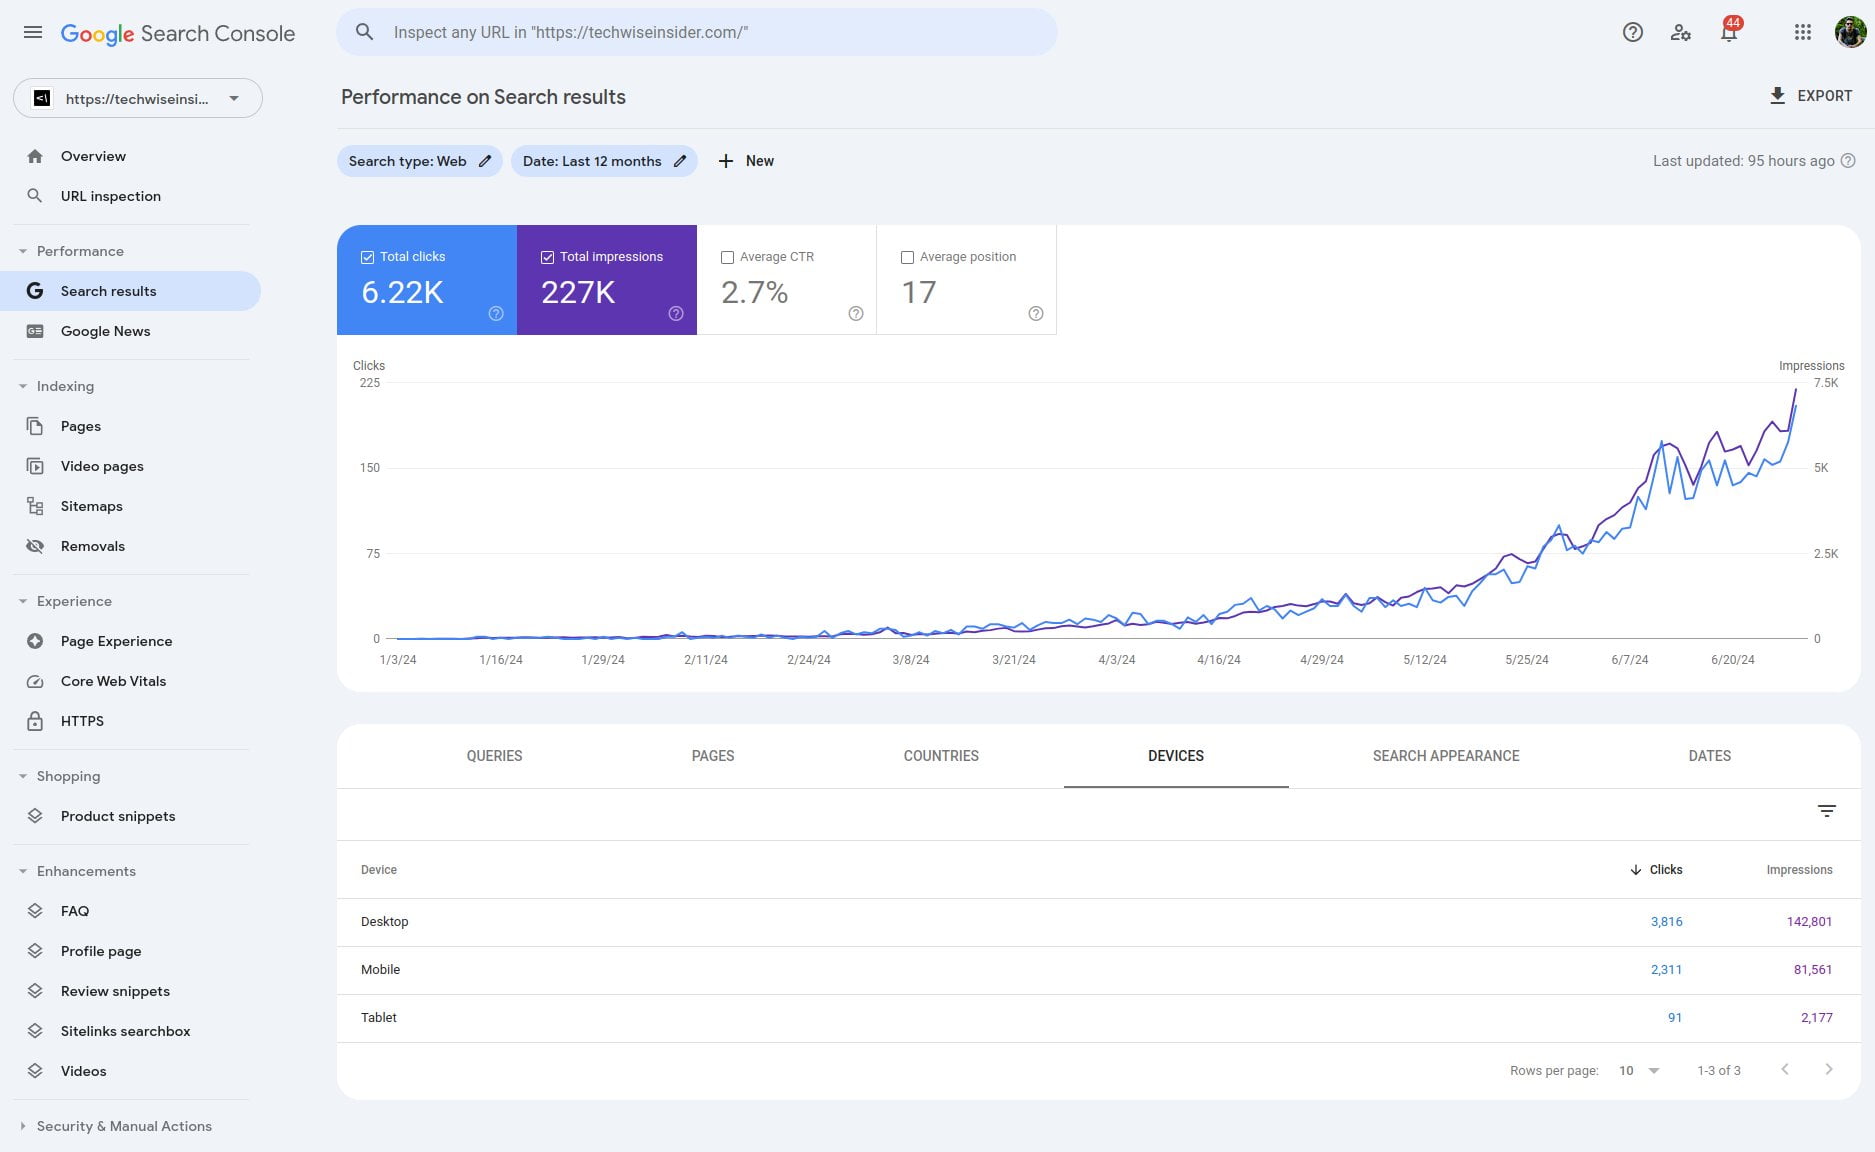
The Google Search Console is one of the most important tools that you’ll have to check often. It will show you if your website has any indexing issues preventing it from getting a better ranking, analytics for your organic traffic, which will tell you how people search and find your content, and alerts, notes, and other important information.
It’s important for every blog to get submitted to the Google Search Console and also submit all the sitemaps. In WordPress, you can use Google’s Site Kit plugin, which, at the moment, is the fastest and easiest way to connect your blog with Google’s Analytics, Search Console, and even AdSense. Another way is to connect it manually by visiting the Google Search Console website.
Every WordPress website has an XML Sitemap by default, and you can find it by visiting your website and adding in the end “/wp-sitemap.xml“. If you’re using an SEO plugin, that URL may be different, and you can get it from the plugin’s settings (look for “Sitemaps”). If you’re using the Rank Math SEO plugin, for example, it should be “/sitemap_index.xml“.
Submit the blog to the Bing Webmaster Tools
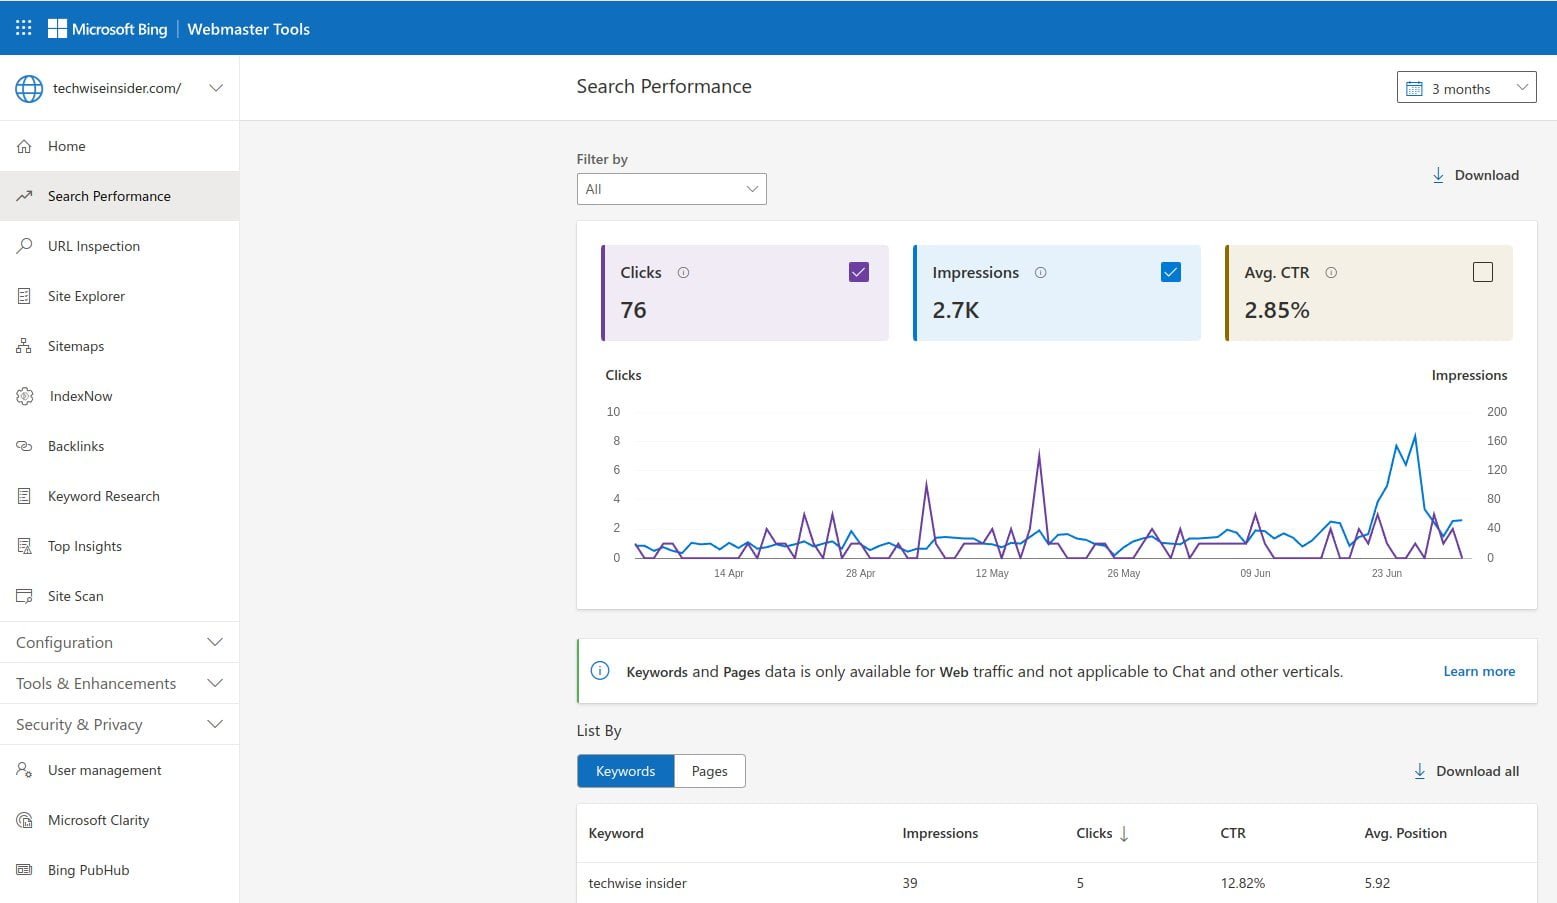
After submitting our new WordPress blog to Google’s Search Console, we’ll have to do the same for Bing Webmaster Tools, which is a similar tool for Bing’s results. Thankfully, Bing is letting us connect our Google account and automatically import all of our settings, which makes our job a piece of cake.
First, visit the Bing Webmaster Tools and register for a new account. Once that’s done, Bing will redirect you to submit your website, choose to import all the options using your Google account, and their system will automatically index your WordPress blog and import all the information from the Search Console.
Make sure it has found and added your sitemaps by taking a quick look at their Sitemaps page. Keep the tool in your bookmarks, as you’d want its statistics for a better understanding of how people are finding your content through Bing.
Conclusion…
Now that your new WordPress blog is done, it’s time to start promoting it. Yes, it will start appearing in Google and Bing’s results, but that would take a bit of time as it’s still very new. While that’s happening, focus on writing and publishing more unique, high-quality, and to-the-point articles that include trending keywords.
Most bloggers also focus on writing evergreen content, which is the type of blog posts that can be read years after they’ve been written without losing their quality. Those articles don’t need to get updated often, and if they have a strong volume, they can bring us lots of monthly traffic.
In conclusion, nowadays it’s fairly easy to create a WordPress blog within a few minutes and start customizing it accordingly. Optimizing it for search engines has also been easier thanks to modern and robust tools, but the competition is also huge. Google also seems to be abandoning independent publishers and niche blogs altogether, so things are changing fast.
Are you interested in starting your own blog or a new one in 2026? If you have any questions, feel free to ask them in the comment section down below, and share your experience as well.









Of all the tutorials this is by far the best one and with the most detailed steps, thank you!! I have successfully created my blog and chosen a template, how can I make my recipes look more stunning with ingredients and options to print or save each recipe? Sorry if I ask too much I know that may be way more technical for older people like myself (and if it is I am okay paying for that).
Of all the tutorials this is by far the best one and with the most detailed steps, thank you!! I have successfully created my blog and chosen a template, how can I make my recipes look more stunning with ingredients and options to print or save each recipe? Sorry if I ask too much I know that may be way more technical for older people like myself (and if it is I am okay paying for that).
Hey, sorry for my delayed reply. You can use a plugin for that part, which is a great way not only to display your recipes through a modern and/or minimal design but also to optimize them for search engines (as they automatically add the right schema markup).
To me personally, WP Recipe Maker is the best choice overall and the one I’m always choosing for my clients. But there are many more in the WordPress Plugin Directory.
To install a plugin, from your WordPress Dashboard go to Plugins -> Add New and search for “recipe” or for a specific plugin. Then simply click on “Install“, wait a bit, and click on “Activate“. You should then find its Settings page somewhere on the left sidebar.
Let me know how it went! 🙂
Thank you for the detailed guide, Panos! I didn't like any of the free themes in wordpress and purchased a theme called newspaper from themeforest but whenever I try to upload it says that I am uploading the wrong file. What am I doing wrong here?
Hey Maryloo, glad you liked it! My guess is that you haven't unziped the theme's file. Many themes need to be extracted to reveal all their files, and usually inside those files there's the right main theme zip file and child theme zip file.
Download the theme's file, right-click on it and click on "Extract here". If you don't see that option, you can use WinRAR or 7-Zip to extract them. Once you've extracted the file, check for newspaper.zip or newspaper-theme.zip file and upload that one to WordPress.
Let me know how it went!
Thank you so much!! This is exactly what I needed, easy and painless! Did Hostinger increase their pricing? The screenshots show a whole different story here, maybe they became too popular and did what most companies do to make themselves even richer.
Well written and easy to understand. Thanks for putting this together.