I’ve been a Spotify subscriber for more years than I can count, but once I got my new Mac Mini M4 and a new iPhone, I had a free 3-month subscription offer from Apple that I couldn’t resist. When I started using Apple Music, the first thing I did was to make the songs sound louder.
But wait, can you really increase the volume without destroying the song’s quality? Well, you can, and it’s as easy as doing a simple and quick change to your application’s settings.
Important Editor’s Note: Sometimes doing specific games that impact the volume of the sound may have bad results when you’re wearing in-ear, earbuds, or any other audio equipment/playback. Please remove them from your ears before you start doing the following adjustments.
How to make Apple Music louder
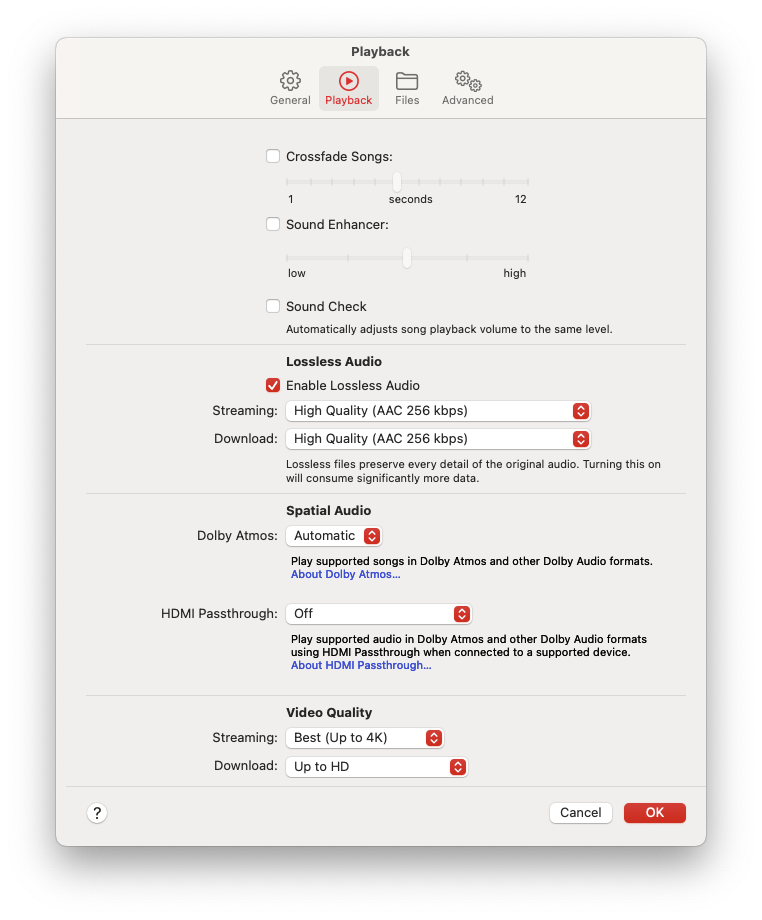
Apple Music has its own integrated feature called “Sound Check“, which is enabled by default for everyone, and it automatically adjusts song playback volume to the same level. Unfortunately, that’s an issue, because most of your songs will have a lower volume.
Here’s how you can fix it:
- Launch Apple Music.
- From the top right menu, click on Music -> Settings.
- Head over to the Playback section.
- Disable the “Sound Check” feature.
- Click “OK” to save the changes.
You should immediately notice the difference in volume (except if you play a song that has a lower volume by its nature).
How to make Spotify louder
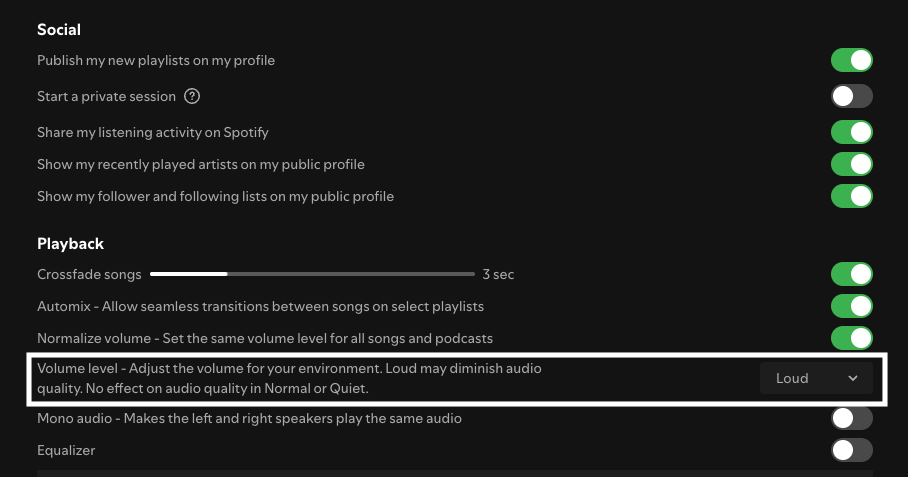
Spotify has a similar feature to the one we’ve seen in Apple Music. It’s called “Normalize Audio”, and as its name suggests, it automatically sets the same volume level for all songs.
Unlike Apple, Spotify gives us more options when it comes to audio normalization, including switching between the “Low,” “Medium,” and “Loud” modes, or even completely disabling it.
Here’s how to disable it or switch between modes:
- Click on your Profile Picture and go to Settings.
- Scroll down to the Playback section and:
- Either disable the “Normalize Audio” feature (recommended).
- Or change it from “Normal” to “Loud“.
- Restart Spotify (for better or worse, it usually works better).
If you have lots of songs that have a low volume by their nature, you can use Spotify’s “Loud” mode to increase the volume, but you may experience diminished audio quality.
Why do streaming platforms implement an audio normalization feature?
Both Spotify’s Audio Normalization and Apple Music’s Sound Check exist for the same core reason: To even out volume differences between songs, albums, and playlists.
Without it, you might get one track that’s super quiet, followed by another that blows out your ears. That’s because music from different eras (and even different artists in the same era) was mixed and mastered at very different loudness levels.
For example, Spotify analyzes the loudness of each track (measured in LUFS – Loudness Units relative to Full Scale) and adjusts playback volume to match a target loudness (around –14 LUFS for most platforms). The core goal is consistent playback volume across songs, so you don’t have to reach for the volume knob.
On the other hand, Apple’s Sound Check scans your library and writes a volume adjustment value into the track’s metadata. When you play the track, iOS/macOS adjusts the playback volume accordingly.
They’re basically two versions of the same idea, just implemented differently. Spotify does it on the streaming side with loudness standards, while Apple applies stored metadata adjustments.
Have you had any issues with lower volume on most of your songs? Did disabling this feature help your songs become louder?
P.S. If you’re using any other streaming platform (such as Tidal or YouTube Music), look for the same or similar features.