
A few months ago, I grabbed myself the latest Mac Mini M4 and connected it to my Xiaomi Mi Curved monitor that comes with a 3440×1440 ultrawide resolution. As you can guess, at this level, everything was looking so small that I could barely read the words.
Unlike Windows and Linux, where I could easily change my screen’s resolution to 120% or 150% to make everything bigger and cleaner, macOS had other things in mind. Instead, I only had as an option 1720×720 resolution, which made everything way too big, making the operating system almost unusable.
Why does macOS offer so few HiDPI resolution options?
Apple designed macOS around fixed 2× (Retina) scaling for perfect pixel alignment.
This means every “virtual” pixel maps to exactly 2×2 real pixels, so:
- Text looks razor-sharp,
- UI elements scale predictably across all Macs,
- No fractional scaling blur like Windows sometimes has at 125% or 150%.
In simpler words, macOS assumes a small set of “safe” Retina resolutions for each display, rather than letting users experiment freely.
Thankfully, there’s a fast and easy solution to our problem – and no, it’s not a solution from Apple, but rather a beautiful script developed by a single developer.
Fixing macOS’s HiDPI resolution with One-Key-HiDPI
One-Key-HiDPI is a free and open-source script that you can find available on GitHub and can execute using a simple command in CMD. Don’t worry if you’ve never done this before, it’s so easy it should only take a few seconds to get over with.
The hidpi.sh script from xzhih’s repo creates scaled “virtual” resolutions (HiDPI modes) based on what you select. Here’s how:
1. Launch CMD and execute the following command:
Just copy the command, right-click inside the CMD, paste it, and hit Enter.
bash -c "$(curl -fsSL https://raw.githubusercontent.com/xzhih/one-key-hidpi/master/hidpi.sh)"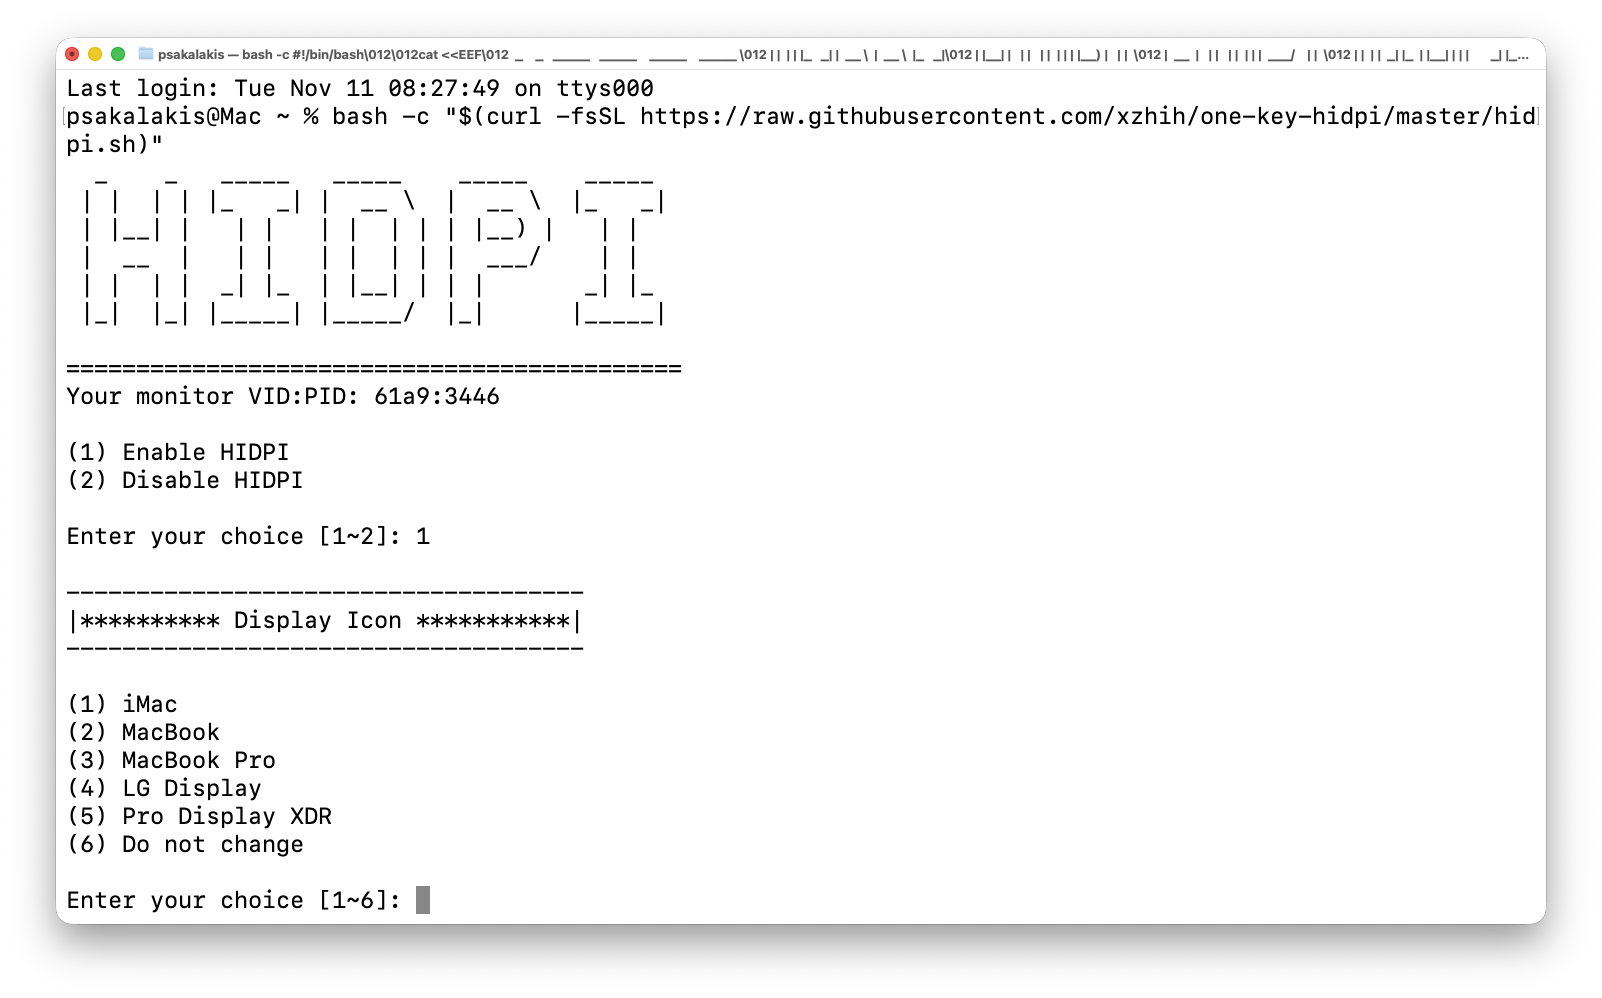
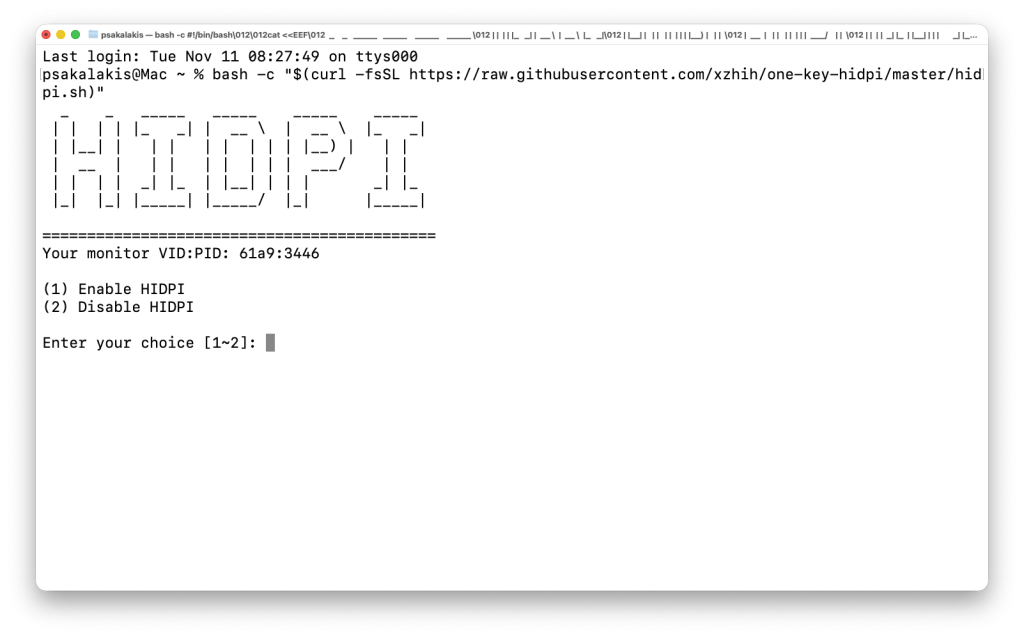
2. Enable HiDPI
CMD will ask you to choose if you want to enable or disable HiDPI: Choose 1 and hit Enter.
3. Choose your monitor
You may see multiple options here, and your monitor may be missing from all the options. In that case, for me, it was the ‘Pro Display XDR‘ option.
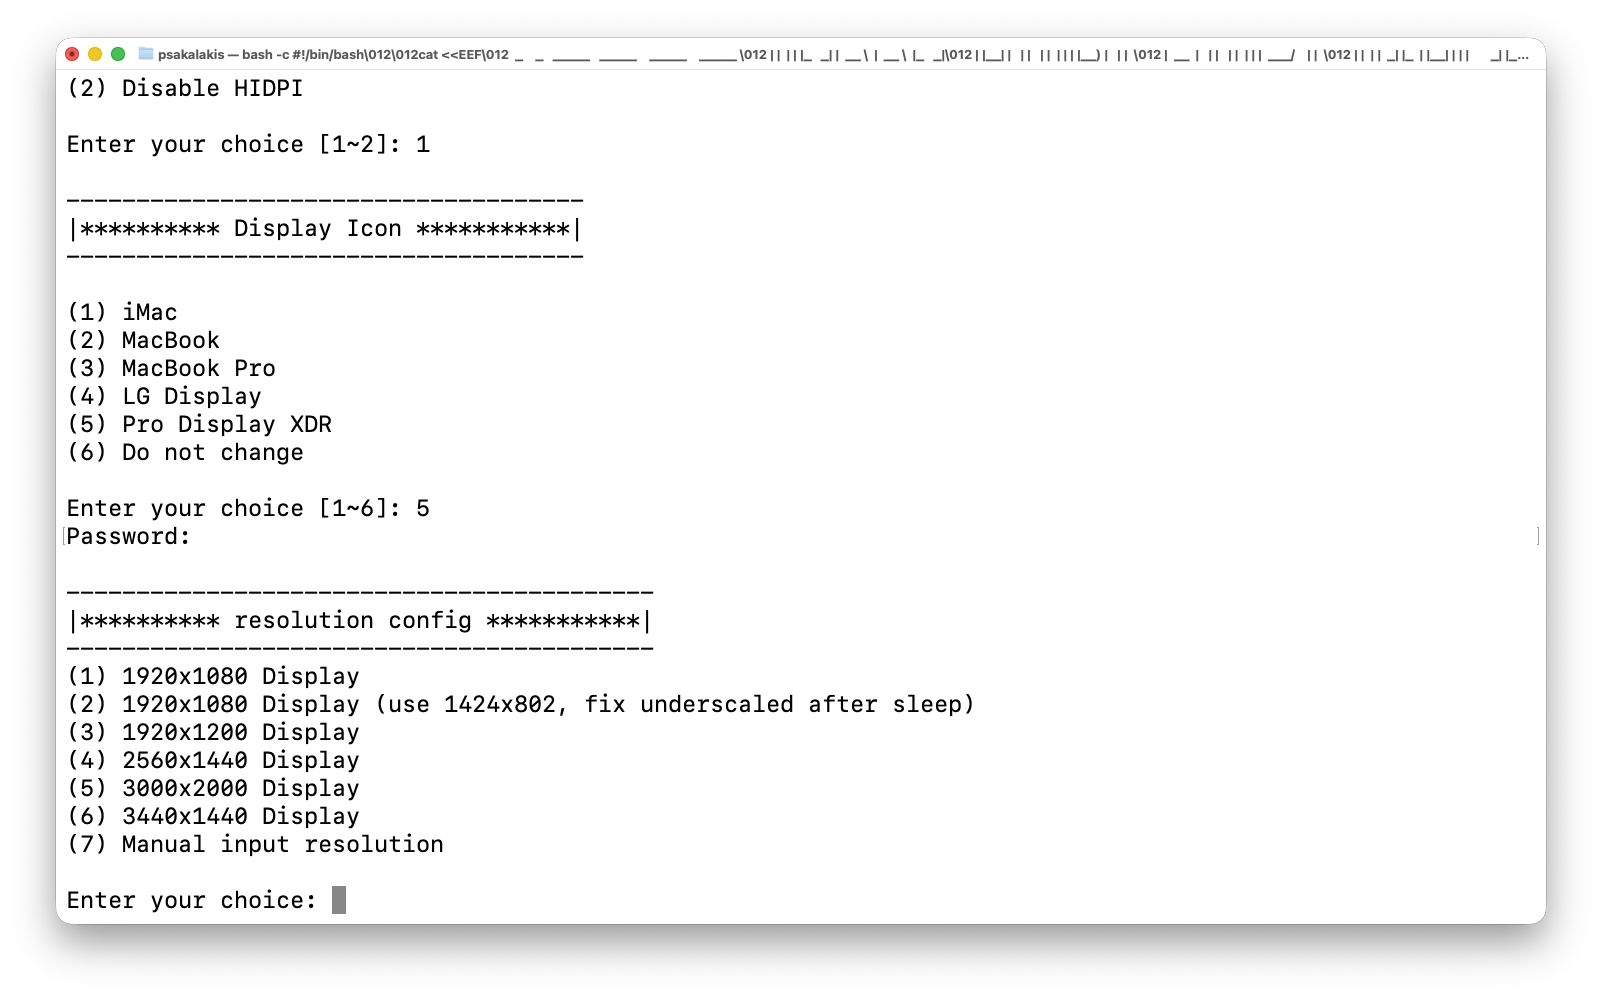
4. Choose or type your new HiDPI resolution
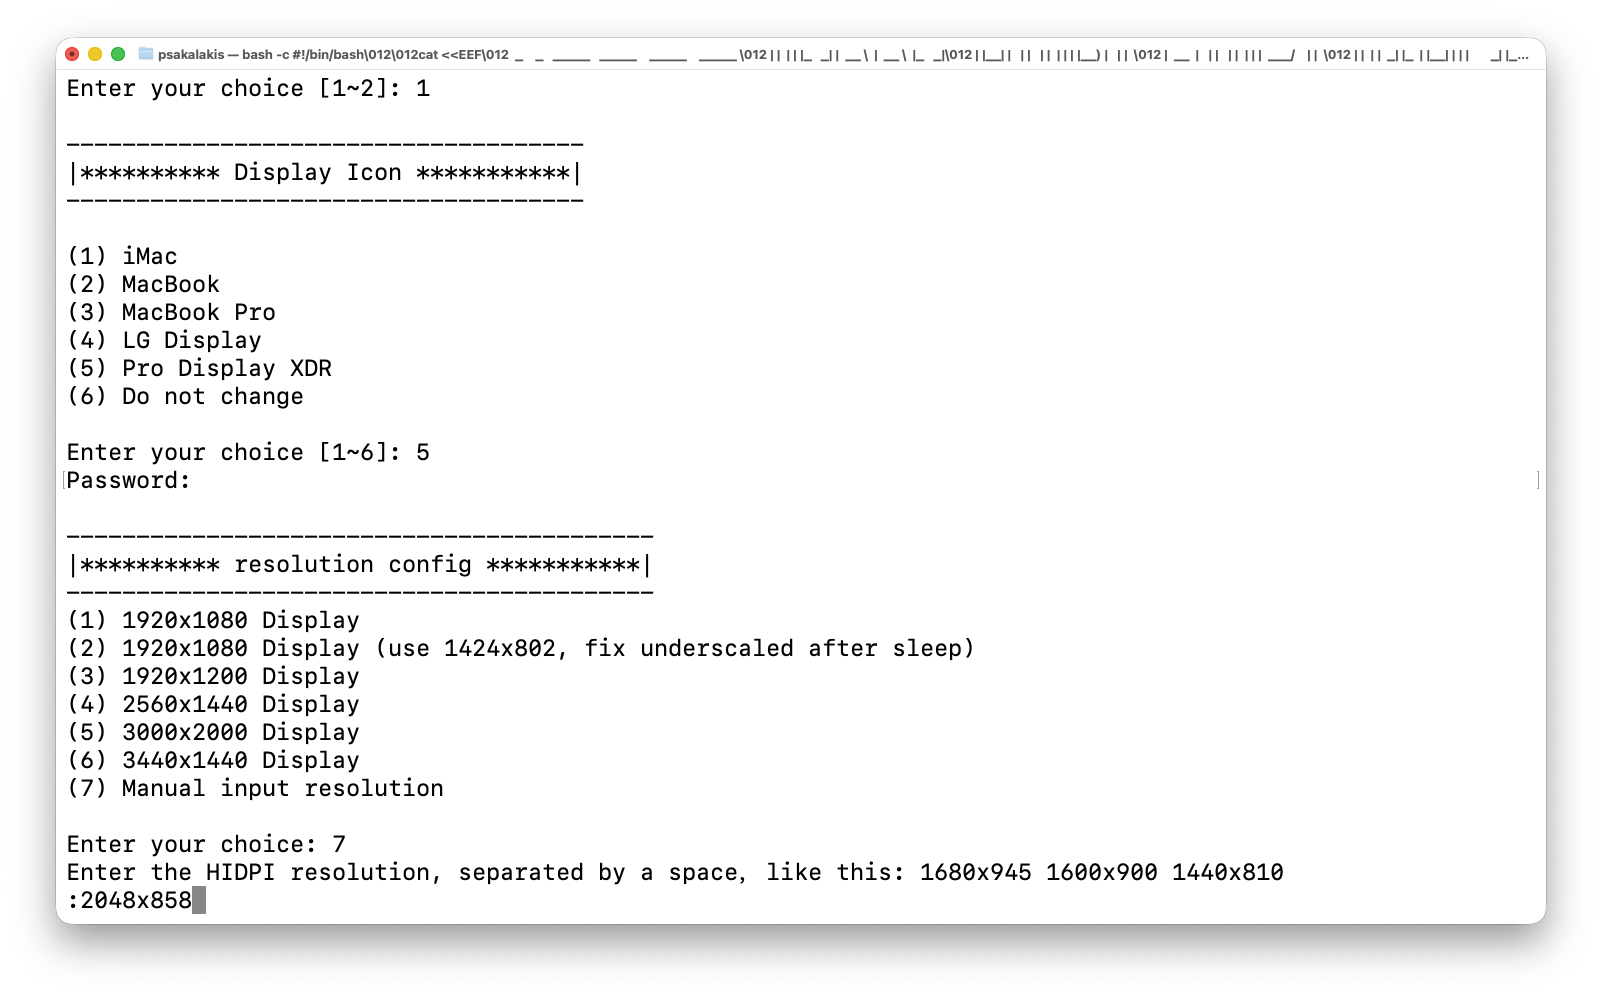
The script will display a few HiDPI resolutions that you can use for your monitor. For me, none of those was the right one, so I typed the number 7 to add my own custom resolution, and the following worked like a charm:
2560x1080If you see the correct resolution, just select it. Elsewhere, add your own custom one based on the standard (16:9 and 3:2) resolution that your monitor supports.
Editor’s Note
The hidpi.sh script by default lists only common Apple-style resolutions (16:9 and 3:2). So while you’ll see: 1920×1080, 2560×1440, 3440×1440, etc. There’s no built-in 2560×1080 option, even though that’s the standard for 29” or 34” ultrawide monitors (21:9), so that’s why I had to manually enter it.
5. Reboot macOS
Save all of your work and just type the following and hit Enter:
sudo rebootThis will restart your system for the new changes to take effect. During the reboot, you may see Apple’s logo getting weirdly big; that’s only going to happen the first time.
6. Choose the right HiDPI resolution
Although we added the new option, we’ll have to switch to it manually from the settings:
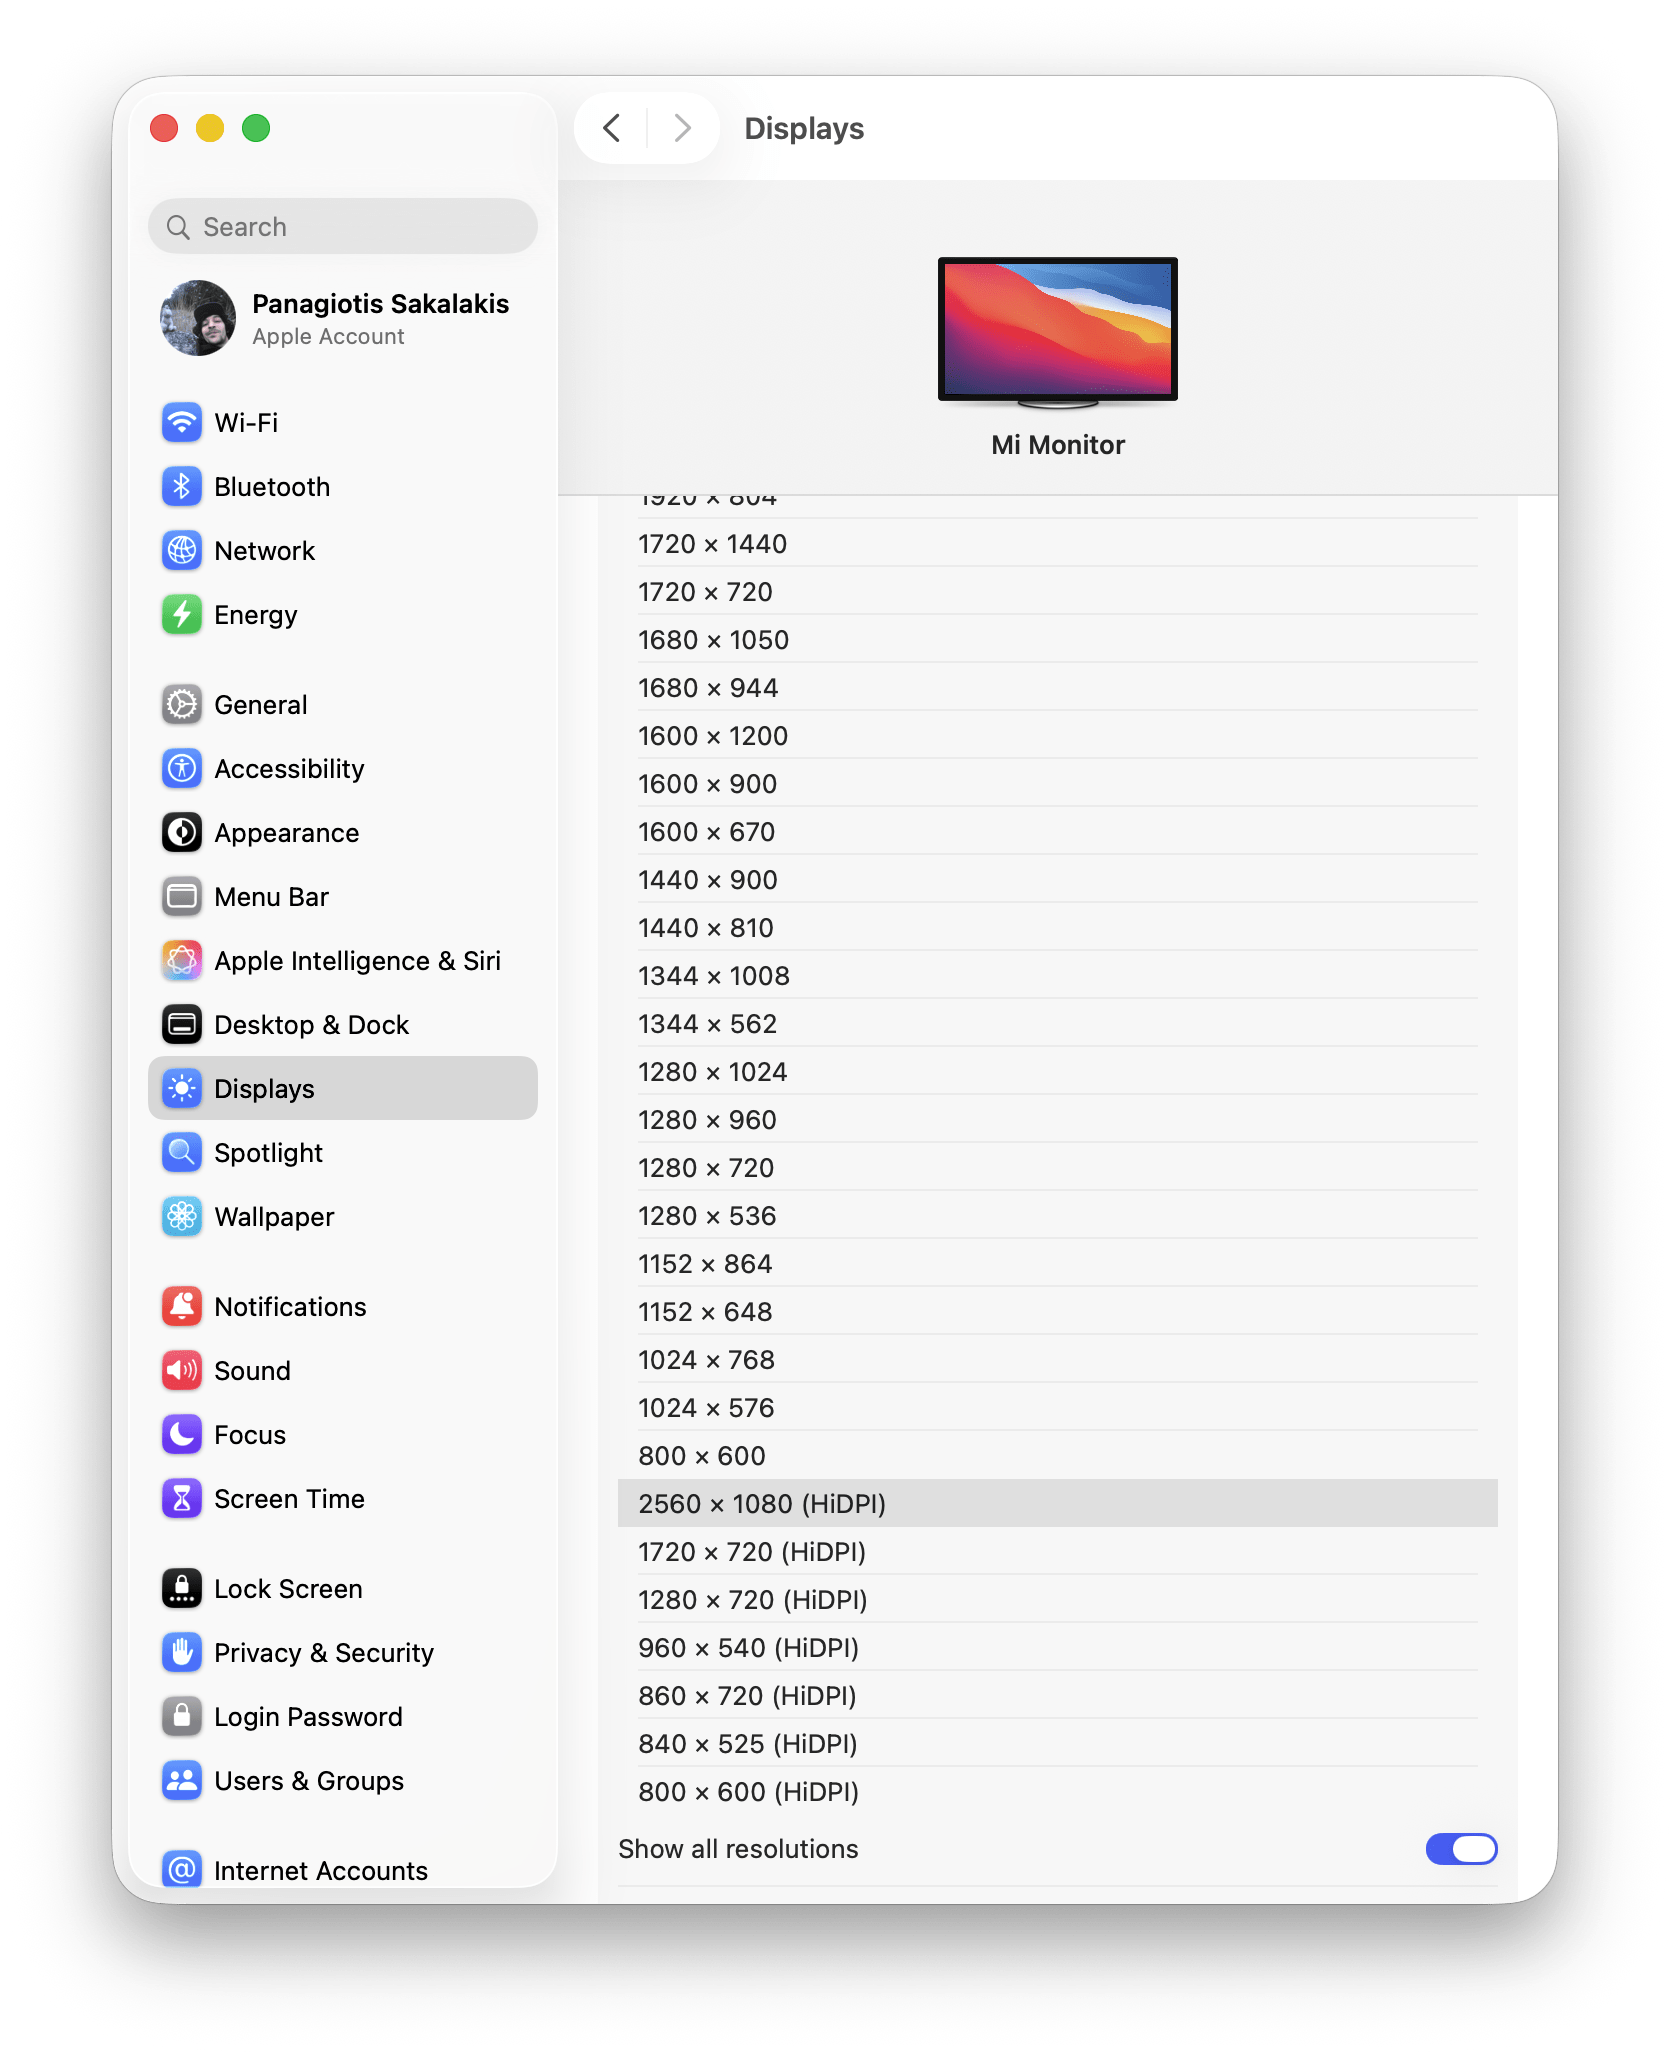
- Open the Settings -> Displays.
- Click on the “Show all resolutions“.
- Choose the right resolution for your monitor.
- Make sure the ‘Refresh Rate‘ is at its highest Hertz.
- Enjoy!
If everything went right, you should be able to enjoy macOS with the resolution that you actually want. But if not, or if you faced some weird issue, I may be able to help you quickly fix it (just read more below).
Troubleshooting common HiDPI resolution issues
Although the script worked great with the latest version of macOS Tahoe, which I’ve been using since it came out, you may encounter a couple of issues with it.
For example, the first time I tried running it, I selected the wrong display, and then I selected the wrong resolution which added two black spaces in the right and left side of the screen.
Here’s how to troubleshoot the most common issues with this script:
- Black borders: If you have black borders in the top, bottom, left, or right side of your screen, that’s typically happening because you selected the wrong resolution for your monitor. For example, if you have a monitor with 3440×1440 resolution, change it to 2560×1440 to avoid those black “cuts”.
- macOS not showing the new HiDPI option: If you’re a hundred percent sure that you haven’t selected the wrong option in the script, but macOS still doesn’t show your custom resolution, just install SwitchResX (free trial) or BetterDisplay (free), both of which will confirm that the new HiDPI mode exists.
If you want full macOS-style control without patching, install BetterDisplay (free & open-source). It safely creates virtual HiDPI modes, custom scaling ratios, and even separate per-display settings, all through a clean GUI.
But for me, only this script was able to work properly, so let me know in the comments down below if it worked for you too, and if you had to make any other additional changes or adjustments that may help more people.


Thanks for the troubleshooting section, I saw the black borders on the left and right side and I thought it wouldn’t work for me but after changing the resolution worked great. THANK YOU!
This post answered a question I’ve had for ages. Thank you!